Creamy Microwave Grits: The Easiest Garlic & Cheese Recipe for Quick Comfort Food
Whether you grew up with it as a cherished Southern breakfast staple, a comforting side dish, or a flavorful Creole classic during Mardi Gras celebrations, grits hold a special place in the hearts (and stomachs) of many. This humble, hearty dish brings a sense of homey satisfaction with every spoonful. However, if the thought of standing over a stove, constantly stirring and tending to a pot of bubbling grits makes you hesitant, you’re in for a treat! This guide will teach you how to make incredibly fast, wonderfully easy, and irresistibly creamy microwave grits, infused with the delightful flavors of garlic and sharp cheddar cheese. Get ready to enjoy perfectly cooked grits without the fuss, anytime you crave them.

Why You’ll Love This Effortless Microwave Grits Recipe
There are countless reasons to fall in love with making grits in your microwave. This method takes all the stress out of preparing this classic dish, making it accessible even on the busiest mornings or evenings.
- Unbeatable Convenience & Speed: Forget the traditional stovetop method that demands constant stirring and vigilant attention to prevent sticking and burning. With this microwave grits recipe, you can achieve perfectly cooked grits in generally just 15-20 minutes, depending on your microwave’s wattage and the type of grits you use. Most of this time is hands-off, allowing you to multitask or simply relax. It’s perfect for busy weeknights or when you need a quick, satisfying meal.
- Effortless Cleanup: Say goodbye to stacks of pots and pans! This recipe requires only one microwave-safe bowl for cooking. Fewer dishes mean less time spent scrubbing and more time enjoying your delicious meal. We won’t judge if you decide to eat your creamy grits right out of the cooking bowl to save even more cleanup time!
- No More Burnt Grits: One of the biggest frustrations with stovetop grits is the dreaded burned bottom, which not only ruins the flavor but also makes cleanup a nightmare. With microwave grits, this common pitfall is virtually eliminated. You won’t have to worry about scraping stubborn, charred bits off your pan ever again – a truly liberating experience for any grits lover!
- Incredibly Versatile: While grits are often associated with breakfast, these garlic and cheese microwave grits are so quick and easy to prepare that you can enjoy them at any meal. They make a fantastic, warm breakfast to kickstart your day, but they’re equally incredible when served with savory additions like smoked sausage, grilled shrimp, crispy bacon, or even a fried egg. This recipe offers a foundational, flavorful base that can be customized to suit any craving or occasion.
- Perfect for Beginners: If you’re new to cooking grits, the microwave method is remarkably forgiving. The simple steps and reduced risk of burning make it an ideal starting point for anyone wanting to master this Southern comfort food.

Since these creamy microwave grits are so incredibly easy to make, they seamlessly fit into any meal plan. Whether you’re looking for a quick, comforting breakfast, a hearty lunch, or a unique savory side for dinner, this recipe delivers on all fronts. Its convenience means you can enjoy that comforting, homey flavor anytime you wish, without the usual fuss.
Quick + Easy Recipes
straight to your inbox
Shopping List: Essential Ingredients for Your Microwave Grits
Gathering your ingredients is the first step to enjoying these incredibly easy and flavorful microwave grits. The beauty of this recipe lies in its simplicity, requiring just a few staple items to create a truly satisfying dish. Here’s what you’ll need to make these creamy garlic and cheese grits:
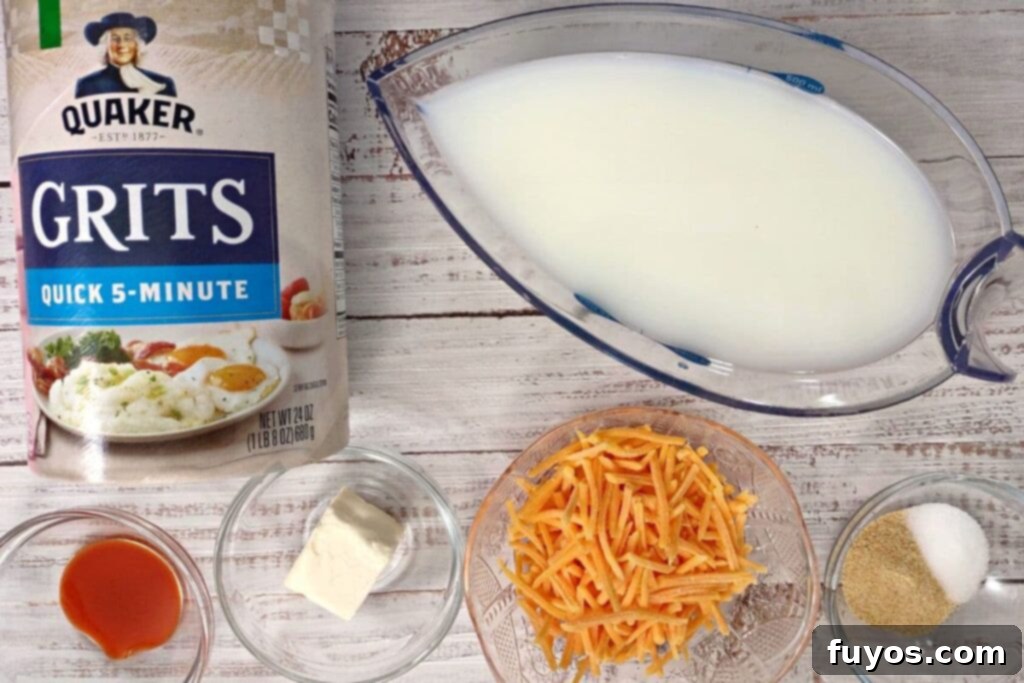
- ½ cup grits (such as Quaker quick 5-minute grits)
- 3 cups water, milk, or chicken stock (or a combination thereof)
- 1 tsp salt
- 1 ½ tsp garlic powder
- 2 tbsp butter (salted is preferred for flavor)
- ½ cup shredded sharp cheddar cheese
- 1 tsp hot sauce (optional, for a subtle kick)
- Additional toppings or garnishes as desired (like green onions or black pepper)
Ingredient Tips, Substitutions, and Delicious Variations
One of the best things about cooking grits is their adaptability. You can easily customize this recipe to suit your taste preferences, dietary needs, or what you have on hand. Here are some expert tips and creative variations to elevate your microwave grits:
- Grits Selection: For this recipe, you can use either regular or quick-cooking grits. While quick-cooking grits (like Quaker 5-minute grits) generally cook a bit faster and more consistently in the microwave, regular grits will also work beautifully if that’s what you have. Just be sure to avoid instant grits, as their texture and cooking process are designed for very rapid, often less satisfying, preparation. Stone-ground grits, while delicious, require a much longer cooking time and are not ideal for the microwave method. Stick to quick or regular for the best results with this recipe.
- Liquid Choices for Creaminess & Flavor: The liquid you choose plays a crucial role in the final texture and taste of your grits.
- For the creamiest, richest grits, milk is your best bet. Whole milk or even a richer half-and-half will yield a wonderfully luxurious texture.
- For a more profound, savory depth of flavor, use chicken or vegetable stock. This adds an umami richness that water alone cannot provide.
- I often find the perfect balance by using a combination: typically, 1 cup of each (water, chicken stock, and milk). This provides both creaminess and savory notes without being too heavy. Feel free to experiment with your own preferred ratios to find your ideal blend.
- Garlic Options: While garlic powder is incredibly convenient and blends seamlessly into the grits, providing a consistent flavor, you can absolutely use fresh garlic if you prefer. If opting for fresh, use 2-3 cloves of finely minced garlic. Add it at the beginning with the other liquids and grits to allow its flavor to infuse fully during cooking.
- Cheese Alternatives: Sharp cheddar offers a classic, bold flavor to these savory grits. However, if cheddar isn’t your favorite, or if you’re looking to explore other flavor profiles, consider these delicious alternatives:
- Gouda: Offers a slightly nutty, buttery flavor that melts wonderfully.
- Parmesan: Provides a salty, umami kick and a slightly granular texture.
- Pepper Jack: For those who enjoy a bit of spice, pepper jack adds a pleasant heat and creamy texture.
- Smoked Gouda or Gruyere: These can add a deeper, more sophisticated smoky or nutty note to your grits.
Always use freshly shredded cheese for the best melt and flavor; pre-shredded varieties often contain anti-caking agents that can affect texture.
- Hot Sauce for a Flavor Boost: The hot sauce in this recipe is entirely optional, so feel free to omit it if you prefer no heat. However, even a small dash (1 tsp as written) won’t make the grits intensely spicy, but rather adds a subtle tang and depth that truly enhances the overall savory profile. I highly recommend trying it for that extra layer of flavor! Classic Louisiana-style hot sauces like Tabasco or Crystal work great.
- Microwave Grits for One Serving: This recipe is easily scaled down. For a single serving, use ¼ cup grits, 1 ½ cups liquid (following the same liquid combination tips), and adjust seasonings (salt, garlic powder) to taste. The cooking time will likely be slightly shorter, around 8-10 minutes, with stirring every 3-4 minutes.
- Sweet Grits Variations: If you’re craving a sweeter breakfast, grits are incredibly versatile. To transform these savory grits into a sweet treat:
- Omit the garlic powder, cheese, and chicken stock.
- After cooking, top with a sprinkle of cinnamon and brown sugar.
- Drizzle with honey and serve with sliced bananas.
- Mix in a dollop of sweet cream or a touch of vanilla extract for a dessert-like experience.
- For a classic breakfast version, top with maple syrup and cooked bacon pieces, or with a perfectly runny fried egg for a sweet and savory delight.
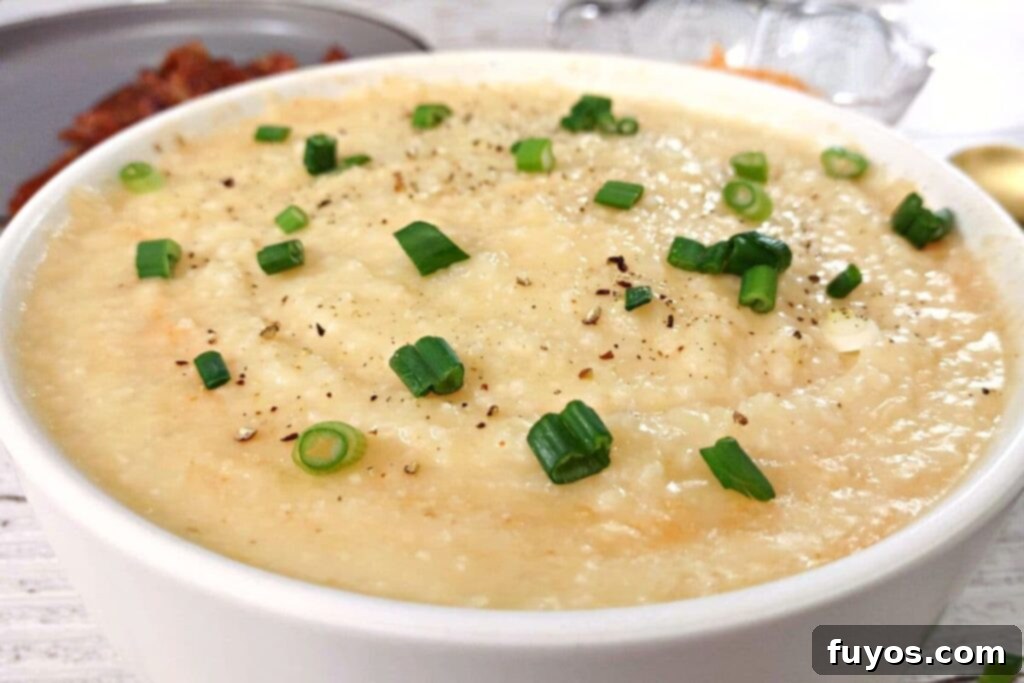
- Savory Topping Ideas: While the garlic and cheese provide a fantastic base, don’t stop there! My preferred savory garlic and cheese grits are perfectly garnished with a sprinkle of freshly sliced green onions and a generous grinding of fresh cracked black pepper. Other fantastic savory additions include:
- Crispy bacon bits or crumbled sausage
- Sautéed shrimp (classic shrimp and grits!)
- Caramelized onions
- Diced jalapeños for more heat
- A fried or poached egg
- Chopped fresh herbs like chives or parsley
How to Cook Creamy Grits in the Microwave: Step-by-Step Guide
Making delicious, creamy grits in the microwave is surprisingly simple and requires minimal effort. Follow these easy steps to achieve perfect garlic and cheese grits every time:
- To a large microwave-safe bowl (I recommend one that is at least 4 quarts, preferably 5.8 quarts, to prevent any overflow during cooking), combine your grits, your chosen liquids (water, milk, or chicken stock, or a combination thereof), salt, and garlic powder. This initial mixture forms the foundation of your flavorful grits.
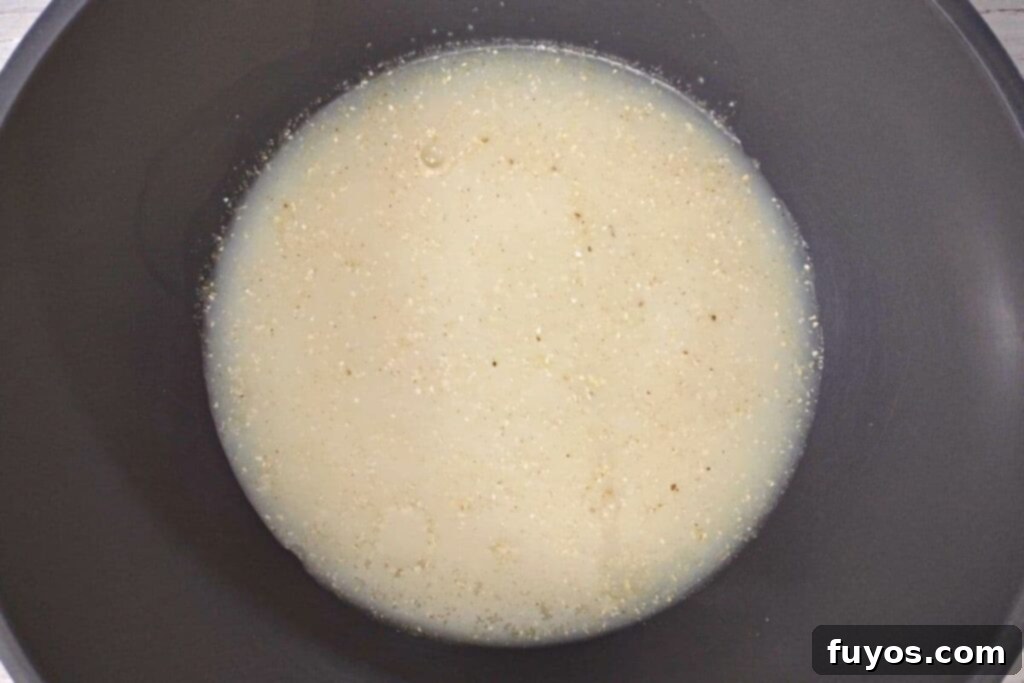
- Thoroughly stir all the ingredients together. This crucial step ensures that the grits are evenly distributed within the liquid and prevents any dry spots or clumps from forming, which can lead to uneven cooking and a less desirable texture. Mix until everything is well combined and the garlic powder is fully incorporated.
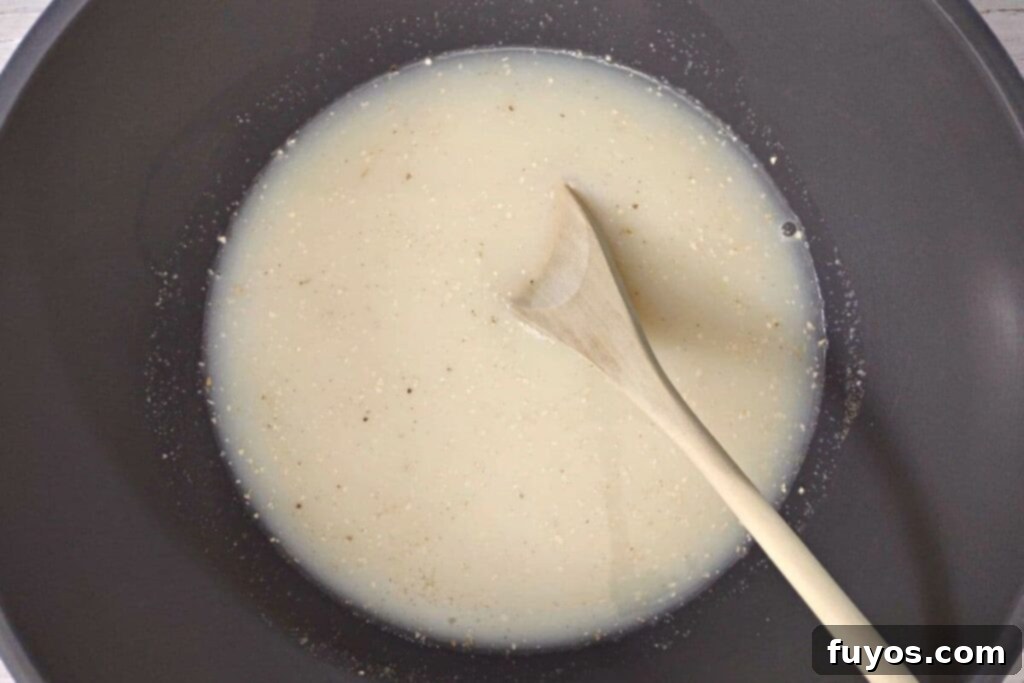
- Place the uncovered bowl into your microwave and cook on high for 15 minutes. It is essential to leave the bowl uncovered to allow steam to escape and the liquid to evaporate effectively, preventing soupy grits. During this cooking period, pause to stir the grits every 5 minutes. Regular stirring helps maintain an even temperature, prevents sticking to the bottom, and ensures a consistently creamy texture throughout.
- Monitor the consistency closely during cooking. If your grits appear to be getting too thick or drying out, add up to ½ cup more hot water (or your preferred liquid) and stir well before continuing to cook. Conversely, if after the initial 15 minutes your grits still seem too thin or watery, continue cooking them for an additional 3-5 minutes, stirring every minute, until they reach your desired creamy consistency. Remember that grits will thicken slightly as they cool and rest.
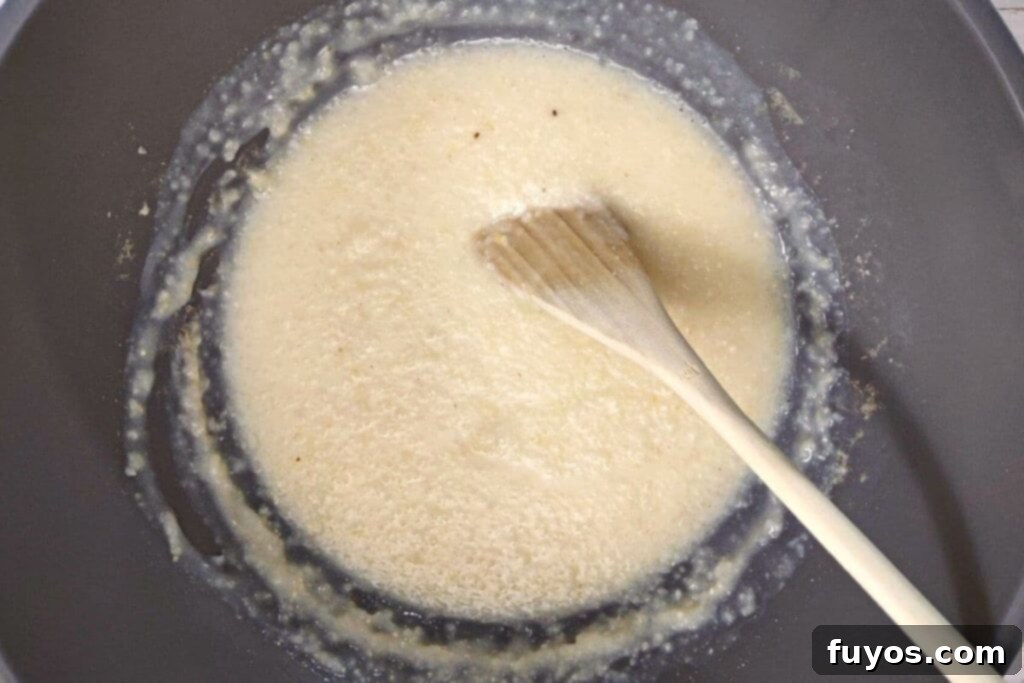
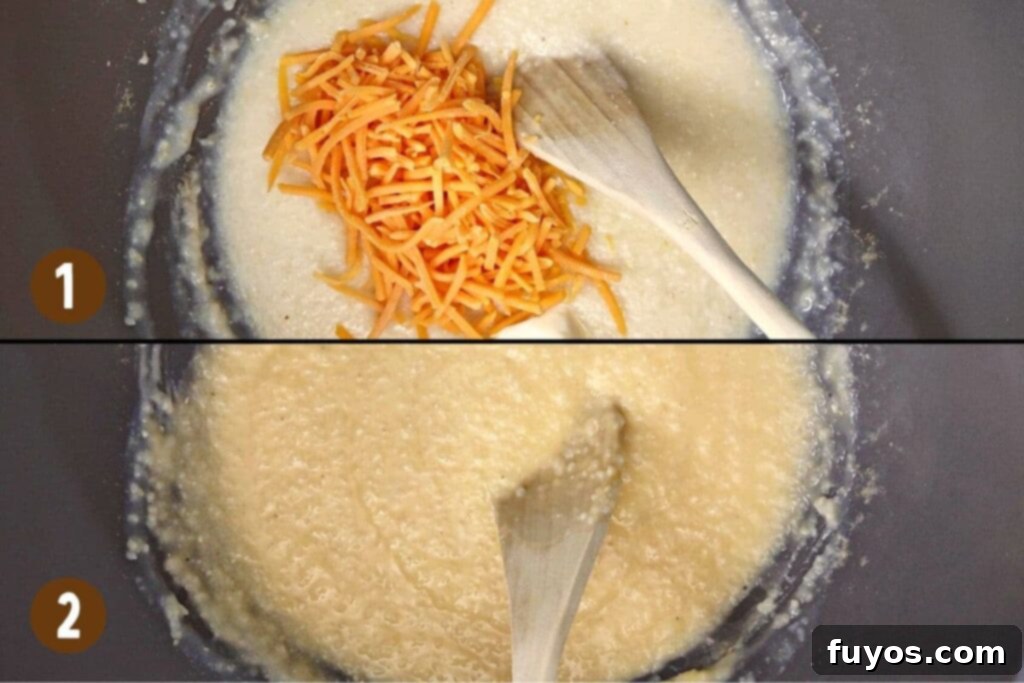
- Once the grits are fully cooked and have reached a tender, creamy texture (see expert tips below for checking doneness), immediately add the butter and shredded sharp cheddar cheese while they are still hot. Stir vigorously until both the butter and cheese are completely melted and beautifully incorporated into the grits, creating a rich, smooth, and flavorful consistency.
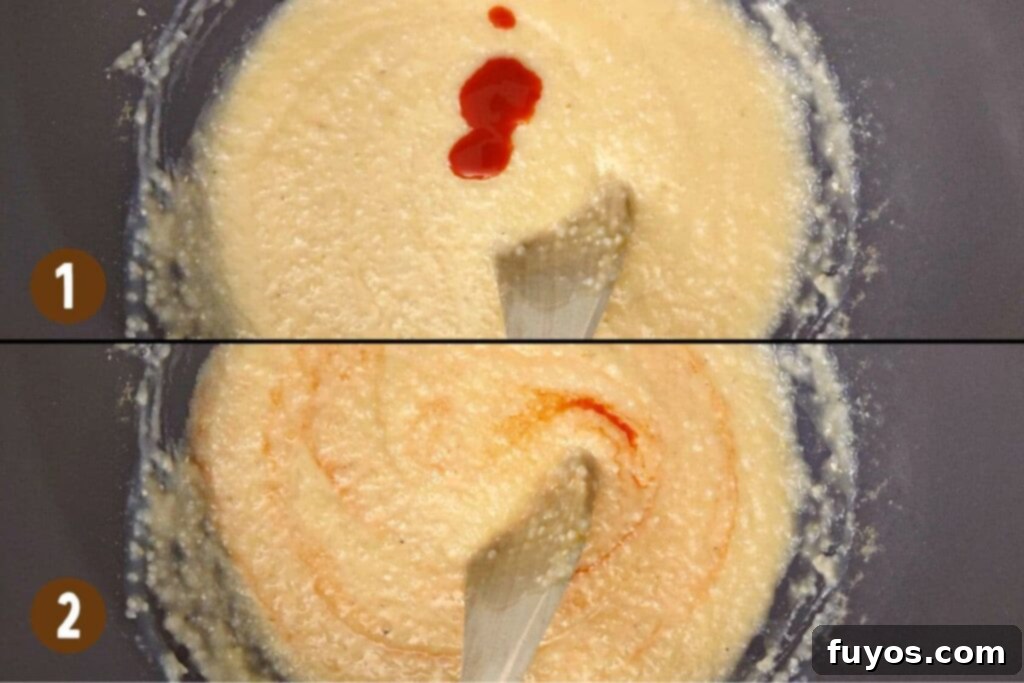
- If you desire a subtle kick and enhanced flavor, add the hot sauce (optional) now. Stir it in thoroughly to combine evenly throughout the grits.
- Your creamy microwave grits are now ready! Top them with your favorite garnishes, such as sliced green onions, fresh black pepper, or any other desired additions, or simply enjoy them as is. Serve immediately and savor the effortless comfort!

What to Serve With These Delicious Microwave Grits
These creamy garlic and cheese microwave grits are incredibly versatile and can be paired with a wide array of dishes, transforming them from a simple side into the star of the meal. Here are some fantastic serving suggestions to inspire your next culinary creation:
For a Hearty Southern Breakfast or Brunch:
- Breakfast sausage: Patties or links, cooked to perfection.
- Smoked sausage: Adds a rich, savory depth.
- Bacon: Crispy strips or crumbled bacon bits. Try our microwave turkey bacon for another quick option.
- Runny egg: Fried, poached, or scrambled eggs pair beautifully with creamy grits.
- Biscuits: A classic Southern combination for dipping and soaking up flavor.
- Gravy: Sausage gravy or a simple sawmill gravy takes grits to the next level.
- Fresh fruit: A refreshing contrast to the rich, savory grits.
- Honey or Maple syrup: For those who enjoy a sweet and savory contrast with their breakfast grits.
For a Flavorful Lunch or Dinner:
- Shrimp and grits: The ultimate Southern comfort food! Sautéed shrimp with a little spice and a rich sauce atop creamy grits.
- Fried fish: Such as our easy air fryer frozen breaded fish or crispy cornmeal catfish nuggets. The crispy texture complements the creamy grits.
- Barbecue ribs or Pulled pork: The smoky, tender meats are a perfect match for the rich grits.
- Etouffee: A classic Creole dish that is often served over rice, but is equally delicious over grits.
- Fried okra: A popular Southern side dish that adds a delightful crunch.
- Collard greens: A hearty, flavorful green vegetable that offers a perfect balance.
- Succotash: A colorful and sweet vegetable medley that adds freshness.
- Air fryer kielbasa: Our tasty air fryer kielbasa offers a quick and easy protein pairing.
- Roasted air fryer ratatouille: For a vibrant and healthy vegetable option, try our roasted air fryer ratatouille.
- Air fryer frozen sausage patties: Another convenient protein option using our air fryer frozen sausage patties recipe.
No matter what you choose, these versatile garlic and cheese microwave grits will elevate your meal with their comforting texture and savory flavor.
Frequently Asked Questions About Microwave Grits
New to cooking grits in the microwave? Here are some common questions and detailed answers to help you achieve perfect results every time.
Can Grits Be Cooked in the Microwave?
Yes, absolutely! Grits can be cooked incredibly well in the microwave. This method is fantastic for saving time and reducing cleanup, making it a popular choice for busy individuals. While this recipe specifically uses quick-cooking grits, most styles of grits—including quick, instant, and even standard stone-ground (though stone-ground will require significantly longer cooking times and more liquid adjustments)—can be successfully prepared in the microwave. The key is to use a large enough bowl and stir frequently to ensure even cooking and prevent lumps.
What is the Ratio of Water to Grits?
For quick grits, instant grits, and standard stone-ground grits, the widely accepted standard ratio of liquid to grits is 4:1. This means for every 1 part of dry grits, you’ll use 4 parts of liquid. For example, if you’re cooking ½ cup of grits, you’ll need 2 cups of liquid. However, for microwave cooking, where steam release can vary, this recipe calls for 3 cups of liquid per ½ cup of grits (a 6:1 ratio). This accounts for evaporation and helps achieve a creamier, less dense consistency without drying out. If your grits appear too thick or the water evaporates quicker than expected before they are fully cooked, don’t hesitate to add a splash more hot water or your preferred liquid, stirring it in until the desired consistency is reached. Conversely, if they are too thin, continue cooking in short bursts.
Do You Add Water or Milk to Grits?
You can use either water or milk for cooking grits, and both yield excellent results, though with different characteristics. Water provides a neutral base, allowing the grits’ natural corn flavor to shine through, especially if you’re adding other seasonings or savory components like chicken stock. Milk, on the other hand, contributes a richer, creamier texture and a slightly sweeter flavor, making for a more indulgent dish. For enhanced savory depth, chicken or vegetable stock can also be used. Many home cooks, including myself, prefer a combination of liquids—for instance, a mix of water, milk, and chicken stock—to achieve a balanced flavor and luscious creaminess. The good news is that you can use any combination you like, as long as you maintain the same total liquid measurement recommended in the recipe.
What kind of bowl should I use for microwave grits?
It’s crucial to use a large, microwave-safe bowl. Grits tend to bubble and expand significantly during cooking in the microwave, and a small bowl will lead to messy boil-overs. A bowl that is at least 4 quarts, or even 5.8 quarts as recommended in this recipe, provides ample space. Ensure the bowl is made of ceramic, glass, or plastic explicitly labeled as microwave-safe to prevent any leaching of chemicals or damage to the container.
Recipe Expert Advice for Perfect Microwave Grits
Achieving perfectly creamy and delicious microwave grits is simple with a few insider tips. These expert recommendations will help you navigate common pitfalls and ensure your grits turn out wonderfully every time.
- To check for doneness of your grits, take a very small spoonful and allow it to cool slightly before tasting. Chew it gently. If the texture is still gritty, sandy, or resistant, your grits are not quite ready and need a little more cooking time. If, however, they feel smooth, tender, and squishy against your palate, then they’re perfectly cooked and ready to be enjoyed. The corn texture should be completely softened.
- It’s critically important to not cover the bowl in the microwave during cooking. This might seem counterintuitive, as covering often helps retain moisture in other microwave recipes. However, for grits, an uncovered bowl allows essential steam to release. This controlled evaporation is crucial for the liquid to reduce and the grits to thicken properly. If you cover the bowl, the steam will condense back into the grits, resulting in a soupy, watery texture that won’t achieve that desired creamy consistency. This is also why using a large bowl (at least 4-5 quarts) is vital – it provides enough headspace to prevent boil-overs as the grits bubble and expand.
- The specified cooking time in this recipe (15-20 minutes) is based on a standard 1000W microwave. Microwave wattages can vary significantly, typically ranging from 700W to 1200W. If your microwave has a lower wattage (e.g., 700-800W), you will likely need to increase the cooking time by a few minutes. Conversely, if you have a higher wattage microwave (e.g., 1100-1200W), you might find your grits cook slightly faster. Always adjust the cooking time up or down slightly as needed, paying attention to the grits’ consistency.
- Keep in mind that cooked grits will thicken slightly as they rest for a few minutes after coming out of the microwave. The starches continue to absorb moisture, leading to a denser texture. If you pull your grits out and think they are almost, but not quite, at your desired thickness, avoid putting them back in for more cooking. Often, they will reach that perfect consistency on their own as they sit.
- If you add your butter and cheese too late, or if your grits have cooled down too much before you incorporate them, the butter and cheese might not melt smoothly. If you find your dairy remaining stubbornly solid, you can simply pop the bowl back into the microwave for another 30-60 seconds. This will gently reheat the grits, allowing the butter and cheese to melt beautifully and blend into a creamy, luscious finish.
- To prevent lumps in your grits, the initial stir after combining the dry grits and liquid is vital. Stir well to ensure every grit particle is moistened before cooking begins. During the cooking process, the intermittent stirring every 5 minutes also helps break up any potential clumps and promotes even hydration and cooking, resulting in a silky-smooth texture.
More Corn-Based Recipes You’ll Love
If you enjoyed the comforting, versatile flavor of these microwave grits, you’ll be delighted by these other delicious corn-based recipes. From crispy appetizers to satisfying side dishes, there’s something for every corn enthusiast!
Air Fryer Frozen Hush Puppies: Easy Golden Brown Side!
Air Fryer Parmesan Polenta Cakes: Easy Crispy Appetizer!
Quick and Easy Air Fryer Corn Casserole Recipe: Perfect Side Dish!
Trader Joe’s Arepas in the Air Fryer (Corn and Cheese)
Reheat Corn on the Cob in the Microwave in Only a Minute!
Final Thoughts on Creamy Microwave Grits
In a world where time is a precious commodity, these super easy microwave grits offer a delightful solution to enjoy a truly comforting classic without the usual fuss and long cooking times. By taking all the hard parts out of traditional grits preparation, this recipe gets you to the best part—eating—that much sooner! The convenience and simplicity make it an absolute game-changer for anyone craving that rich, creamy texture and hearty flavor.
Whether you’re planning a festive Mardi Gras celebration and need the perfect accompaniment for some succulent shrimp, or you’re simply looking for a warm and satisfying start to your day with a fried egg and crispy bacon, these microwave grits are incredibly versatile. You truly can’t go wrong no matter how you choose to enjoy them!
But for me, the rich, savory depth of the garlic and sharp cheddar cheese combination is by far my favorite flavor pairing. It creates a dish that is both comforting and incredibly satisfying, proving that quick and easy can also be utterly delicious. Give this recipe a try, and discover your new favorite way to make grits!
Katie’s tip
For another quick-cooking breakfast bursting with flavor and perfect for microwave preparation, be sure to check out my incredible Microwave Shakshuka recipe!

Creamy Microwave Garlic Cheese Grits
Equipment
-
Microwave
-
Large microwave safe bowl (4 qt or larger preferred)
-
Spatula or spoon for stirring
-
Measuring cups and spoons
Ingredients
- ½ Cup grits (such as Quaker quick 5-minute grits)
- 3 Cups water, milk, or chicken stock (or a combination thereof)
- 1 Tsp salt
- 1 ½ Tsp garlic powder
- 2 Tbsp butter (salted)
- ½ Cup shredded sharp cheddar cheese
- 1 Tsp hot sauce (optional)
- Additional toppings or garnishes as desired
Instructions
-
To a large microwave safe bowl add grits, water (or other liquids as desired), salt, and garlic powder½ Cup grits, 3 Cups water, milk, or chicken stock, 1 Tsp salt, 1 ½ Tsp garlic powder
-
Stir everything to distribute well and prevent dry spots and clumping
-
Cook on high uncovered in microwave for 15 minutes, pausing to stir every 5 minutes
-
If it gets too thick during cooking, add up to ½ cup more water. Alternatively, if too thin, cook for an additional 3-5 minutes
-
Once grits are cooked, while still hot, add butter and cheese and stir until both are melted and incorporated2 Tbsp butter, ½ Cup shredded sharp cheddar cheese
-
Add hot sauce if desired and stir to combine1 Tsp hot sauce
-
Top with your favorite toppings or enjoy as is!Additional toppings or garnishes as desired
Notes
- To check for doneness of your grits, take a small spoonful and try to chew it. If it is gritty or sandy, it’s not ready. If it’s more of a smooth, squishy texture, then it’s done
- It’s important to not cover the bowl in the microwave during cooking. This allows for better release of steam so the liquid evaporates (we’re using more than the normal ratio so this is necessary). If you cover it, your grits will be soupy. That’s why you’ll want a large bowl (to avoid overflow)
- Cooking time is based on a 1000W microwave. If you have a different wattage, you may need to adjust up or down slightly to accommodate
- The grits will thicken slightly as they rest for a few minutes. If you think they’re close when you pull them out after cooking, don’t put them back in – they’ll get there on their own
- You can use regular or quick cooking grits for this (but not instant). The quick cooking does tend to cook slightly faster and a little more reliably, but you can definitely use regular if needed
- For the creamiest grits use milk, or you can even substitute half and half. For more flavor, use chicken stock. I typically use 1 cup of each (water, stock, and milk)
- I find garlic powder is easier to work with and blends in well, but you can use 2-3 cloves of fresh, minced garlic if preferred
- If you dislike cheddar cheese, gouda is another great option. I’ve also tried parmesan with success
- Hot sauce is entirely optional so you can omit it if you don’t like any heat. I do like to add some as I feel it gives it a little more flavor (it’s not spicy as written, though)
- Variations: For sweeter grits, omit garlic, cheese, and stock. Top cooked grits with cinnamon and brown sugar, honey and bananas, or sweet cream. Try a breakfast version topped with maple and cooked bacon pieces, or with a runny egg
- My savory garlic and cheese grits are topped with sliced green onions and fresh cracked black pepper
- Exact nutritional values will vary based on brand of ingredients, substitutions and toppings, and quantity consumed, so please consider this a guideline only
Nutrition
Number of total servings shown is approximate. Actual number of servings will depend on your preferred portion sizes.
Nutritional values shown are general guidelines and reflect information for 1 serving using the ingredients listed, not including any optional ingredients. Actual macros may vary slightly depending on specific brands and types of ingredients used.
To determine the weight of one serving, prepare the recipe as instructed. Weigh the finished recipe, then divide the weight of the finished recipe (not including the weight of the container the food is in) by the desired number of servings. Result will be the weight of one serving.

Did you try this recipe?
Mention @TheDinnersDoneQuick or tag #dinnersdonequick! for even more!
Pin Recipe
Leave A Review

