Magical No-Bake Caramel Apple Broomsticks: The Ultimate Easy Halloween Treat!
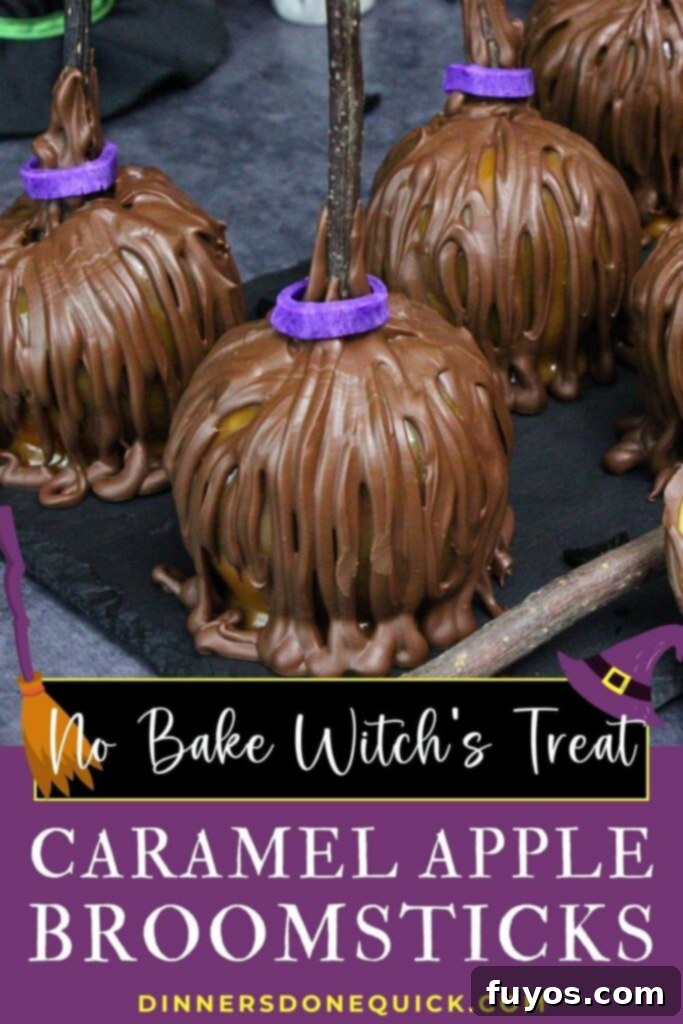
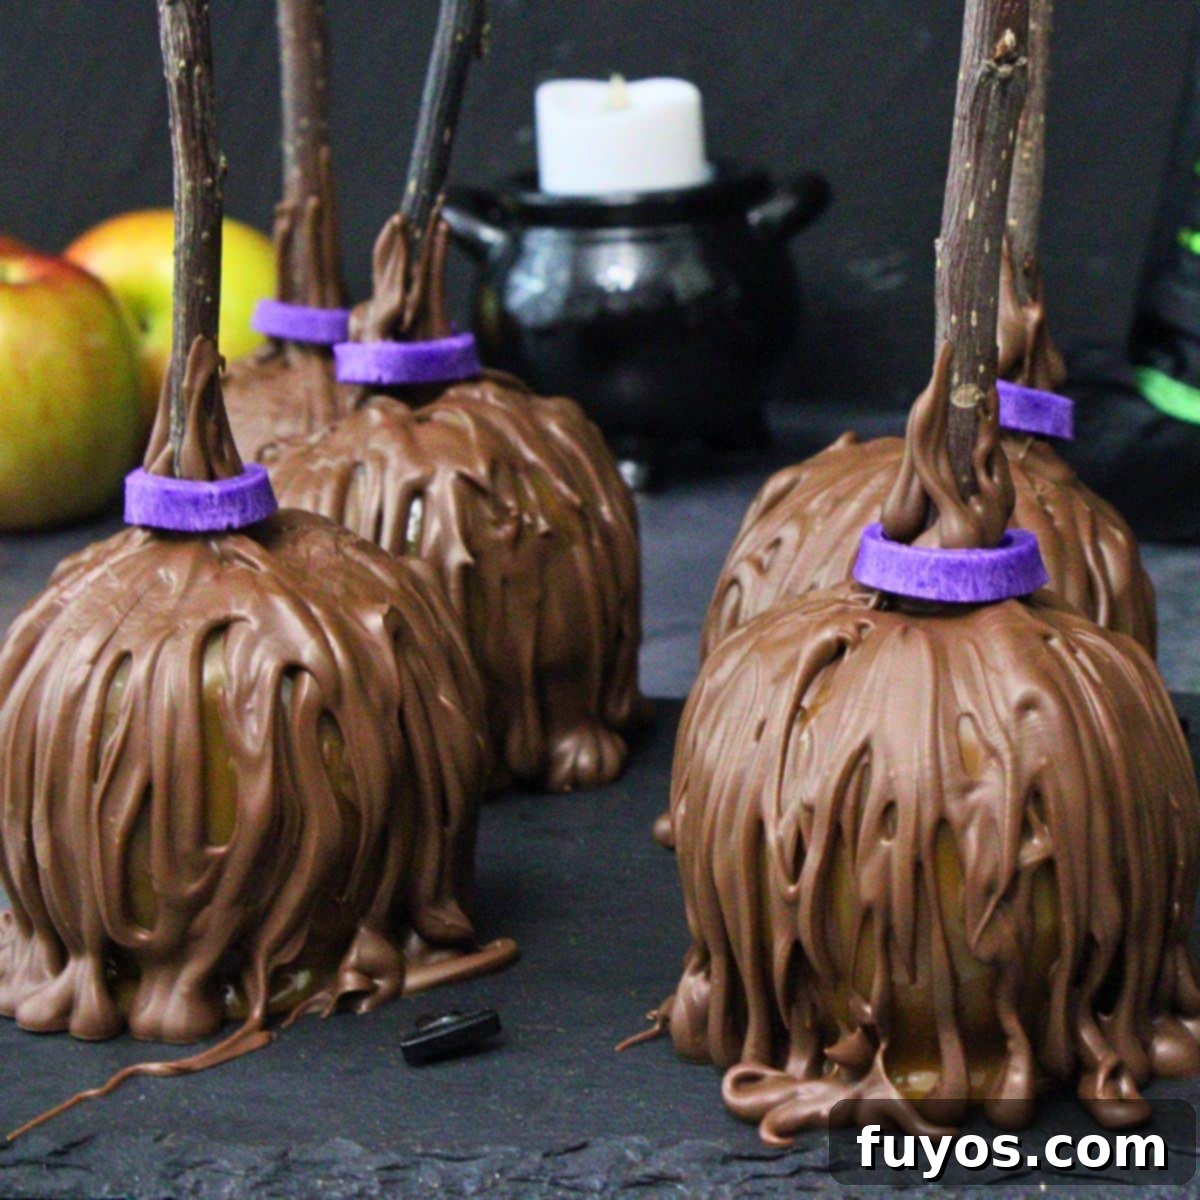
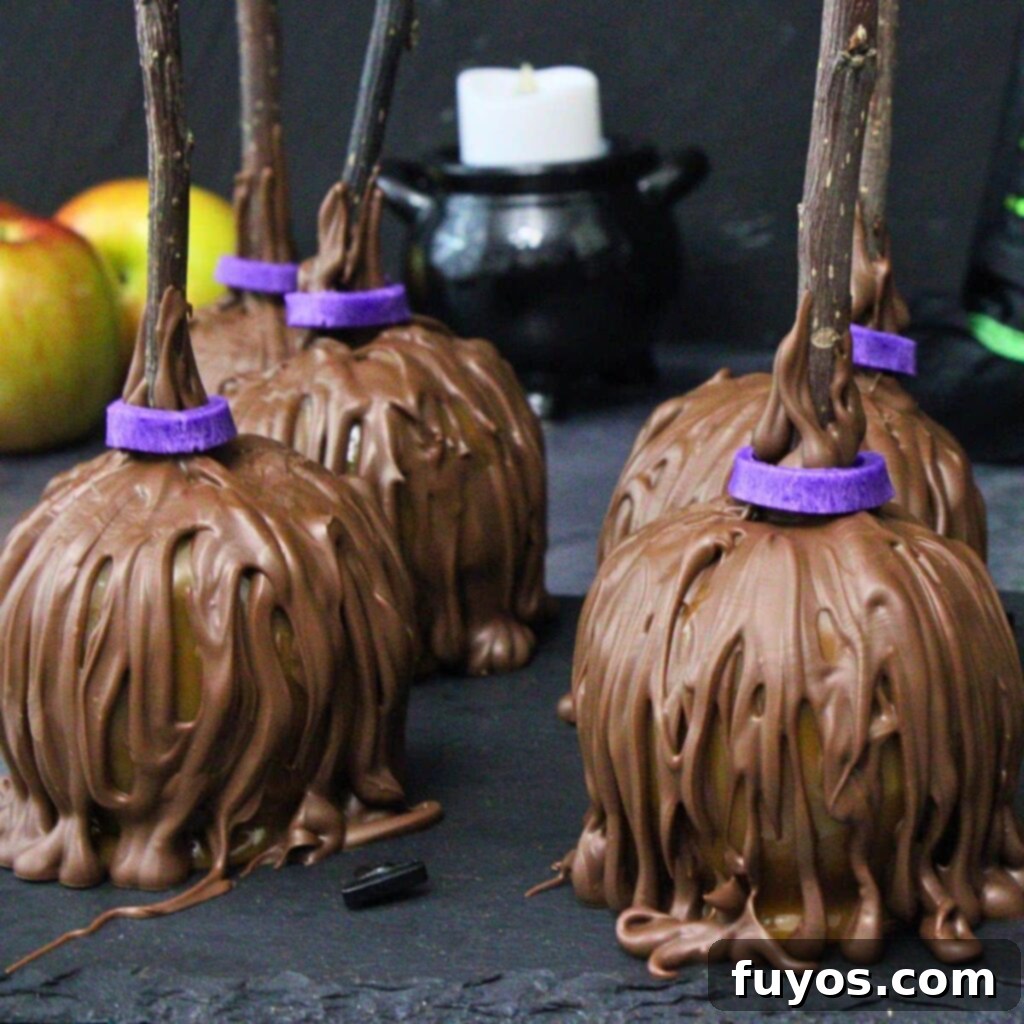
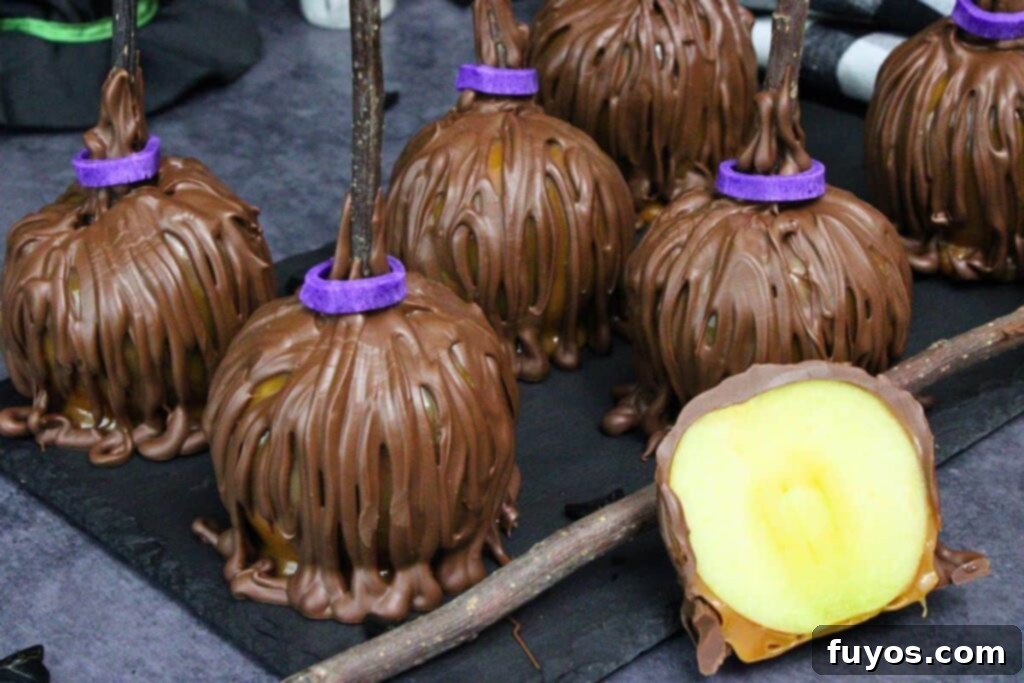
These enchanting caramel apple broomsticks are the quintessential Halloween treat, bringing a touch of whimsy and deliciousness to your spooky celebrations! Imagine crisp, fresh small apples, meticulously coated in a rich, gooey caramel, then adorned with piped chocolate designed to mimic the twiggy bristles of a witch’s broom. This delightful combination creates a perfectly witchy snack that captivates both children and adults. The best part? They are incredibly simple to make, requiring no baking whatsoever – just the convenience of a microwave!
Why You’ll Love These Fun Halloween Treats
Caramel apple broomsticks aren’t just a treat; they’re an experience! This no-bake Halloween delight is as visually appealing as it is delicious. It takes the cherished, nostalgic flavor of crisp apples dipped in sweet, chewy caramel and elevates it with a festive, playful makeover. By serving these mini caramel apples on unique “broomstick” handles, they become not only a whimsical snack but also incredibly portable and easy to manage, especially at lively Halloween parties.
One of the primary reasons these treats are so beloved is their fantastic balance of flavors and textures. The refreshing tartness and satisfying crunch of a fresh apple beautifully cut through the rich, buttery sweetness of the caramel, creating a harmonious bite. Unlike traditional, often cumbersome full-sized caramel apples, these charming little broomsticks are perfectly portioned. Their smaller size makes them ideal for kids, easy for guests to grab at parties, and perfect for bite-sized snacking without any mess.
Beyond their delightful taste, these caramel apple broomsticks offer immense versatility. They effortlessly double as captivating party décor! Their whimsical broomstick appearance makes them an absolute standout as a centerpiece on your Halloween dessert table or an eye-catching item on a themed platter. Customization is also a key feature; you can unleash your creativity with Halloween-themed sprinkles, colorful chocolate drizzles, or even crushed candies to add unique flair. With no oven required, these easy-to-make treats promise to bring a magical touch to your autumn celebrations, making them a must-try for any Halloween enthusiast.
Quick + Easy Recipes
straight to your inbox
Essential Ingredients for Your Caramel Apple Broomsticks
Crafting these adorable caramel apple broomsticks requires just a few simple ingredients, easily found at any grocery store. The beauty of this recipe lies in its minimal components, allowing the natural flavors to shine while creating a visually stunning Halloween snack. Here’s what you’ll need to gather:
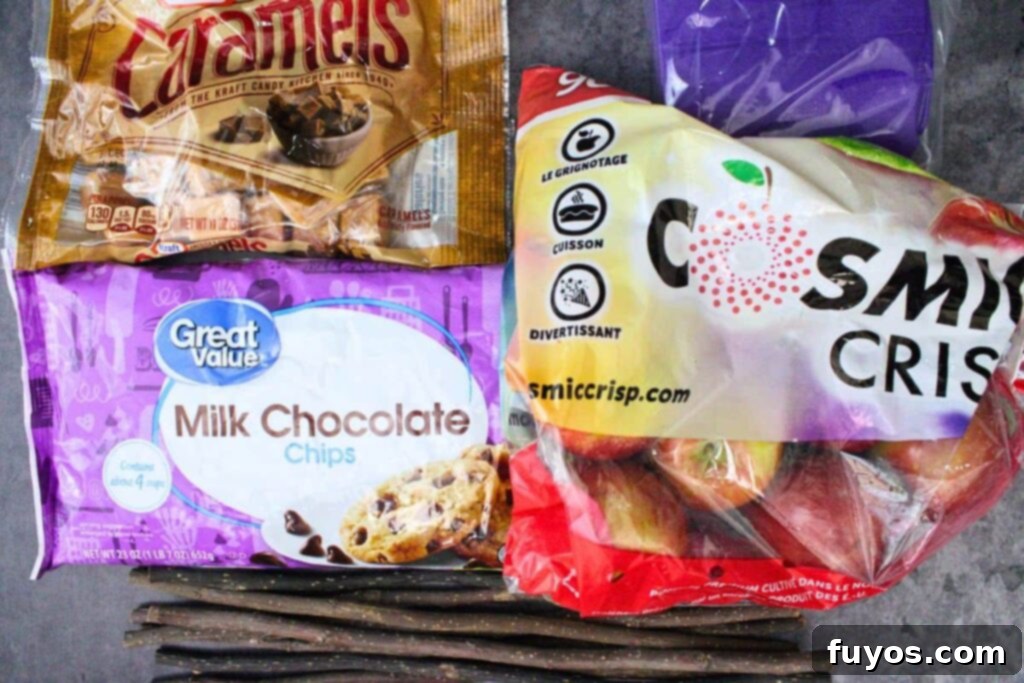
- 6 mini apples: Opt for small, firm varieties like Rockit apples or the smaller Cosmic Crisps. Their compact size is perfect for individual portions and easy handling.
- 11 ounce bag Kraft caramels (or similar) + 1 Tbsp water: Make sure to use individually wrapped caramels for easy melting. The water helps create a smooth, dippable consistency.
- 11.5-ounce bag milk chocolate chips (or about 2 cups): Milk chocolate provides a classic, sweet flavor that complements the caramel and apple perfectly.
- 6 broomstick wooden twigs: These are crucial for the authentic broomstick look and serve as practical handles. Ensure they are food-safe and sturdy enough to skewer the apples.
- Purple, yellow, or orange fondant for decorating (optional): Fondant adds a decorative touch, allowing you to create small “ties” around the broom’s bristles, enhancing the witchy aesthetic.
Ingredient Tips and Smart Substitutions for Customization
Flexibility is key in the kitchen, especially when preparing festive treats. Here are some helpful tips and clever substitutions to ensure your caramel apple broomsticks are exactly how you envision them, catering to different tastes and available ingredients:
- Apples: This recipe is incredibly adaptable! If you’re hosting a larger gathering or simply want more of these delightful treats, feel free to easily double the recipe. You might even find that an 11-ounce bag of caramels can coat up to 7 mini apples, offering a little extra flexibility. When selecting apples, look for varieties that are firm and tart, such as Granny Smith, Honeycrisp, or Fuji, as their crispness provides a wonderful contrast to the sweet coatings.
- Caramel Alternatives: Not a fan of caramel, or perhaps you’re looking for an alternative? You can absolutely skip the caramel layer and simply double the amount of chocolate. First, dip the apples in a generous coating of melted chocolate. Once hardened, you can then pipe on additional chocolate to create the broom bristles, achieving a similar aesthetic with a different flavor profile.
- Chocolate Choices: While milk chocolate chips offer a classic, universally loved sweetness, don’t hesitate to experiment! Dark or semi-sweet chocolate chips can provide a richer, less sugary counterpoint. For a truly vibrant and customizable look, consider using colored candy melts. Imagine making “poison” apples with bright red or green candy melts, or a whole rainbow of witchy brooms for a truly magical display!
- Broomstick Handles: The wooden twigs are fantastic for that rustic, authentic broomstick charm. However, if you can’t find them or prefer another option, pretzel rods can also work. Keep in mind that pretzel rods might be a bit harder to firmly jab into the apple without breaking, so proceed with care. Other sturdy, food-safe sticks could also be considered, prioritizing stability for easy dipping and handling.
- Decorative Ties: I love using fondant to create the neat little ties at the top of the “broom” where the apple meets the stick. It’s pliable and holds its shape well. However, you have several other creative options! Icing, decorating gel, or even a little extra piped caramel can achieve a similar effect, adding that final, polished touch to your witchy creation.
Step-by-Step Instructions: Crafting Your Magical Caramel Apple Broomsticks
Creating these charming caramel apple broomsticks is a straightforward process, perfect for a fun Halloween activity. Follow these detailed steps to ensure your treats turn out perfectly, ready to impress your guests and delight your taste buds!
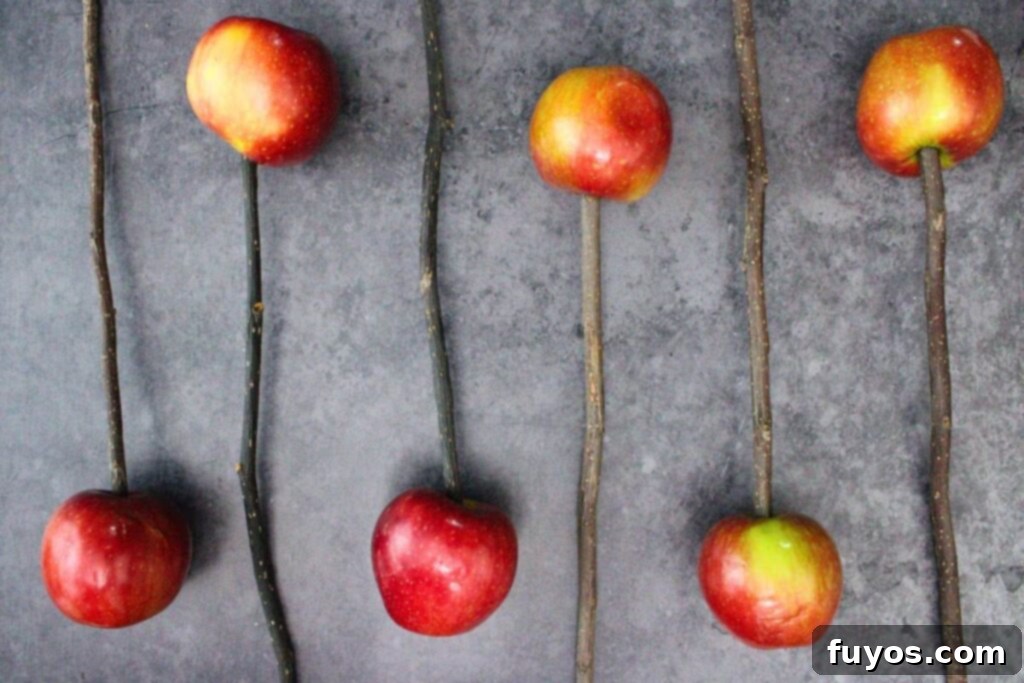
- Prepare Your Apples and Sticks: Begin by thoroughly washing and drying your mini apples. A dry surface is crucial for the caramel and chocolate to adhere properly. Carefully remove the stem from each apple. In its place, firmly skewer each apple with a broomstick twig. Ensure the twig is jabbed in well and centered to provide a stable handle for dipping and so the apple can stand upright on its own. Line a baking sheet (or similar flat surface) with parchment paper or a silicone baking mat to prevent sticking. This preparation is key to a smooth process.
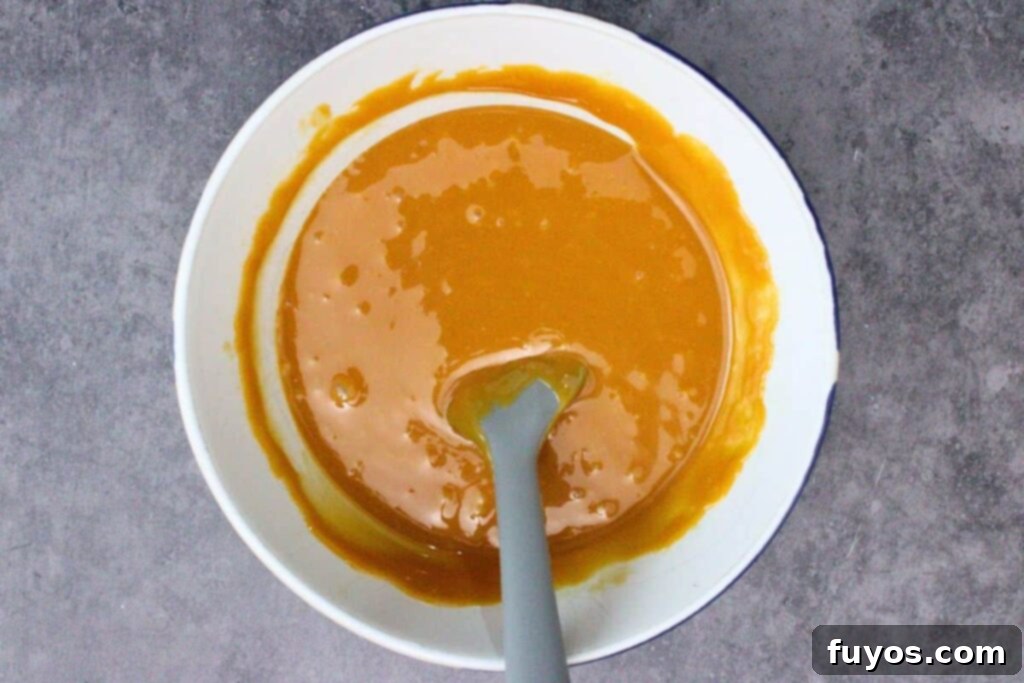
- Melt the Caramel: Add your unwrapped Kraft caramels to a microwave-safe bowl. For optimal dipping, choose a bowl that is taller and narrower, allowing the apple to be fully submerged without excessive caramel. Add 1 tablespoon of water to the caramels. Microwave on high in 1-minute intervals, stirring thoroughly between each interval, until the caramel is completely melted and smooth. (For reference, my 1000W microwave typically takes about 2 minutes total). If you’re using a different brand of caramel, always refer to the package directions, as melting times and water requirements may vary. A perfectly smooth caramel ensures an even, glossy coat.
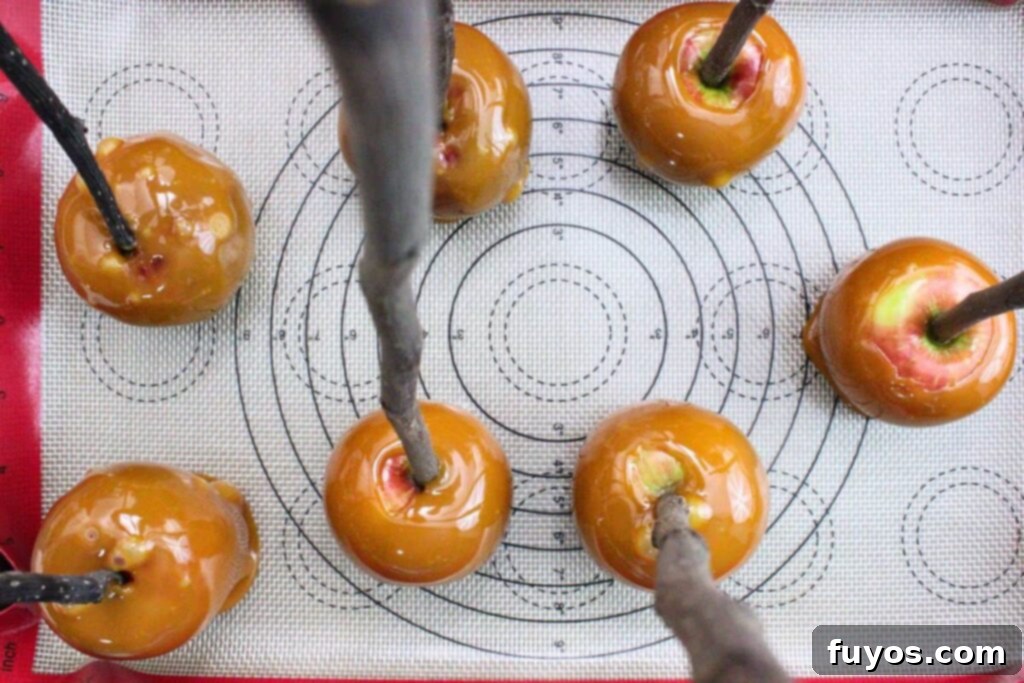
- Dip in Caramel: Holding onto the broomstick twig, dip your apples into the hot, melted caramel. Turn the apple gently to ensure it is fully coated. A small gap at the very top, near the stick, is perfectly acceptable, especially as the caramel level in the bowl decreases. If you prefer a completely covered look, you can spoon a little caramel over the top to fill any gaps. Allow any excess caramel to drip off briefly before carefully placing each caramel-coated apple onto your lined baking sheet. To speed up the hardening process, you can pop them into the freezer for 5-10 minutes.
- Melt and Prepare Chocolate: Next, place your milk chocolate chips into another clean, microwave-safe bowl. Microwave on high in short 30-second increments, stirring well after each, until the chocolate is fully melted and smooth. Overheating chocolate can cause it to seize, so stir diligently and stop as soon as it’s melted. Once smooth, transfer the melted chocolate into a piping bag. If you have a narrow round piping tip, you can use that for fine details. Otherwise, simply snip a small hole (about ¼-inch wide) off the very tip or corner of the piping bag or Ziploc bag.
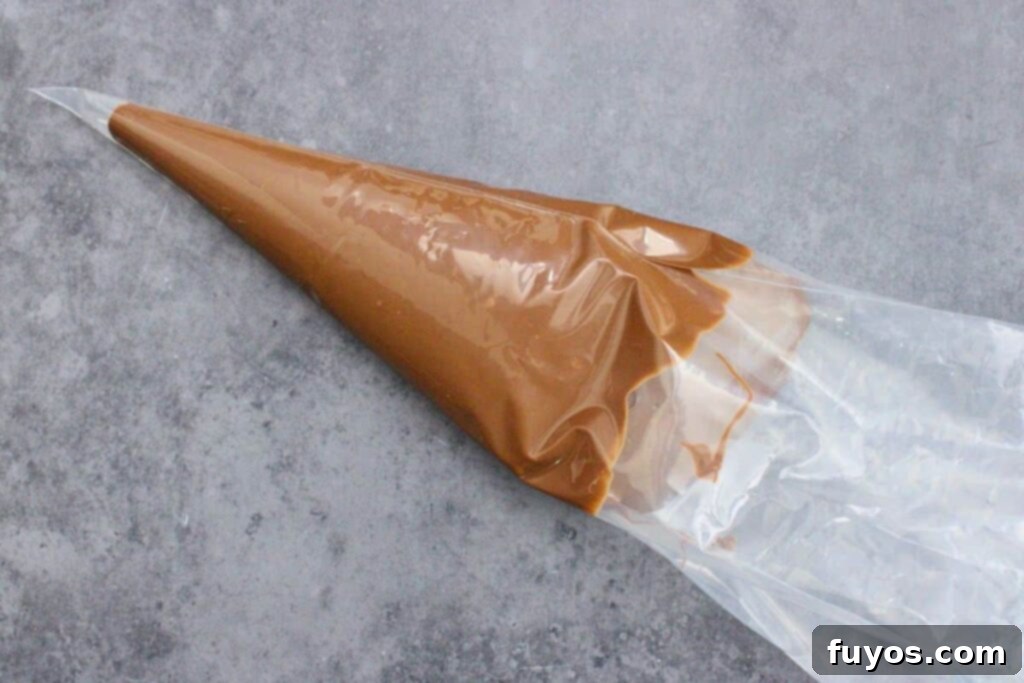
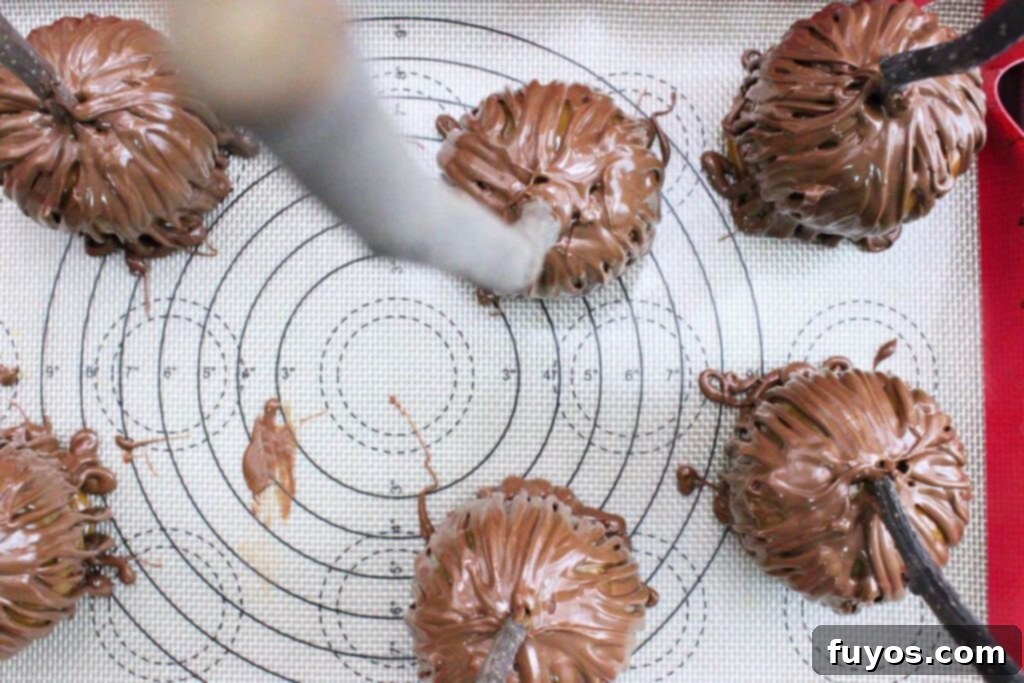
- Decorate with Chocolate “Bristles”: Now for the fun part – creating the broom effect! Holding the apple by its stick, pipe thin lines of melted chocolate up and down the sides of the caramel-coated apple. These lines will form the whimsical “bristles” of the broomstick. Extend some chocolate up the stick itself, towards the top of the apple, to create the broom’s upper structure. Once all your apples are decorated, allow the chocolate to harden. You can expedite this by placing them in the fridge for 20-30 minutes or the freezer for 10-15 minutes. *A helpful note: These broomsticks can be quite tall, so you might need to remove a shelf in your fridge to accommodate their height while they set!*
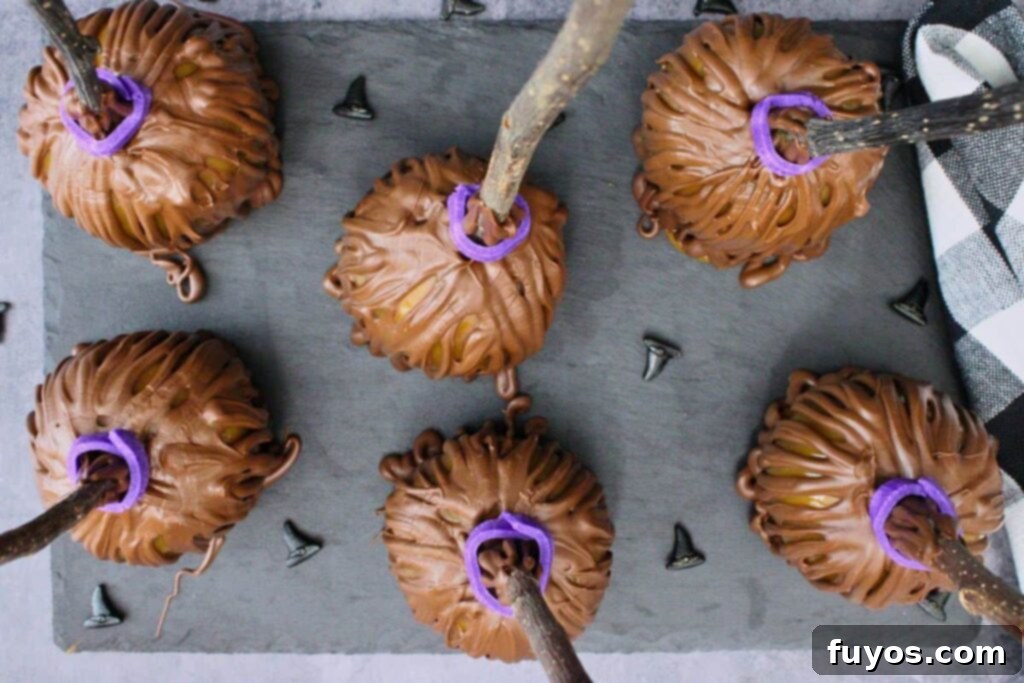
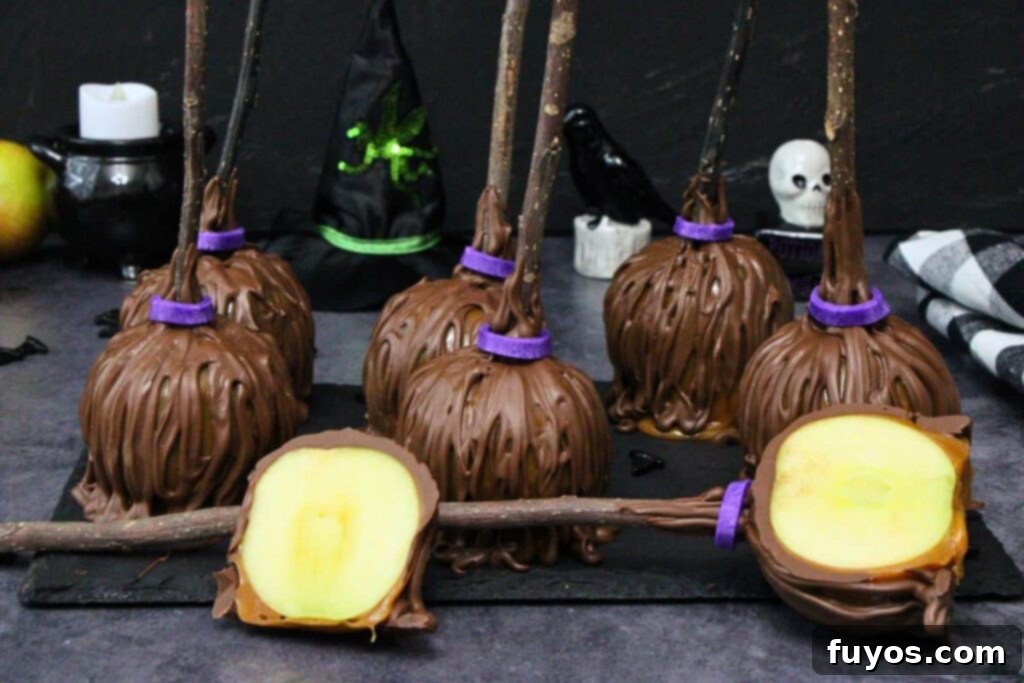
- Add Final Touches and Serve: For an extra decorative flourish, wrap small strips of purple, yellow, or orange fondant around the top of the apple where it meets the stick, creating a “tie” for the broom bristles. Alternatively, you can pipe on a little extra melted chocolate or frosting to achieve a similar tying effect. Once complete, your magical caramel apple broomsticks are ready to be enjoyed!
Perfect Pairing Suggestions for Your Halloween Feast
These caramel apple broomsticks are a show-stopping treat on their own, but pairing them with the right accompaniments can elevate your Halloween celebration even further. Here are some delightful suggestions for appetizers, drinks, and other desserts, ensuring a perfectly themed and delicious spread.
Appetizers & Snacks
- Cheese Board with Sharp Cheddar or Brie: The savory, often salty notes of a robust cheese like sharp cheddar or the creamy richness of brie provide a wonderful counterpoint to the sweetness of the caramel apples. This sophisticated pairing balances the palate.
- Salted Pretzels: For a simple yet effective contrast, serve a bowl of salted pretzels. The crunch and saltiness of the pretzels are a classic pairing with gooey caramel, creating a sweet and salty combination that’s incredibly addictive. For a Halloween twist, try my Ghost Pretzels!
- Spiced Nuts: Warm, aromatic spiced nuts (pecans, almonds, or cashews tossed with cinnamon, nutmeg, and a hint of cayenne) complement the rich caramel and fresh apple flavors beautifully, adding texture and a touch of autumnal spice.
Drinks
- Hot Apple Cider (spiked or non-alcoholic): Doubling down on cozy fall flavors, hot apple cider is a natural companion. Its warmth and apple notes perfectly echo the main ingredient. For adults, a splash of rum or bourbon makes it a delightful spiked option.
- Pumpkin Spice Latte or Chai Tea: Embrace the autumn spirit with warm beverages like a pumpkin spice latte or a fragrant chai tea. The spices in these drinks — cinnamon, clove, ginger — beautifully complement the caramel and apple, creating a comforting experience.
- Sparkling Wine or Hard Cider: For a more festive adult beverage, sparkling wine or a crisp hard cider can cut through the sweetness of the caramel apples with their effervescence and acidity, making for a refreshing pairing that keeps the party lively.
Desserts
- Pumpkin Bars or Pumpkin Bread: The earthy, comforting flavors of pumpkin are a quintessential fall taste and pair wonderfully with the richness of caramel. These baked goods offer a different texture and depth to your dessert table.
- Chocolate Truffles or Bark: Introduce another layer of decadence with rich chocolate truffles or a homemade chocolate bark. This adds a contrasting texture and deep chocolate flavor that complements the apple’s brightness. For a delightful sweet and salty option, consider my Halloween Crack.
- Mini Donuts with Cinnamon Sugar: Evoking classic fairground treats, mini donuts dusted with cinnamon sugar offer another seasonal, comforting dessert that guests will adore alongside the caramel apples.
Halloween-Themed Pairings
- Witch Hat Cookies: Lean into the witchy theme by serving charming witch hat cookies, perfectly playing up the broomstick motif of your caramel apples.
- Monster Popcorn (with candy mix-ins): A vibrant bowl of Monster Popcorn, featuring colorful candies and sprinkles, is a fun, easy, and visually appealing snack that fits right in with any spooky celebration.
- Witch Cocktails: For the adult guests, dramatic and creatively named “witch cocktails” (think dark colors, dry ice effects) will complement the theme and add an exciting element to the festivities.
Recipe FAQs: Your Caramel Apple Broomstick Questions Answered
Are Caramel Apples Truly Delicious?
Absolutely! Caramel apples are overwhelmingly loved for their exquisite balance of tart, crisp apple with sweet, wonderfully chewy caramel. This combination creates a treat that is both refreshing and deeply indulgent, making it a highly anticipated classic fall delicacy. They’re especially popular at autumn fairs, harvest festivals, and of course, Halloween parties, where their delightful flavors and satisfying textures are a highlight.
What is the Origin and History of the Caramel Apple?
The caramel apple’s delightful history traces back to the 1950s, when a creative Kraft Foods employee ingeniously used leftover Halloween caramels. By melting them down and dipping apples, a new iconic treat was born. This innovative idea quickly gained immense popularity, transforming the caramel apple into a seasonal staple across the U.S. and eventually around the world, becoming synonymous with autumn and festive gatherings.
Why are Caramel Apples such a Popular Halloween Treat?
Caramel apples are deeply tied to Halloween celebrations because they perfectly encapsulate the essence of the autumn apple harvest. In past decades, they were often lovingly prepared as homemade treats given out during trick-or-treating. Their naturally festive appearance, coupled with their universally appealing sweet flavor, makes them a perfect and traditional fit for fall festivities and all things spooky season.
Top Tips For the Best Caramel Apple Broomsticks Every Time
Achieving perfect caramel apple broomsticks is easier than you think with these expert tips. These insights will help you navigate common challenges and ensure your Halloween treats are not only delicious but also beautifully presented and sturdy.
- Preparing Apple Stems: Sometimes, apple stems can be quite recessed or stubborn. If yours are, a pair of pliers can be very helpful in pulling them out cleanly. For particularly thick sticks that might be difficult to insert into the apple, a gentle tap with a hammer can aid insertion. Just be careful not to exert too much force and push the stick all the way through the other side of the apple!
- Smooth Caramel Layer: After dipping your apples in caramel, you might notice some small bubbles in the caramel layer. To achieve a perfectly smooth and even base for your chocolate, gently poke these bubbles with a toothpick. This will allow them to flatten out, ensuring a cleaner, more professional-looking chocolate coating later.
- Centering Your Sticks for Stability: For broomsticks that stand tall and proud without tipping over, it’s vital to keep your sticks as centered as possible in each apple. Even if the apple itself has an irregular shape, aim for a central axis for the stick. This stability is crucial for both dipping and display.
- Easy Piping Bag Filling: Filling a piping bag with melted chocolate can sometimes be messy. Here’s a brilliant trick: place the piping bag into a tall drinking glass and roll the top edge of the bag over the rim of the glass. This holds the bag open and upright, making it incredibly easy to spoon in your melted chocolate without any spills.
- Caramel Melting Methods: While this recipe champions the convenience of microwaving caramel for a no-bake approach, you can also melt it on the stovetop. If you opt to heat the caramel in a saucepan on your stove, you should use 2 tablespoons of water instead of 1 to achieve the ideal smooth, dippable consistency.
- Adjusting Setting Times: Keep in mind that the exact setting time for both the caramel and chocolate layers can vary significantly based on the temperature and humidity levels in your kitchen. On warmer, more humid days, you may need to extend the chilling time in the fridge or freezer. Always ensure each layer is fully hardened before proceeding to the next step or wrapping.
Storage and Presentation: Keeping and Displaying Your Witchy Treats
Once your magical caramel apple broomsticks are complete, you’ll want to ensure they stay fresh and look their best. Proper storage and creative presentation can make all the difference for your Halloween party!
Storage Tips
- Storage for Freshness: To keep your caramel apple broomsticks fresh and prevent the coatings from becoming sticky, store them in the fridge. Arrange them upright on a parchment-lined tray to prevent sticking. They will generally stay fresh and delicious for 2–3 days.
- Wrapping for Longer Storage or Gifting: If you plan to store them for a longer period or intend to gift them, wrap each broomstick individually. Use wax paper or clear cellophane bags. This helps to protect the caramel from drying out and prevents any sticking. It’s crucial to ensure that the chocolate is completely cooled and hardened before wrapping, otherwise, it will smudge. Store wrapped broomsticks in a cool, dry place.
Presentation Tips
- Themed Display for Extra Flair: For a truly enchanting presentation, arrange your caramel apple broomsticks upright. You can use a sturdy foam block (hidden within a festive container) or even place them in a small cauldron or decorative basket filled with crinkled paper or “witch’s brew” tissue paper. This adds an undeniable witchy flair to your Halloween spread!
- Sprinkle Fun and Customization: While the chocolate is still wet after piping, this is your chance to get creative! Decorate with a variety of Halloween sprinkles (ghosts, bats, pumpkins), edible glitter for a shimmering effect, crushed candy for added texture and color, or even a contrasting colored chocolate drizzle. This personalization makes each broomstick unique.
- Festive Plating: When serving on a platter, enhance the festive ambiance by lining it with candy corn, a generous scattering of Halloween sprinkles, or edible “hay” (such as shredded wheat cereal). These small details contribute significantly to the overall Halloween theme and make your treats even more appealing.
More Enchanting No-Bake Halloween Treats
Halloween Puppy Chow: Monster Munch Muddy Buddies!
Frankenstein Rice Krispie Treats: No Bake Halloween Fun!
- Frankenstein Pretzels: Another quick and easy no-bake option, perfect for kids.
- Vampire Fudge: Rich, decadent, and delightfully spooky, this fudge is a simple yet impressive treat.
Final Thoughts: Your Perfect Halloween Treat Awaits!
These incredibly fun caramel apple broomsticks are so much more than just a dessert; they’re an edible embodiment of a witch’s broom, making them an absolutely perfect addition to your Halloween party or any October celebration! Their charming design and delicious flavors ensure they are a beloved treat for both kids and adults alike. Since they are entirely no-bake, the preparation is surprisingly easy and enjoyable, requiring just a little patience with the piping bag to create those intricate chocolate bristles.
What truly sets these treats apart is their wonderful customizability. You have the creative freedom to choose different kinds of chocolate, various stem options, and a wide array of decorations to truly make them your own. It’s an excellent opportunity for family fun, too! Once the adults have safely handled the melting and dipping of the caramel and chocolate, the kids can enthusiastically take over the decorating phase, adding their unique artistic flair with sprinkles, fondant, or colorful drizzles.
These witch’s broomsticks are not only a blast to make but are even more delightful to eat! They present beautifully on any dessert tray, instantly becoming a conversation starter and a festive focal point. Plus, with their built-in handle, they’re the ultimate grab-and-go indulgence, making them ideal for mingling guests. To truly complete your holiday spread and embrace the spirit of the season, consider pairing these magical treats with more of my delicious No Bake Halloween Treats. Get ready to cast a delicious spell this Halloween!

Caramel Apple Broomsticks (No Bake)
Equipment
-
Microwave
-
Microwave safe bowls
-
6 Branch sticks
-
Spatula (or spoon; for mixing)
-
Baking sheet (or similar)
-
Parchment paper (or silicone baking mat)
-
Piping bag (or Ziploc)
Ingredients
- 6 mini apples (such as Rockit or the small size Cosmic Crisps)
- 11 ounce bag Kraft caramels (or similar) + 1 Tbsp water (unwrap the caramels)
- 11 ½ ounce bag milk chocolate chips (or about 2 cups)
- Purple, yellow, or orange fondant for decorating (optional)
Instructions
-
Wash and dry your apples. Remove the stem, and in its place, skewer each one with a broomstick twig (make sure to jab it or hammer it in well, as you’ll hold onto it for dipping, and keep it centered so the apple can stand upright). Line a baking sheet (or similar) with parchment or a silicone baking mat6 mini apples
-
Add your unwrapped caramels to a microwave-safe bowl (taller and narrower is better for dipping, just make sure the apple will fit into it) along with the water. Microwave on high in 1-minute intervals, stirring between each, until melted and smooth (my 1000W microwave takes 2 minutes total). For other brands of caramel, follow package directions as they may differ11 ounce bag Kraft caramels (or similar) + 1 Tbsp water
-
Dip your apples into the hot caramel, turning to coat fully (a little gap at the top is fine, especially as the caramel gets lower, or you can spoon it up to fill the gap if preferred). Let the excess drip off before placing them on the lined baking sheet. Allow the caramel to harden (pop them in the freezer for 5-10 minutes to speed up the process)
-
Now, place the chocolate into another microwave safe bowl. Cook on high in 30-second increments, stirring between each, until melted and smooth. Transfer to a piping bag or Ziploc (if you have a narrow round piping tip you can use that, otherwise just nip the tip/corner of the bag about ¼” wide)11 ½ ounce bag milk chocolate chips
-
Pipe on lines of chocolate up and down the sides of the apple to form the bristles of the broomstick. Add a little to the top of the apple up the stick as well to form the top of the broom. Once all are decorated, allow to harden (pop them in the fridge for 20-30 minutes or freezer for 10-15 minutes to speed up the process). Note the sticks are difficult to cut; I had to remove a shelf in my fridge to accommodate the height
-
Wrap small strips of fondant around the top where the apple meets the stick (or pipe on melted chocolate or frosting as desired). Enjoy!Purple, yellow, or orange fondant for decorating
Notes
- This recipe easily doubles if you’d like to make more apples (I can actually usually do 7 with this amount of ingredients)
- If you don’t want to use caramel, you can double the amount of chocolate. Dip the apples in a coating of chocolate instead of caramel and then add more after it hardens for the broom look
- Instead of milk chocolate chips, you could use dark or semisweet chocolate, or even colored candy melts if you want to make colorful brooms
- The twigs really add to the broomstick look, but you could also use pretzel rods or something similar (though it may be harder to jab the apple with those)!
- I use fondant to make the ties at the top of the “broom” but you could also use icing, decorating gel, or pipe on a little extra caramel to create a similar look
- Exact nutritional values will vary based on brand, size, and flavor of ingredients, actual amounts of toppings used, and quantity consumed, so please consider this a guideline only
Nutrition
Number of total servings shown is approximate. Actual number of servings will depend on your preferred portion sizes.
Nutritional values shown are general guidelines and reflect information for 1 serving using the ingredients listed, not including any optional ingredients. Actual macros may vary slightly depending on specific brands and types of ingredients used.
To determine the weight of one serving, prepare the recipe as instructed. Weigh the finished recipe, then divide the weight of the finished recipe (not including the weight of the container the food is in) by the desired number of servings. Result will be the weight of one serving.

Did you try this recipe?
Mention @TheDinnersDoneQuick or tag #dinnersdonequick! for even more!
Pin Recipe
Leave A Review
