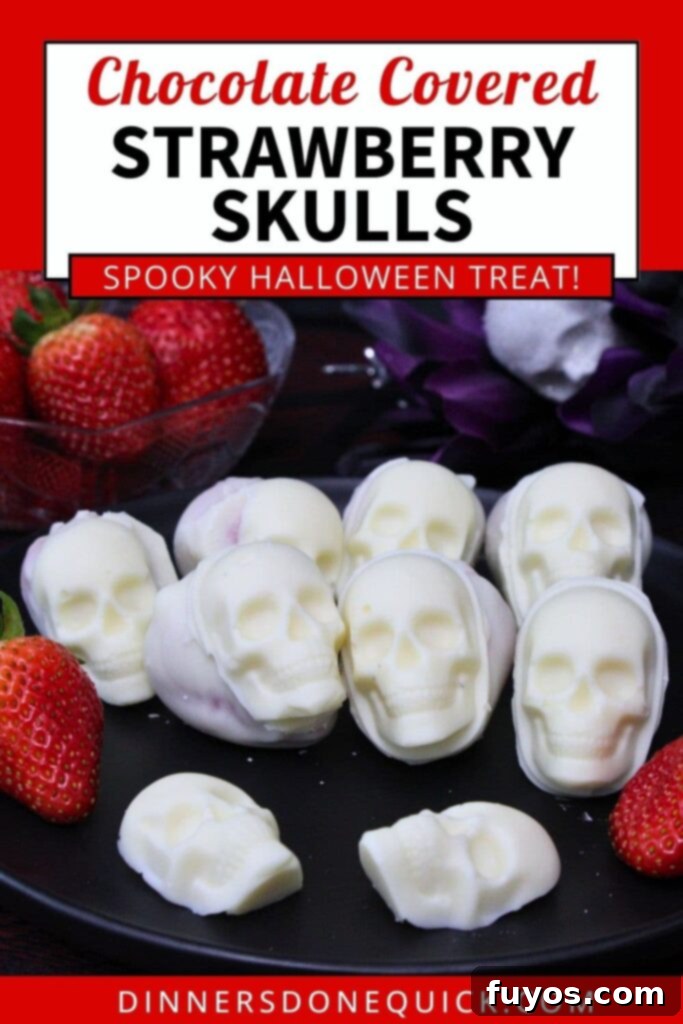
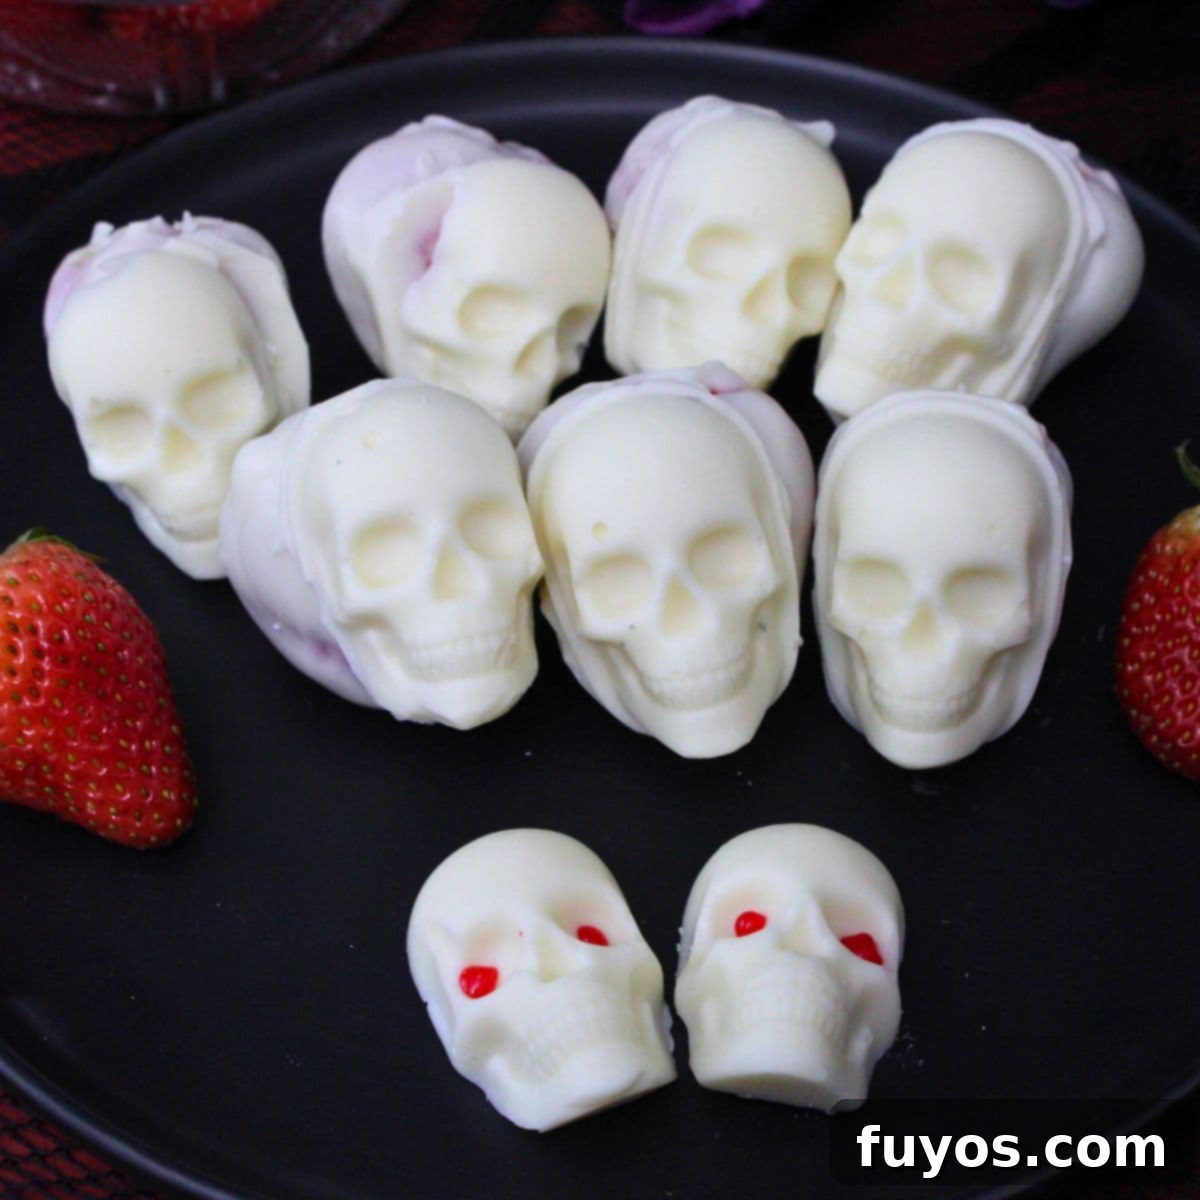
Spooky & Sweet Chocolate Strawberry Skulls: The Ultimate No-Bake Halloween Treat!
Prepare to elevate your Halloween celebrations with a delightfully eerie twist on a classic dessert! These chocolate strawberry skulls are not just a treat for the taste buds but also a festive, eye-catching centerpiece for any spooky gathering. Imagine juicy, fresh strawberries draped in rich chocolate, meticulously shaped into adorable (or delightfully creepy!) skulls. They’re a surefire hit at Halloween parties, captivating both kids and adults with their unique blend of ghoulish charm and irresistible sweetness. Best of all, they’re a completely no-bake option, meaning you can whip up these impressive treats without ever needing to turn on your oven, saving you time and effort for other party preparations.
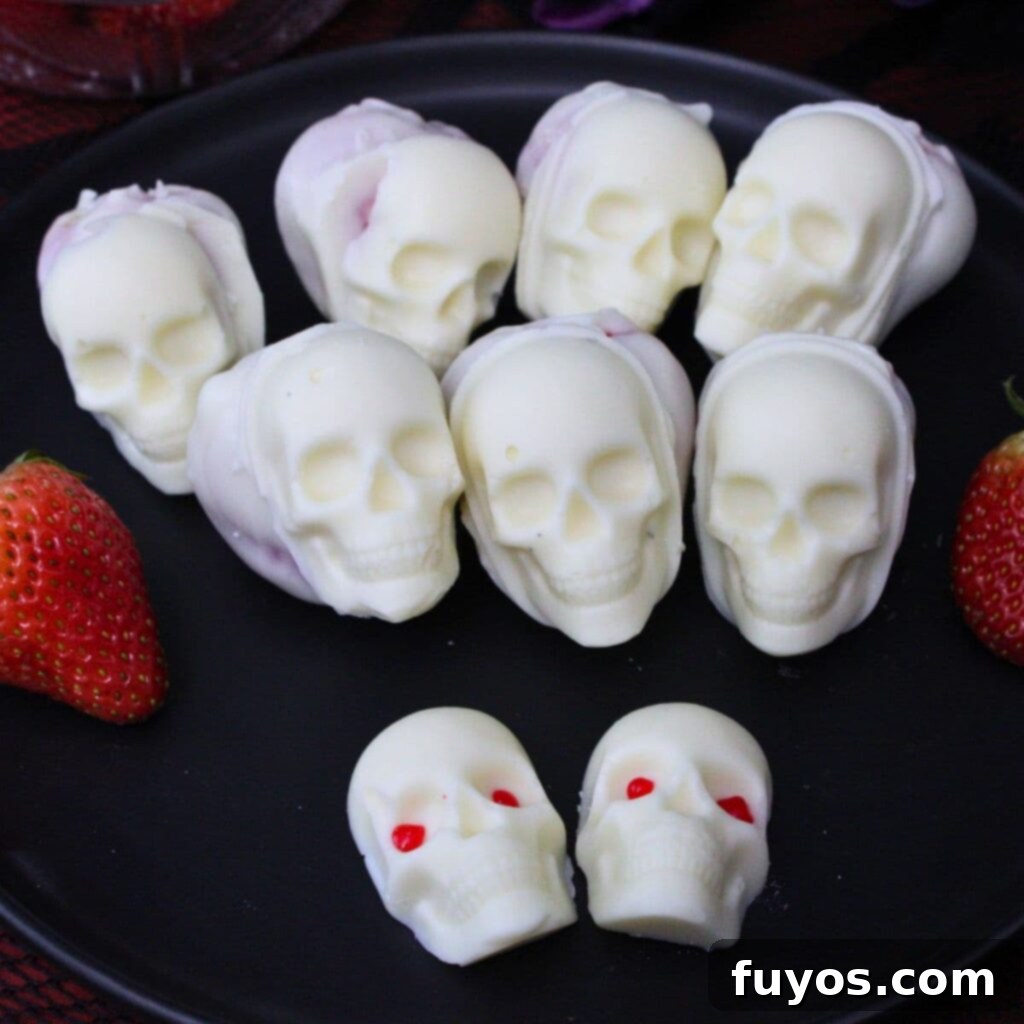
What are Chocolate Strawberry Skulls?
Chocolate strawberry skulls are an innovative and fun dessert that transforms ordinary chocolate-dipped strawberries into miniature works of spooky art. The process involves carefully dipping fresh, ripe strawberries into melted chocolate, then gently pressing them into a silicone skull-shaped mold. This simple technique allows the chocolate to harden around the berry, capturing the intricate details of a skull’s face, creating a truly unique and memorable treat. It’s an imaginative way to infuse some Halloween spirit into your dessert spread, turning simple fruit into a hauntingly delicious experience.
Katie’s tip
No mold, no problem! If you don’t have a skull mold or prefer a less “creepy” vibe, try my Strawberry Ghosts instead. They’re just as fun, require no special equipment, and are equally delicious, offering a slightly less spooky but still festive option for your fall gatherings!
The beauty of these spooky strawberry skulls lies in their versatility. You can experiment with various types of chocolate – white, milk, or dark – not only to create different flavor profiles but also to achieve diverse aesthetic effects. White chocolate, for instance, naturally lends itself to a classic “bone” color, making it the most popular choice for a realistic skull appearance. However, using dark chocolate can give your skulls a more sinister, shadowy look, while milk chocolate offers a softer, sweeter appeal. These fruity chocolate skulls are remarkably easy to make, requiring only a microwave for melting the chocolate, making them an ideal, stress-free dessert for any Halloween party or autumnal celebration. They’re guaranteed to be a crowd-pleaser, delighting guests of all ages with their sweet, fruity goodness and playful, macabre design.
Quick + Easy Recipes
straight to your inbox
Essential Ingredients for Spooky Strawberry Skulls
Crafting these adorable yet eerie chocolate strawberry skulls requires just a few simple ingredients, making it an accessible recipe for even beginner bakers (or no-bakers, in this case!). The key is to select high-quality ingredients that will give you the best flavor and appearance. Here’s what you’ll need to gather:
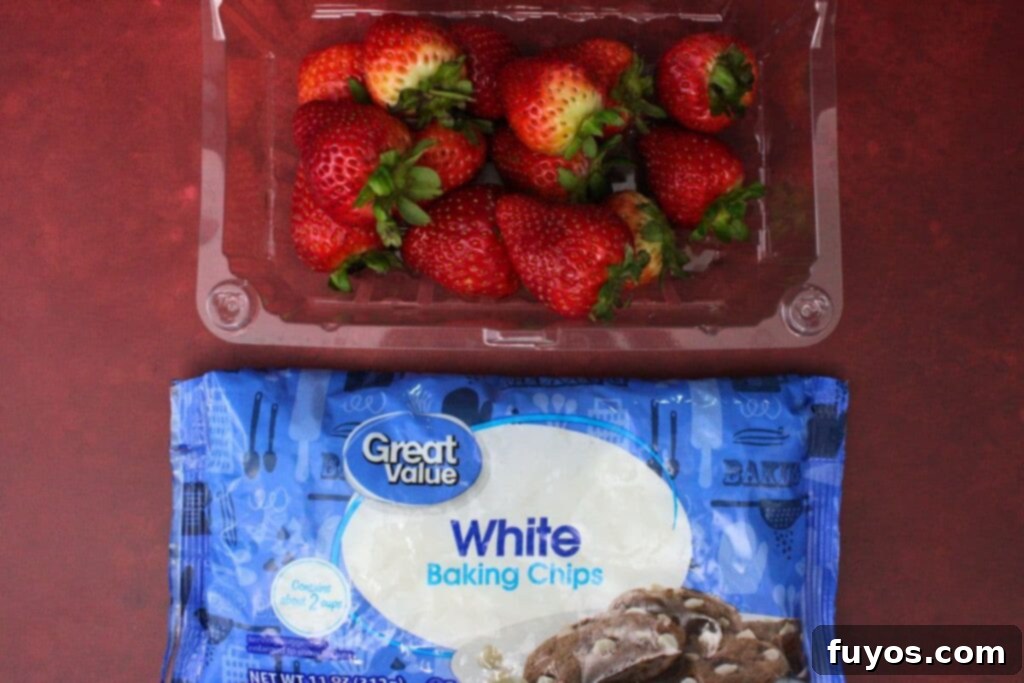
- 6 fresh strawberries: Opt for firm, unblemished berries that are washed and thoroughly dried. The size of your strawberries will be important for fitting into the mold.
- 2 cups chocolate chips: Your choice of white, milk, or dark chocolate. White chocolate is highly recommended for the classic skull look, but feel free to experiment with other varieties for different effects.
- 1 Tbsp coconut oil: (Optional, but highly recommended) A small amount of coconut oil helps thin the melted chocolate, making it smoother and easier to dip your strawberries, resulting in a more even and glossy coating.
Ingredient Tips and Notes for Success
- When selecting your strawberries, aim for berries that will fit perfectly within your silicone skull mold (I personally love and recommend this one for its ideal size and detail). Berries that are too large might not take on the skull shape well, while those too small might leave too much empty chocolate in the mold. Consistency in size among your chosen berries will also lead to more uniform results.
- For the chocolate, feel free to use your favorite brand and type. While white chocolate offers the most authentic “skull” appearance, a mix of white, milk, and dark chocolate can add variety and visual interest to your Halloween spread. You could even use colored candy melts to create vibrant or glow-in-the-dark effects!
- Looking for other fruit options? Raspberries or blueberries can also be used, especially if you have smaller skull molds, such as the one featured in my Skull Caprese Salad. These smaller fruits are fantastic for bite-sized skull treats.
- Consider a stuffed variation for an extra special treat! Carefully core your strawberries before dipping and fill them with a creamy cheesecake mixture or a dollop of peanut butter for a delightful surprise inside your chocolate skulls. This adds an extra layer of flavor and texture that truly elevates the dessert.
- If you choose to use coconut oil, ensure it’s unrefined for a subtle coconut flavor or refined for a neutral taste, depending on your preference. This small addition makes a huge difference in the ease of dipping and the final texture of your chocolate coating.
Step-by-Step: Crafting Your Chocolate Strawberry Skulls
Creating these spooky chocolate strawberry skulls is a fun and straightforward process, perfect for getting into the Halloween spirit. Follow these detailed steps to ensure your treats come out perfectly ghastly and delicious!
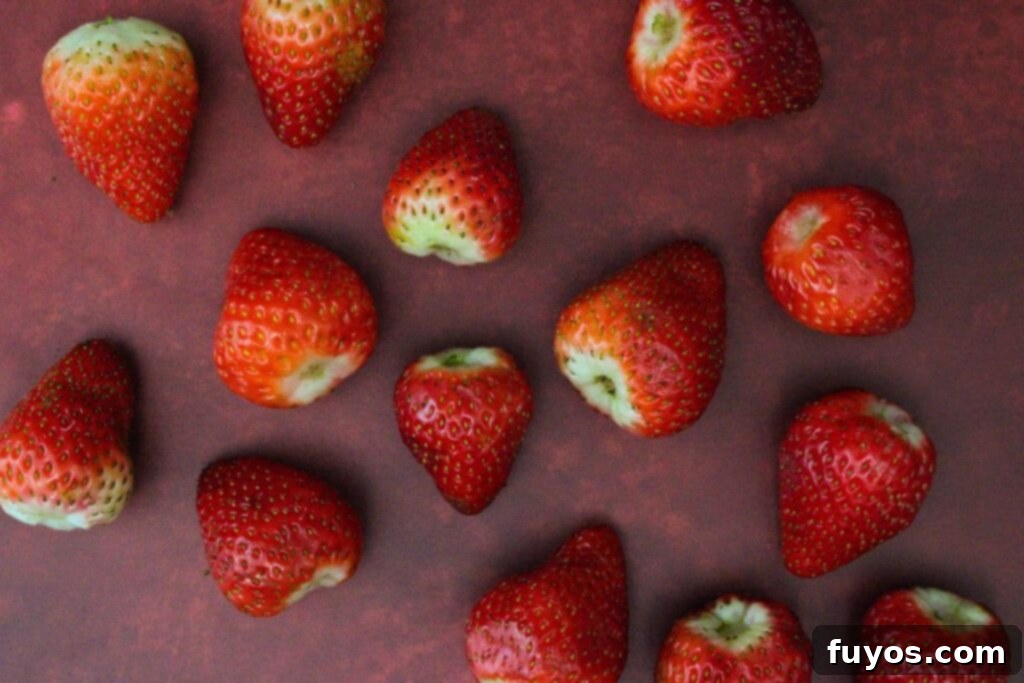
- Prepare Your Strawberries and Workspace: Begin by gently removing the green stems from your fresh strawberries. It’s important to be careful not to cut too deeply into the berry, as excess moisture can prevent the chocolate from adhering properly. Once stemmed, ensure your strawberries are completely dry. Moisture is the enemy of melted chocolate, so pat them thoroughly with a paper towel. Next, lay out a piece of parchment paper or a silicone baking mat on a baking sheet; this will be your non-stick surface for setting the dipped berries.
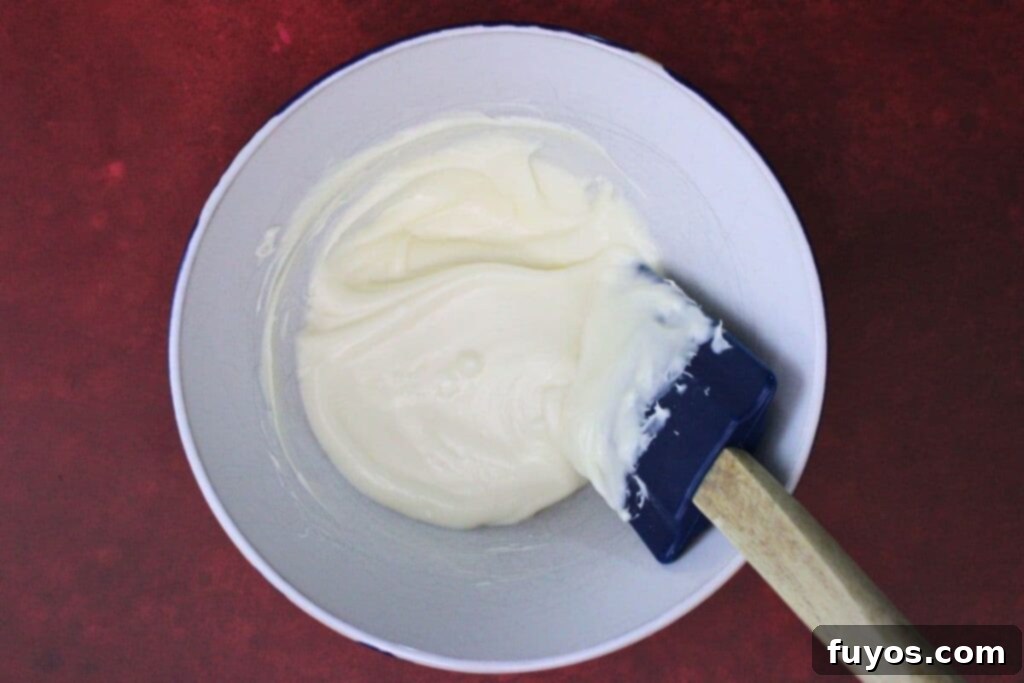
- Melt the Chocolate: In a microwave-safe bowl, combine your chosen chocolate chips (white, milk, or dark) and the optional coconut oil. Microwave on high for 30 seconds. Remove and stir well. Continue microwaving in 15-second increments, stirring thoroughly after each interval, until the chocolate is completely melted and smooth. This typically takes about 1 minute total in a 1000W microwave. Stirring frequently helps prevent the chocolate from burning and ensures an even consistency. If your chocolate seems too thick, a tiny bit more coconut oil can help achieve the desired fluidity.
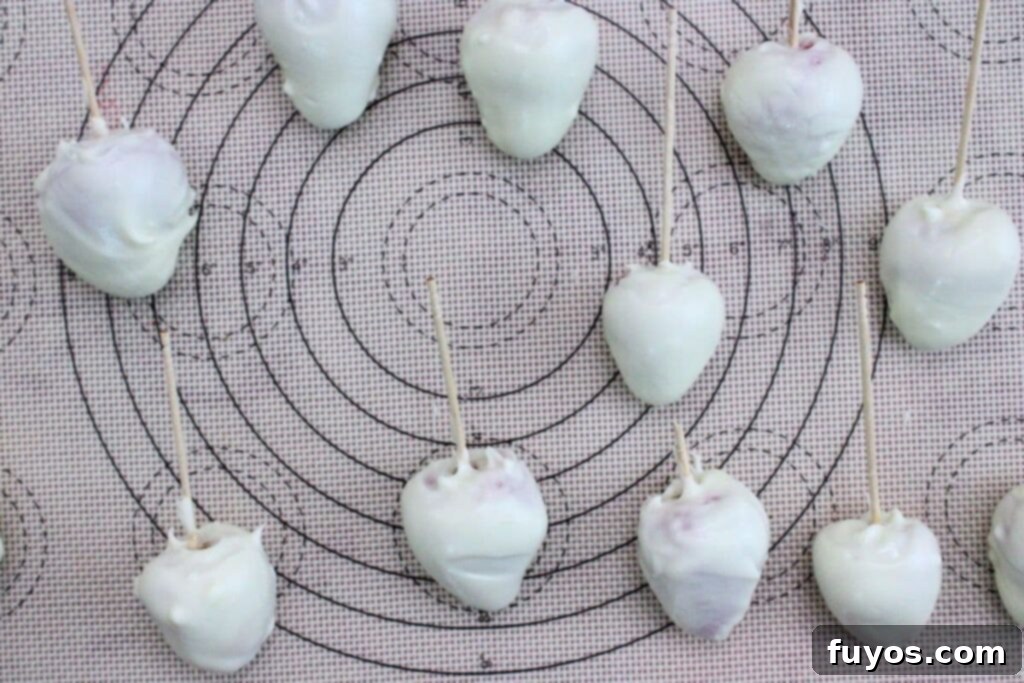
- Dip the Strawberries: Using a toothpick or a fork inserted into the top of each strawberry (where the stem was), carefully dip one strawberry at a time fully into the melted chocolate. Ensure the entire berry is coated, including the top where the stem was removed. Gently tap off any excess chocolate against the side of the bowl. Place the dipped strawberry onto your prepared parchment paper or silicone baking mat. Repeat this process for all strawberries. Once dipped, transfer them to the freezer for about 10-15 minutes, or until the chocolate coating is firm to the touch. This quick chill helps the chocolate set faster and prevents the strawberry’s moisture from seeping out later.
- Mold the Skulls: Once your chocolate-dipped strawberries are firm, it’s time to bring them to life (or undeath!). Reheat your remaining melted chocolate slightly if it has hardened. Using a small spoon, carefully add a layer of melted chocolate into the bottom of each skull mold cavity, just enough to cover the intricate facial features. While the chocolate in the mold is still wet and pliable, gently press one of your chilled, dipped strawberries into each mold. Make sure to press firmly enough so the berry adheres to the chocolate and the mold’s features are imprinted onto the chocolate covering the strawberry. If there are any gaps around the strawberry, fill them in with a little extra melted chocolate to ensure a complete skull shape.
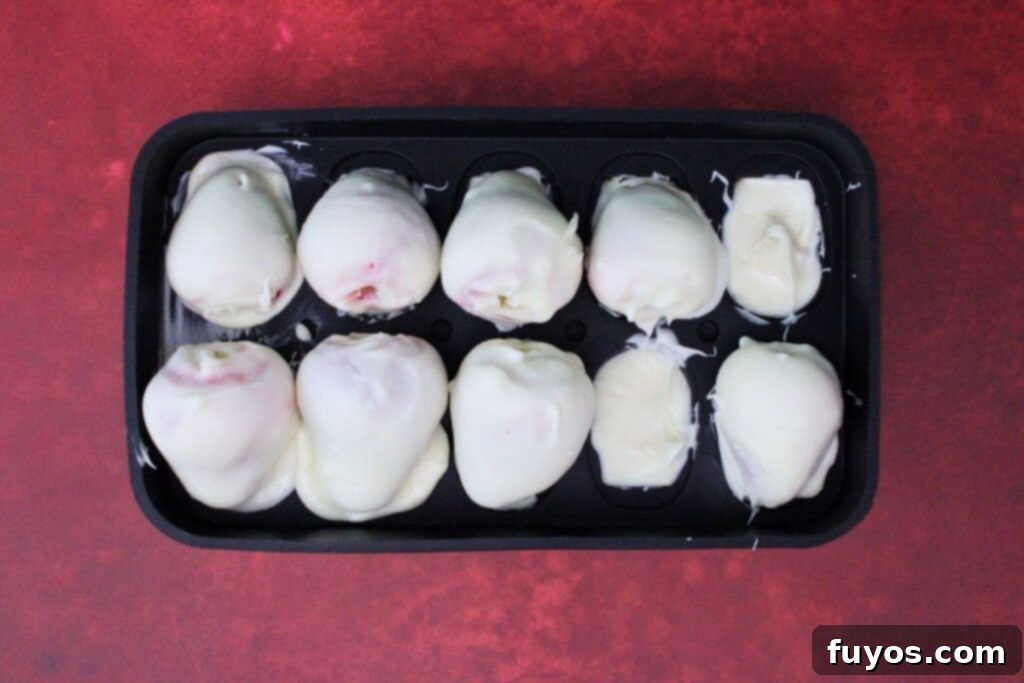
- Harden the Skulls: Allow the filled molds to sit at room temperature for approximately 30 minutes. For a quicker set, you can pop them into the refrigerator or freezer for about 15 minutes. The chocolate needs to be completely hardened before attempting to remove them from the molds. This ensures the skull shape is fully formed and won’t break upon release.
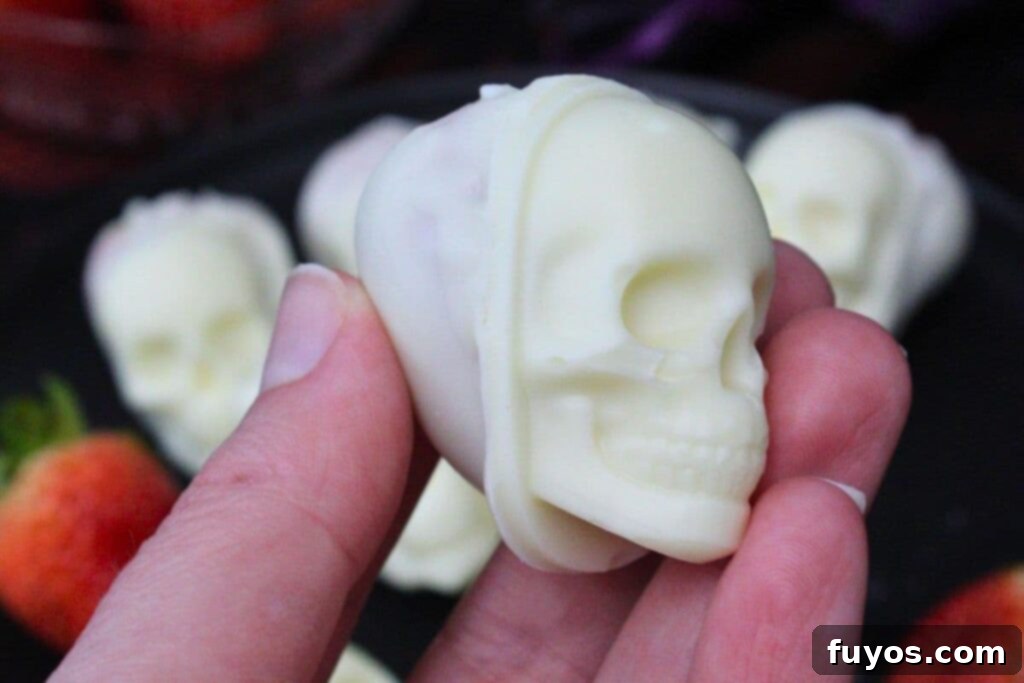
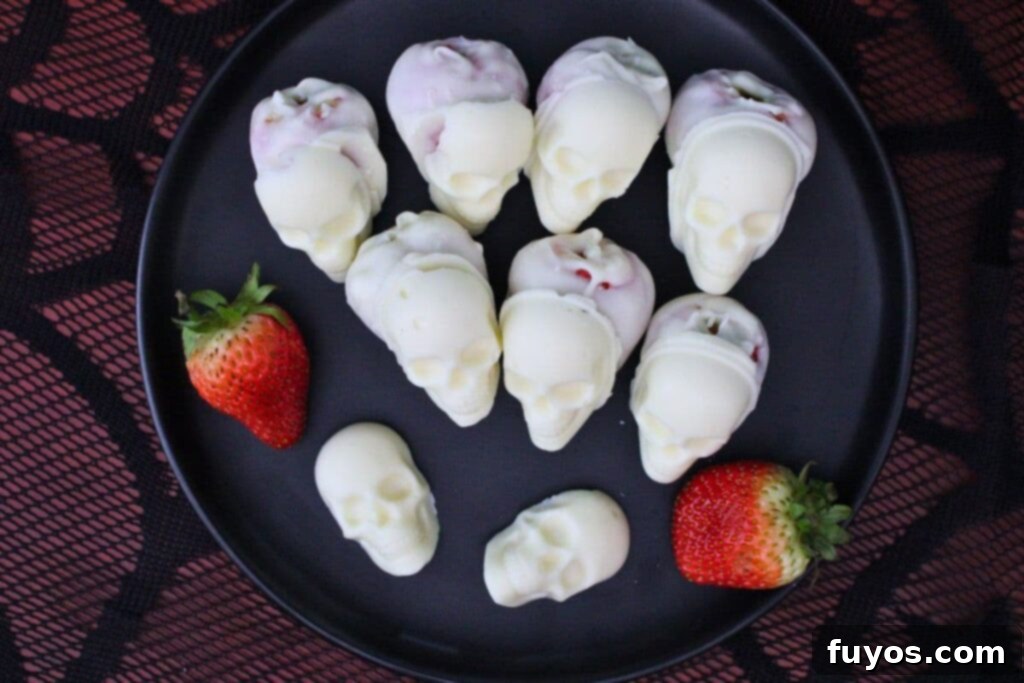
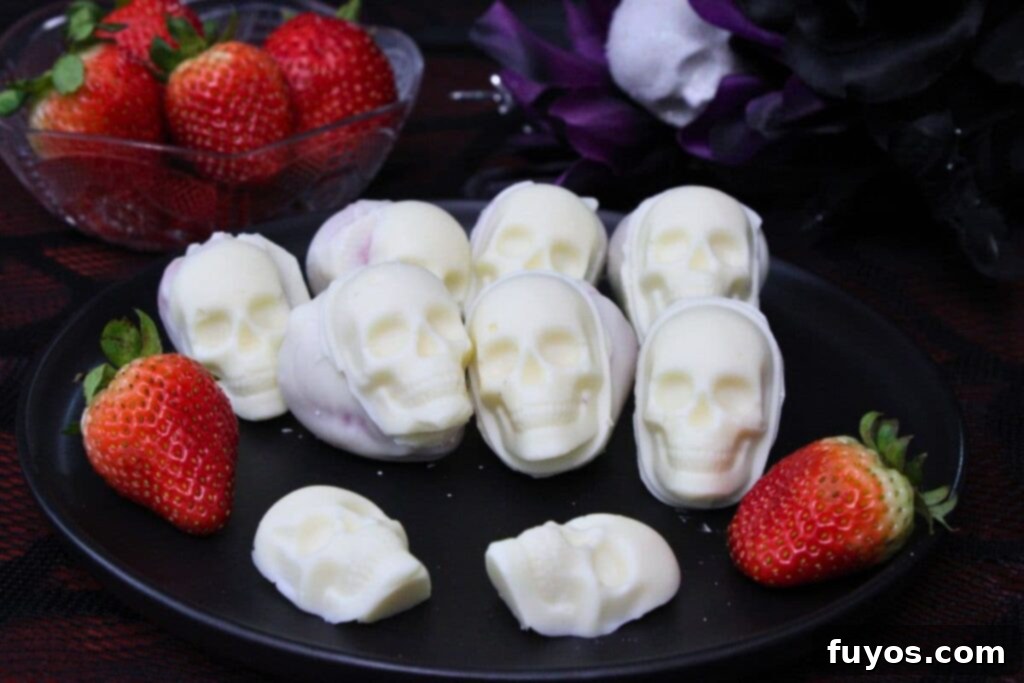
- Demold and Enjoy: Once the chocolate is fully set, carefully flip the silicone mold over. Gently press on the backs of the skull shapes to release them from the mold. Silicone molds are flexible, so they should pop out easily, revealing your perfectly formed chocolate strawberry skulls. Arrange them on a platter and prepare for delighted gasps from your guests!
More Hauntingly Delicious Halloween Party Foods
Mummy Hot Dogs in the Air Fryer: Easy Halloween Meal!
Chocolate Spider Web Pretzels: Crunchy Halloween Treat!
Pizza Pumpkins: Air Fryer Recipe Perfect For Halloween!
3 Ingredient Nutter Butter Ghosts: Spooky Halloween Treat
- Jack O’ Lantern Cheeseburgers: A savory and fun main dish that’s perfect for a Halloween feast.
- Mummy Baked Brie: An elegant and delicious appetizer wrapped in pastry to resemble mummies.
Recipe FAQs for Chocolate Strawberry Skulls
Have some lingering questions about making these spooky treats? Here are answers to some of the most common inquiries to help you master your chocolate strawberry skulls!
Can You Make Chocolate Strawberry Skulls Without Molds?
Yes, it is possible, though the results will not be as precise or detailed as with a mold, and the process will be considerably more time-consuming. To make them without a mold, you would need to carefully sculpt each individual strawberry into a skull-like shape before dipping it into the chocolate. After dipping, you could use piping chocolate or edible markers to painstakingly add extra facial features like eye sockets and nose holes. However, using silicone molds is highly recommended as it significantly simplifies the process, ensures a more uniform and detailed skull shape, and saves a lot of time and effort, making it ideal for party preparation.
What Type Of Chocolate Is Best For Making Strawberry Skulls?
White chocolate is most frequently recommended and used because its light color closely resembles the natural color of bone, making for the most realistic skull appearance. However, your choice of chocolate can also be a creative decision. Dark chocolate or milk chocolate can be used for a different aesthetic, perhaps a more “gothic” or “ghostly” look. Additionally, colored candy melts are an excellent option if you wish to create vibrant, non-traditional skull colors or add specific decorative details. You can even use different colored chocolates or edible food coloring to highlight features like eye sockets, or to create fun designs, transforming them into Mexican sugar skull-inspired treats.
How Long Do Chocolate Strawberry Skulls Last?
For optimal freshness and appearance, chocolate strawberry skulls are best enjoyed within one to two days when stored properly in an airtight container in the refrigerator. It’s important to note that strawberries naturally release moisture over time, which can cause the chocolate coating to soften, “weep,” or become sticky, affecting both its texture and visual appeal. While they’ll still be edible, they might lose some of their crispness and pristine look after the first day. To ensure the best experience, plan to make them as close to your serving time as possible.
Are Chocolate Strawberry Skulls Vegan?
Chocolate strawberry skulls can easily be adapted to be vegan-friendly by making a few simple ingredient substitutions. The key is to use a high-quality dairy-free chocolate or vegan candy melts for dipping. Many brands now offer excellent plant-based chocolate options that melt beautifully. For any decorative elements, ensure you’re using plant-based food coloring or decorations. These treats are also naturally gluten-free and vegetarian, making them suitable for a variety of dietary needs. However, if you have severe allergies or sensitivities, always double-check the labels of all your specific ingredients to ensure there’s no cross-contamination during production.
Can You Add Flavors To Chocolate Strawberry Skulls?
Absolutely! Adding flavor extracts is a fantastic way to introduce an extra layer of taste to your chocolate strawberry skulls. You can stir about ½ teaspoon of vanilla extract, almond extract, peppermint extract, or even a hint of orange zest into your melted chocolate before dipping. This will infuse the chocolate coating with a delightful aroma and flavor that complements the sweet and tart strawberry inside. Alternatively, using flavored candy melts for either the main coating or for decorative accents can also add a unique twist, allowing you to create truly personalized and delicious Halloween treats.
Expert Tips for Perfect Chocolate Strawberry Skulls
Achieving picture-perfect chocolate strawberry skulls is all about a few key techniques and creative touches. Here are some pro tips to help you make the most impressive and delicious spooky treats:
- Unleash Your Creativity with Decorating Options: Don’t stop at just the skull shape! To enhance the spooky effect of white chocolate skulls, lightly brush them with a small amount of cocoa powder using a soft brush. This will create a weathered, aged bone appearance. For a truly gruesome (and fun!) touch, add a drop of red gel icing into the eye cavities to simulate blood. You can also use edible food coloring pens to draw intricate designs or add realistic cracks for an extra creepy vibe.
- While these treats are designed to be eaten, remember that the chocolate coating will naturally be thicker than a standard chocolate-dipped strawberry due to the molding process. This thickness contributes to the skull’s shape and detail. I find them perfectly enjoyable to eat, but if you’re concerned, try to choose a mold that isn’t excessively large, as the mold size directly determines the overall thickness of your chocolate shell. Smaller, more intricate molds often yield a more balanced fruit-to-chocolate ratio.
- Precision Trimming for a Clean Finish: If any of your melted chocolate inadvertently overflows the edges of the mold during the shaping process, don’t worry! Once the chocolate has fully hardened, you can easily use a small, sharp knife or a paring knife to carefully trim away any excess chocolate from the edges. This will give your chocolate strawberry skulls a clean, professional, and refined look, ensuring every detail of the skull is crisp.
- Temperature Control is Key: Ensure your strawberries are at room temperature before dipping, or even slightly chilled, but completely dry. Very cold strawberries can cause the chocolate to seize or crack. Conversely, chocolate that is too hot can melt the strawberries. Aim for perfectly melted, smooth chocolate and well-prepared berries.
- The Power of Patience: While tempting to rush, allowing adequate time for the chocolate to set, both after the initial dip and after molding, is crucial. Rushing this step can lead to messy, broken skulls.
Storage & Make-Ahead Tips for Your Spooky Treats
While these chocolate strawberry skulls are undeniably delightful, mastering their storage and make-ahead strategy is key to enjoying them at their best. Due to the delicate nature of fresh strawberries and chocolate, a little planning goes a long way:
- Optimal Freshness: As with all chocolate-covered fresh fruit, strawberry skulls are truly best enjoyed fresh, ideally within a few hours of making them. The vibrant juiciness of the strawberry and the crisp snap of the chocolate are at their peak during this time.
- Short-Term Refrigeration: You can certainly refrigerate them for 1-2 days if you need to prepare them slightly in advance. However, be aware that the natural moisture from the strawberries will gradually start to “weep” over time. This moisture can cause the chocolate to soften, become slightly tacky, or even develop a thin, sugary film, diminishing its perfect texture and appearance. Always store them in an airtight container to minimize moisture exposure.
- Make-Ahead for Parties: If you’re planning a Halloween party, you can confidently make these chocolate-covered berries a few hours in advance. For best results and to maintain their optimal texture and visual appeal, cover them loosely (to allow for slight air circulation, which can prevent sweating) and store them at cool room temperature rather than in the fridge. This keeps the chocolate firm without subjecting it to the humid environment of a refrigerator, which can lead to condensation and melting.
More Delicious Chocolate Strawberry Recipes to Explore
Chocolate Strawberry Overnight Oats: Easy Breakfast Recipe!
Chocolate Covered Strawberry Martini: Easy Sweet Cocktail
Enjoy Strawberry White Chocolate Scones in Just 20 Mins
Chocolate Covered Strawberry Yogurt Clusters: Sweet & Healthy!
- Microwave Chocolate Covered Strawberries: The quick and classic method for this beloved dessert.
- Strawberry Chocolate Mug Cake: A speedy, single-serving dessert when you crave something sweet and easy.
Conclusion: Your Hauntingly Delicious Halloween Dessert Awaits!
These chocolate-covered strawberry skulls are more than just a dessert; they’re a statement piece for your Halloween party! By adding a spooky twist to the beloved classic, you get a treat that’s not only incredibly delicious but also visually captivating. The combination of juicy, fresh strawberries and your choice of sweet, rich chocolate, expertly molded into an eerie skull, makes for an unforgettable seasonal delight.
The beauty of this recipe lies in its simplicity and versatility. Being a no-bake dessert, it minimizes kitchen time and stress, allowing you to focus on other aspects of your party planning. Plus, these creepy treats can be prepared a few hours in advance, making them an excellent low-stress option for entertaining or even as a unique hostess gift. Their natural gluten-free and vegetarian qualities also ensure they cater to a wider range of dietary preferences, making sure almost everyone can enjoy a piece of your hauntingly delicious spread.
If you’re hosting an adult Halloween bash, consider pairing these delightful skulls with my Chocolate Covered Strawberry Shots for a complete themed experience. The delicate pastel hues of white chocolate against the red of the strawberry bring a sophisticated yet spooky flair, perfect for a modern, elegant Halloween celebration. Dive into the fun of the season and surprise your guests with these uniquely charming and utterly irresistible chocolate strawberry skulls!
Chocolate Covered Strawberry Skulls
Equipment
-
Microwave
-
Microwave safe bowl
-
Spatula (or spoon)
-
Toothpicks (or fork)
-
Parchment paper (or silicone baking mat)
-
Skull ice mold (or similar)
Ingredients
- 6 fresh strawberries (washed and dried)
- 2 cups white chocolate chips (or milk or dark chocolate)
- 1 Tbsp coconut oil (optional, but makes dipping smoother)
Instructions
-
Remove the stems from your strawberries (try not to cut into them too much as you don’t want them to be wet). Lay out a piece of parchment or a silicone baking mat as well6 fresh strawberries
-
Add the chocolate chips (and coconut oil if using) to a microwave safe bowl and cook on high for 30 seconds. Stir, then cook in additional 15-second increments, stirring each time, until melted and smooth (this is usually about 1 minute total for me in a 1000W microwave)2 cups white chocolate chips, 1 Tbsp coconut oil
-
Use a toothpick or a fork to dip a strawberry fully into the chocolate (you want to cover the top too) tapping off the excess. Set aside on a piece of parchment or a silicone baking mat. Repeat until all strawberries are dipped, then cool for about 10-15 minutes until they harden (I use the freezer)
-
Use a spoon to add melted chocolate into the base of your skull mold (reheat the chocolate a bit if it’s hardened while waiting for the berries to cool), just until it covers the facial features. Then, press one of the dipped strawberries into the mold while the chocolate is still wet, pressing so it sticks. Fill in any gaps with extra chocolate if needed
-
Let sit at room temperature for about 30 minutes (or pop them in the fridge/freezer for about 15 minutes to speed up the process) until the chocolate is hardened
-
Flip the mold over and gently press on the faces of the skulls until they release from the mold. Enjoy!
Notes
- You’ll want strawberries that fit well with the size mold you use. Try to pick berries the same size or smaller than the mold for the best look!
- Any type of chocolate is fine, choose your favorite (or you can mix and match, making some of each)
- Other Fruits. You can use raspberries or blueberries instead of strawberries (which work well if you have a smaller mold)
- If any of your chocolate overflows the mold, use a sharp knife to trim excess of the edges after hardening
- Feel free to brush white chocolate skulls with cocoa powder to add a spooky effect, or add red gel icing into the eye cavities to amp up the creepy factor!
- While best served fresh, you can make these chocolate strawberry skulls a few hours in advance for a party. Simply cover and store them at room temperature for best results until ready to enjoy!
- Exact nutritional values will vary based on brand, size, and flavor of ingredients, any decorations added, and quantity consumed, so please consider this a guideline only
Nutrition
Number of total servings shown is approximate. Actual number of servings will depend on your preferred portion sizes.
Nutritional values shown are general guidelines and reflect information for 1 serving using the ingredients listed, not including any optional ingredients. Actual macros may vary slightly depending on specific brands and types of ingredients used.
To determine the weight of one serving, prepare the recipe as instructed. Weigh the finished recipe, then divide the weight of the finished recipe (not including the weight of the container the food is in) by the desired number of servings. Result will be the weight of one serving.

Did you try this recipe?
Mention @TheDinnersDoneQuick or tag #dinnersdonequick! for even more!
Pin Recipe
Leave A Review
