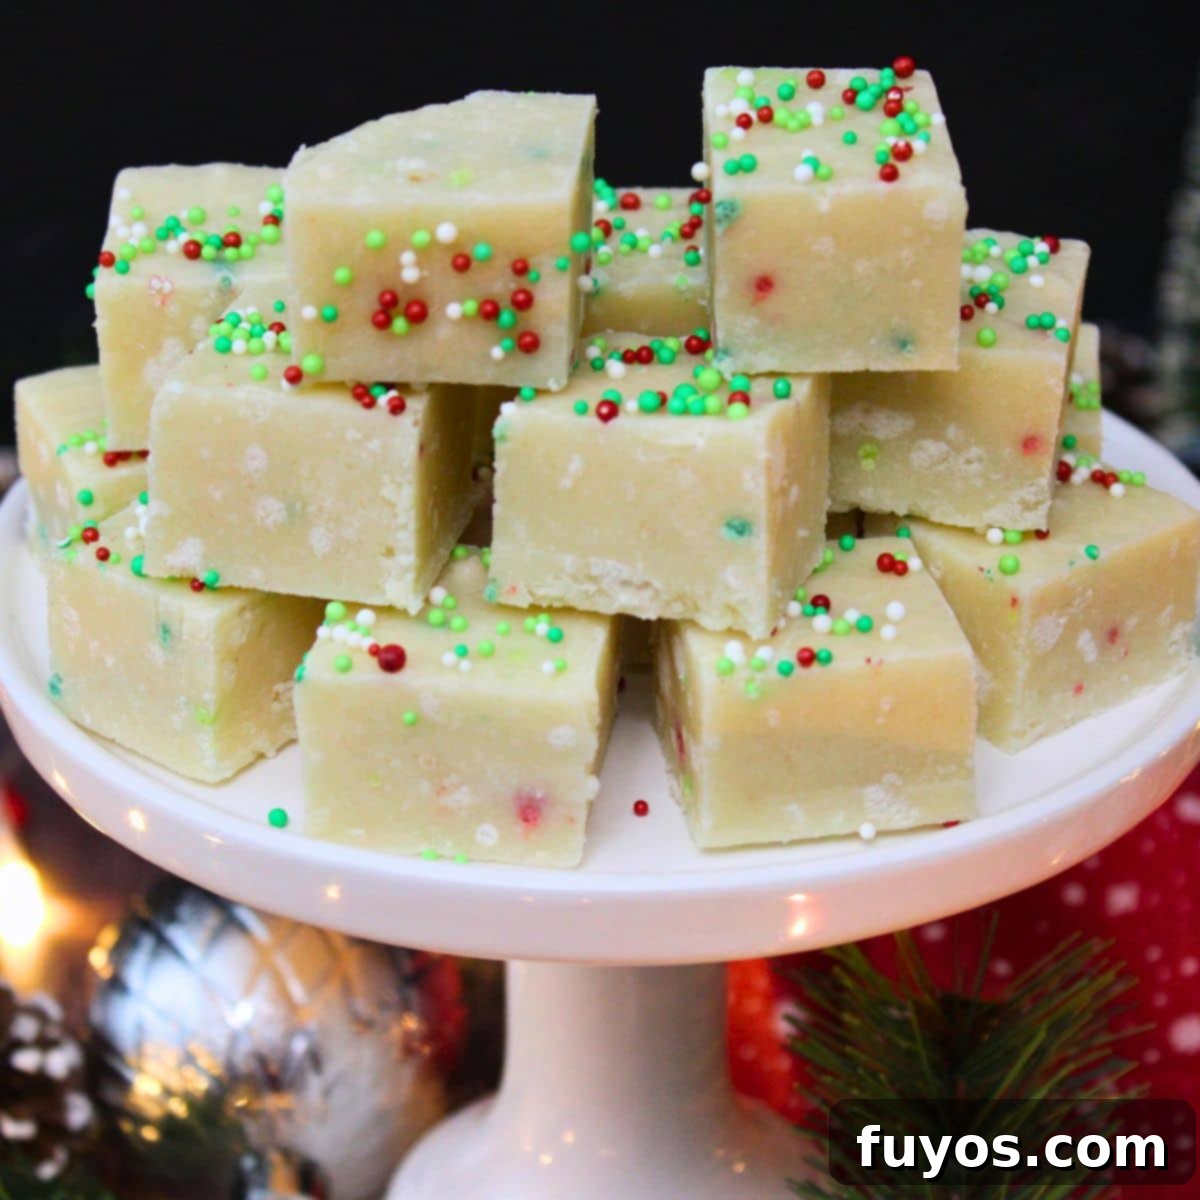
Microwave Sugar Cookie Fudge: The Easiest No-Bake Holiday Treat
As the festive season approaches, the search for quick, delightful, and fuss-free desserts becomes a top priority. Look no further for your ultimate Christmas confection! This incredibly simple Sugar Cookie Fudge recipe captures all the beloved flavors of traditional holiday sugar cookies, but with one major advantage: absolutely no baking required. Crafted with just 6 common ingredients and the magic of your microwave, this no-bake wonder is a dream come true for busy holiday hosts and dessert enthusiasts alike. It’s a fun, vibrant, and effortlessly festive sweet treat guaranteed to bring smiles and satisfy every sweet tooth during this joyous time of year.
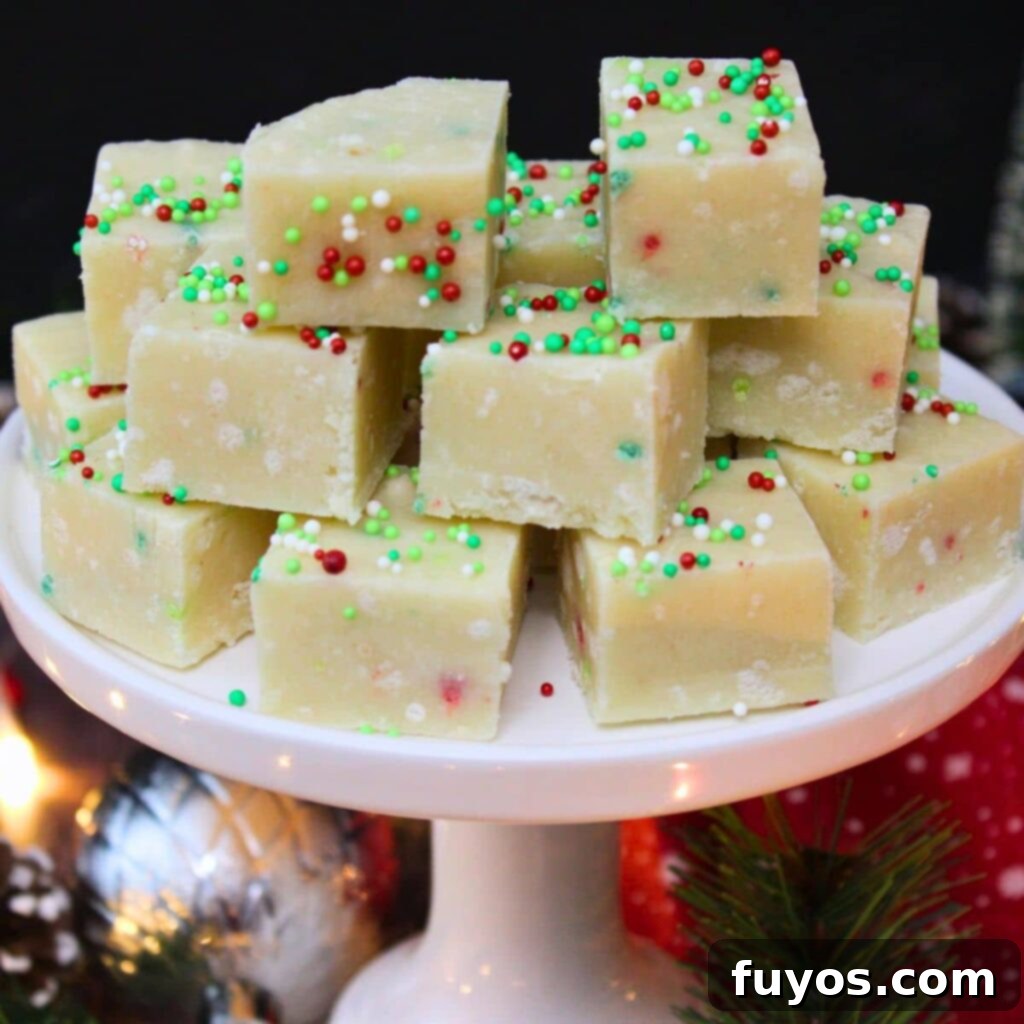
What Exactly is Sugar Cookie Fudge?
Sugar Cookie Fudge is a brilliant confectionery creation that marries the smooth, rich texture of classic fudge with the comforting, vanilla-infused taste of freshly baked sugar cookies. It’s an ingenious way to enjoy the essence of Christmas cookies without ever turning on your oven. This unique dessert offers a creamy, melt-in-your-mouth experience, distinct from the crumbly texture of a cookie, yet it delivers that unmistakable buttery, sweet, and pure vanilla flavor profile that makes sugar cookies so universally loved during the holidays.
The foundation of our easy microwave fudge is a luxurious white chocolate base. This choice isn’t just for its delightful sweetness; white chocolate provides a pristine, light-colored canvas that perfectly mimics the look of a frosted sugar cookie. Into this base, we introduce a sugar cookie mix and a generous hint of vanilla, amplifying the authentic cookie flavor. What truly brings this fudge to life, transforming it into a visual and edible celebration, is a colorful array of festive holiday sprinkles. These vibrant additions aren’t merely decorative; they contribute a subtle crunch and a playful texture, making each square of fudge a mini work of art, reminiscent of beautifully decorated Christmas cookies.
The standout feature of this particular recipe for sugar cookie fudge is its unparalleled convenience. You literally only need your microwave to bring this decadent Christmas treat to life! The process is incredibly straightforward: a few quick cycles of heating, melting, mixing, pouring, and then a period of chilling in the refrigerator until firm. This hands-off approach makes it an ideal make-ahead dessert, drastically reducing stress during the often-hectic holiday season. Imagine having batches of homemade, perfectly festive fudge ready days in advance, leaving you more time to enjoy your celebrations and guests!
Quick + Easy Recipes
straight to your inbox
Essential Ingredients for Your Sugar Cookie Fudge
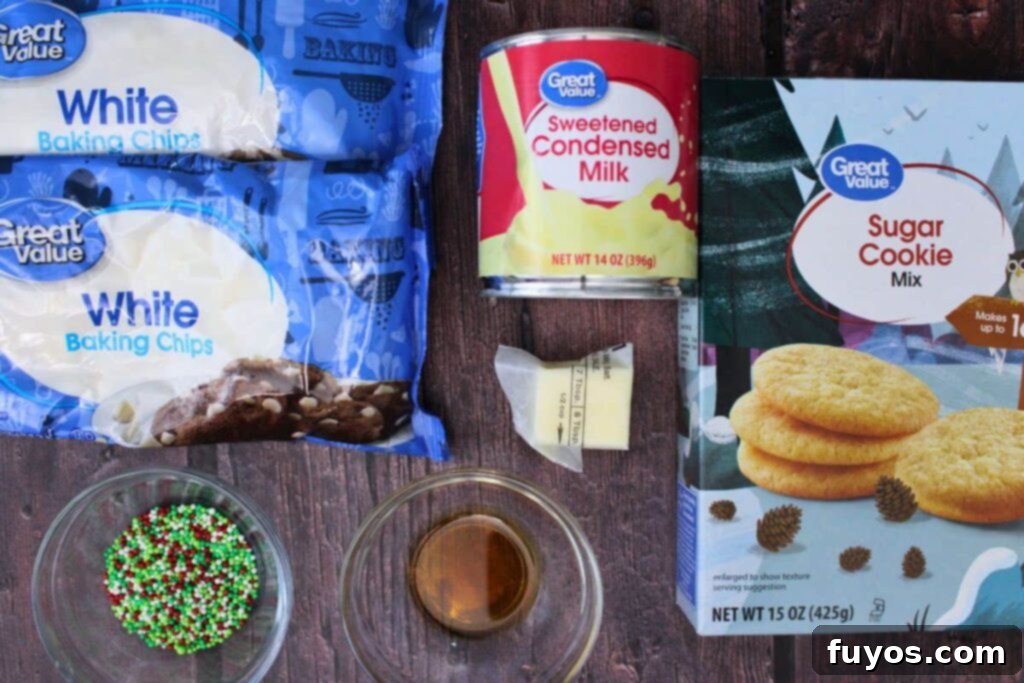
Crafting this delightful sugar cookie fudge requires just a handful of readily available ingredients, making it an incredibly accessible recipe for any home cook. Here’s what you’ll need to gather to create this festive treat:
- 2 ½ cups white chocolate chips: These form the creamy foundation of our fudge. White chocolate provides a mild, sweet flavor and a pristine white canvas, perfect for making those festive sprinkles pop and giving the fudge a true sugar cookie appearance.
- 14 oz can sweetened condensed milk: This is the crucial ingredient that gives the fudge its signature smooth, dense texture and concentrated sweetness. It acts as the primary binder, ensuring a perfectly set and luscious consistency.
- 2 Tbsp salted butter: Butter adds a vital richness and depth of flavor, mimicking the buttery notes of a traditional sugar cookie. If you opt for unsalted butter, simply add about a pinch (⅛ teaspoon) of salt to the mixture to balance the sweetness and enhance the overall taste.
- 1 ¼ cups sugar cookie mix (heat treated – see notes below): This ingredient is the heart of the sugar cookie flavor. Using a pre-packaged mix streamlines the process significantly, but remember the essential step of heat treating it for food safety to eliminate potential raw flour bacteria.
- ½ tsp vanilla extract: A staple in almost any sweet recipe, vanilla extract amplifies the warm, sweet notes of the fudge, complementing the cookie flavor profile and adding an aromatic depth that is truly inviting.
- 2 Tbsp Christmas sprinkles (or as desired): These are not just for show! Festive sprinkles add a wonderful pop of color, texture, and holiday cheer. They are key to transforming your fudge into a visually appealing treat that truly resembles a decorated Christmas cookie.
Ingredient Tips and Smart Substitutions
- Choosing Your Chocolate for Best Results: While you can technically use any chocolate flavor you prefer, white chocolate is highly recommended for this particular recipe. Its delicate flavor won’t overpower the sugar cookie essence, and its pale color provides the perfect neutral backdrop, allowing your colorful holiday sprinkles to stand out beautifully. Using milk or dark chocolate would drastically change the visual appeal and potentially mask the intended sugar cookie taste.
- Experimenting with Flavor Extracts: The vanilla extract is central to achieving that classic sugar cookie taste. However, for those who love to experiment, it can be easily swapped for other flavor extracts to create unique variations. Consider almond extract for a subtle marzipan-like note, butter extract to intensify the rich, buttery flavor, or even a hint of peppermint extract for a refreshing and festive winter twist. While optional, vanilla significantly enhances the overall depth of flavor.
- Creative Alternatives for Sugar Cookie Mix: If you’re looking to avoid a pre-packaged sugar cookie mix, or simply want a different textural dimension, you have options. Many brands now offer pre-made cookie dough specifically designed and marketed as safe for raw consumption. You could incorporate small, chilled chunks of this edible cookie dough into your fudge. This not only adds an exciting chewiness but also a more pronounced raw cookie dough flavor, which is a popular treat on its own!
- Sprinkle Your Way to Festive Fun: When it comes to Christmas sprinkles, don’t limit yourself! I personally favor holiday nonpareils because their tiny, round shape closely resembles the classic decorations found on frosted sugar cookies, providing a charming and authentic look. However, feel free to choose your absolute favorites—whether they’re colorful jimmies, sparkling sanding sugar, edible glitter, or a festive medley. The goal is to make your fudge visually appealing and full of holiday cheer!
- Balancing Sweetness with Salted Butter: If you opt for unsalted butter in this recipe, remember to add a tiny pinch of salt (about ⅛ teaspoon) to your fudge mixture. This small addition of salt is crucial for balancing the sweetness of the chocolate and condensed milk, bringing out the deeper flavors and preventing the fudge from being overly saccharine.
Crucial Step: How to Heat Treat Your Sugar Cookie Mix for Safety
For absolute food safety, it is paramount to heat treat commercially packaged sugar cookie mixes before integrating them into any no-bake recipe, including this delicious fudge. The reason for this critical step lies in raw flour, which is a primary component of these mixes. Raw flour can harbor harmful bacteria, such as E. coli, naturally present from the grain harvesting process. These bacteria are only destroyed when flour is cooked or baked to a safe internal temperature. Skipping this vital precaution could pose a health risk, so please ensure you do not omit this step!
Heat treating your sugar cookie mix effectively eliminates these potential bacteria, guaranteeing that your decadent sugar cookie fudge is safe and enjoyable for everyone. Thankfully, this process is quick and simple, offering two convenient methods:
- The Oven Method: Spread your sugar cookie mix evenly in a thin layer across a baking sheet. Place the baking sheet in a preheated oven at 350°F (175°C) and bake for approximately 5 minutes. The crucial element here is to ensure the flour reaches an internal temperature of 165°F (74°C). For precise measurement, you can use a reliable food thermometer.
- The Microwave Method: Alternatively, place the sugar cookie mix in a microwave-safe bowl. Heat it on high power, stirring the mix thoroughly every 30 seconds. Continue microwaving and stirring until the mix reaches an internal temperature of 165°F (74°C). This method typically takes about 2 minutes, but the exact time can vary based on your microwave’s wattage and the size of the bowl.
Once the sugar cookie mix has been properly heat treated, allow it to cool completely to room temperature before adding it to your fudge mixture. You can perform this safety step up to a week in advance, storing the cooled, treated mix in an airtight container at room temperature until you’re ready to assemble your delicious fudge masterpiece. This preparation will make your fudge-making process even more seamless and worry-free!
Crafting Your Delightful Sugar Cookie Fudge in the Microwave
Making this incredible sugar cookie fudge is remarkably straightforward, primarily utilizing your microwave for a quick and mess-free process. Follow these simple steps to create a batch of perfect, festive no-bake fudge that will be the highlight of your holiday dessert table:
- Prepare Your Baking Pan: Start by lining an 8×8 or 9×9 inch square baking pan, or a 9-inch round cake pan, with parchment paper. Ensure the parchment paper hangs over the edges to create “handles” for easy removal. If parchment isn’t available, a thorough coating of nonstick spray will also work. For an aesthetic touch that truly mimics a classic round sugar cookie, I highly recommend using a 9-inch cake pan for this recipe. It helps to achieve that authentic, festive cookie shape.
- Combine the Fudge Base Ingredients: In a large, microwave-safe bowl (preferably glass, which retains heat well), combine your white chocolate chips, the entire can of sweetened condensed milk, and the 2 tablespoons of salted butter. Make sure your bowl is spacious enough to allow for comfortable stirring once the ingredients begin to melt.
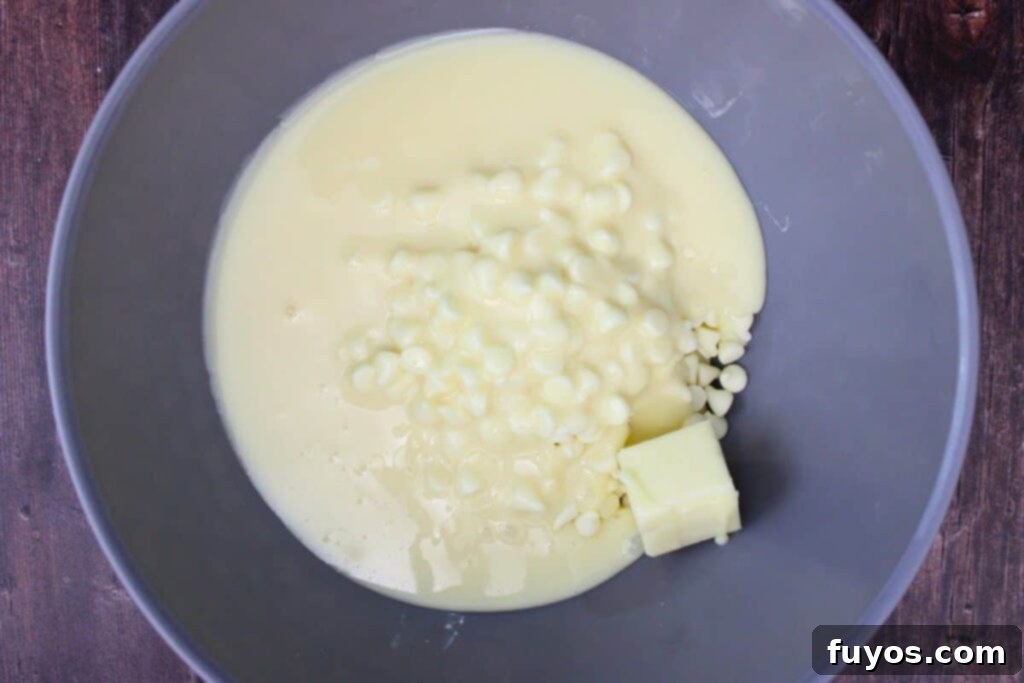
- Melt to Perfection: Place the bowl in your microwave and heat on high power in 1-minute intervals. After each minute, carefully remove the bowl and stir the mixture vigorously with a spatula. Continue this process until all the ingredients are fully melted and smoothly combined, forming a glossy, consistent mixture. For the best setting consistency and a perfectly firm fudge, aim for the mixture to reach an internal temperature of 235°F (113°C). Using a candy thermometer here can be very helpful. In my 1000W microwave, this step typically takes about 5-6 minutes. Reaching this specific temperature is key to ensuring your fudge sets reliably and beautifully. While simply melting might work, hitting this temperature provides a more consistent and firm final product.
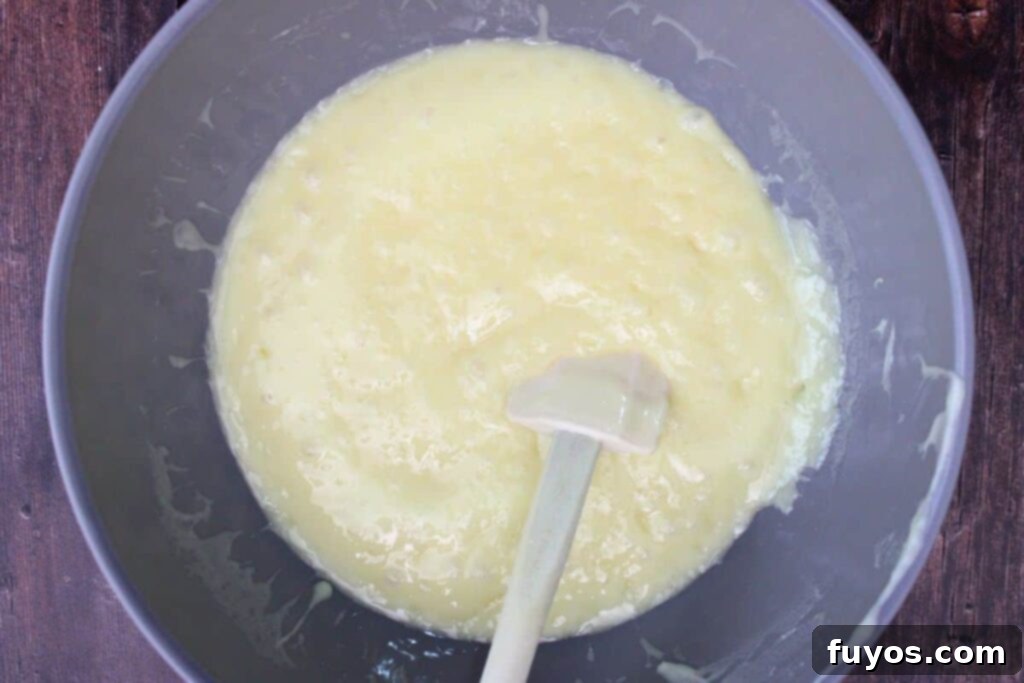
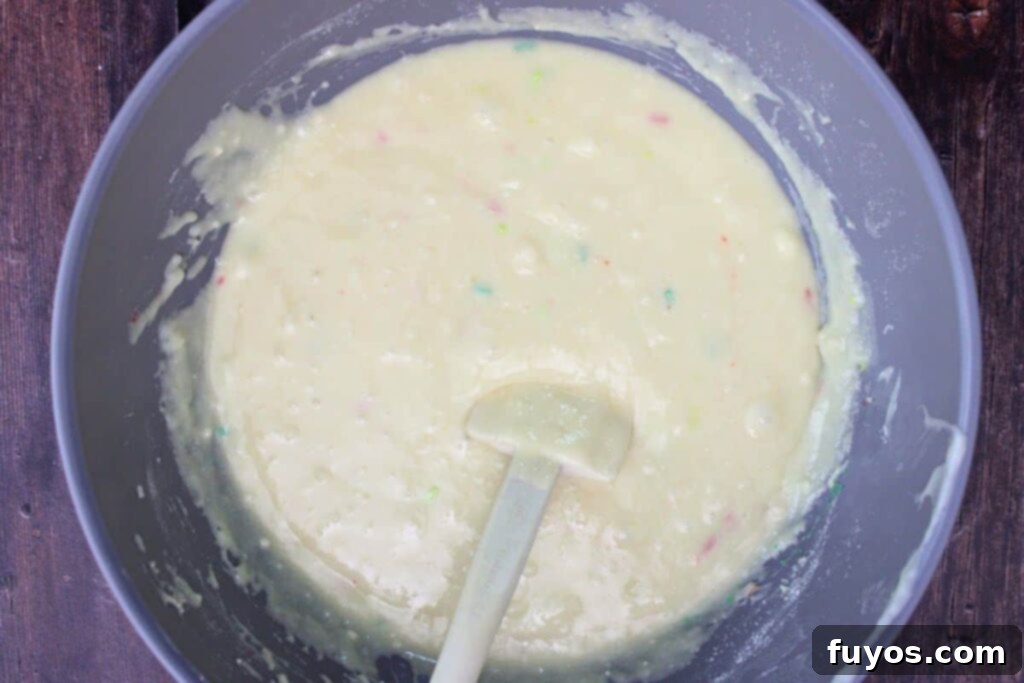
- Infuse Flavor and Texture: Once your hot fudge base is perfectly melted and shimmering, remove it from the microwave. Now, quickly but carefully stir in your heat-treated sugar cookie mix and the vanilla extract. Mix thoroughly until these ingredients are fully incorporated into the warm chocolate mixture and no dry streaks remain. For an exceptionally smooth fudge, you might consider sifting your cookie mix beforehand to prevent any small lumps from forming, although a few tiny lumps will not significantly impact the overall taste or enjoyability. Finally, gently fold in about 1 tablespoon of your festive holiday sprinkles. This will distribute some sprinkles throughout the fudge, adding a delightful surprise pop of color and texture in every bite.
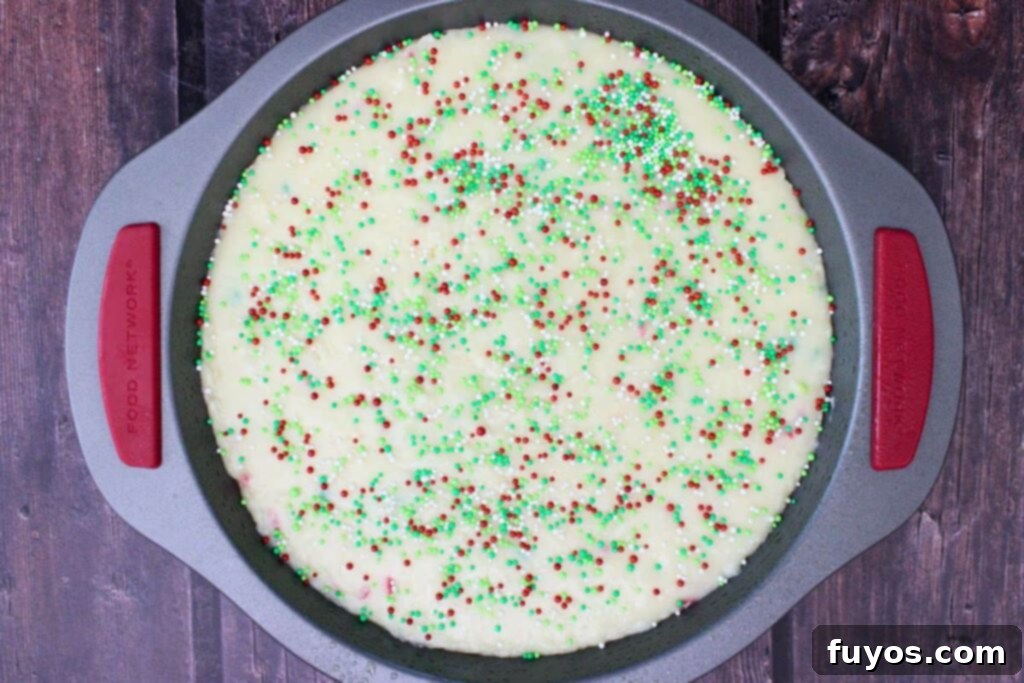
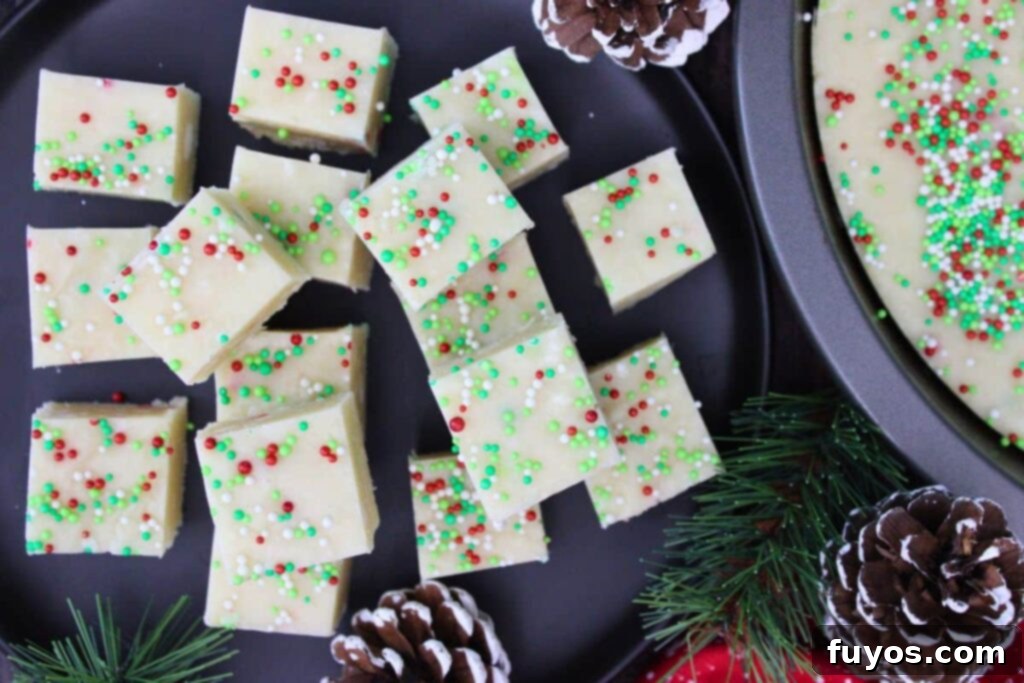
- Pour and Decorate with Holiday Flair: Promptly pour the warm, thick fudge mixture into your prepared baking dish. Use your spatula or the back of a spoon to spread and smooth out the top evenly, creating a uniform surface. For that signature sugar cookie look, immediately scatter the remaining 1 tablespoon of holiday sprinkles (or more, if you’re feeling extra festive and generous!) generously over the entire top of the fudge. Gently press them into the surface with the back of a spoon or your fingertips to ensure they adhere well as the fudge cools and sets.
- Chill to Set Firmly: Allow the fudge to cool and firm up. You can either leave it at room temperature for approximately 4 hours (in a cool spot) or, for a quicker set, transfer it to the refrigerator to chill for 2-3 hours. The fudge is perfectly set when it is firm to the touch and holds its shape without being sticky or soft. Patience during this chilling phase is crucial for achieving that ideal sliceable consistency!
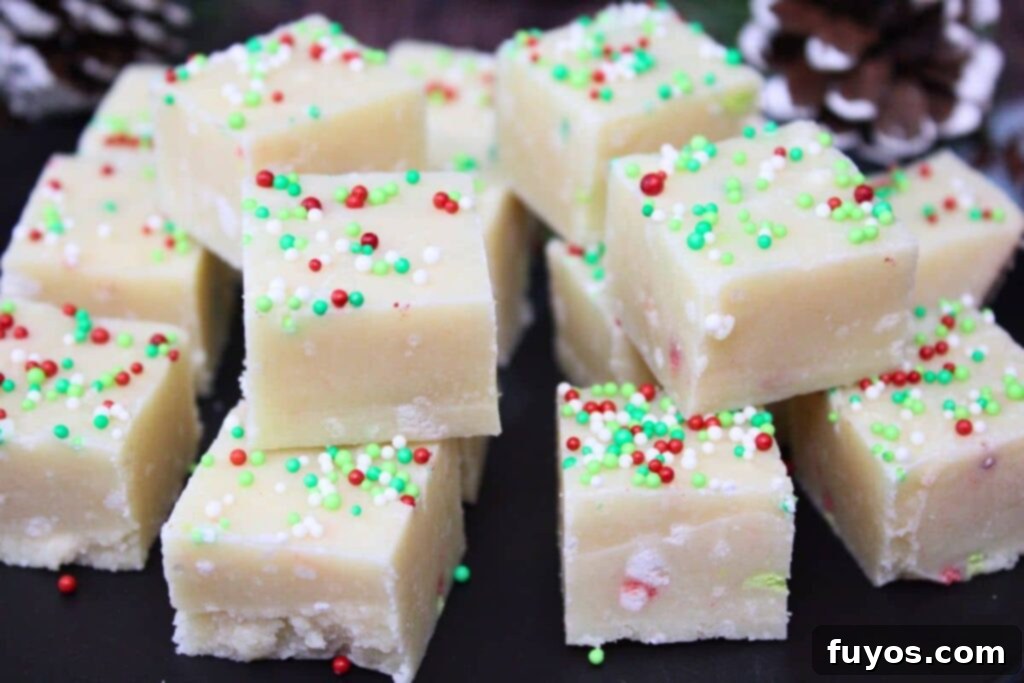
- Slice and Serve Your Festive Treat: Once the fudge is completely set, carefully lift it out of the pan using the parchment paper handles. Place the block of fudge on a clean cutting board. Using a sharp, heavy-duty knife, slice it into your desired size squares. I typically cut 1-inch or 2-inch squares, which are perfect for bite-sized indulgence. Arrange your beautifully decorated fudge on a festive platter and get ready to enjoy the rave reviews from friends and family!
Explore More Easy Microwave Fudge Flavors
Pistachio Fudge: Easy 4 Ingredient Microwave Recipe
Cranberry Orange Fudge: Easy Microwave Recipe
Easy 2 Ingredient Microwave Fudge: No-Fail Holiday Bliss!
- Peppermint Patty Fudge: A cool, minty, chocolatey delight perfect for winter festivities.
- Butter Pecan Fudge: Rich, buttery, and nutty – a Southern-inspired classic in fudge form.
- Lemon Poppy Seed Fudge: Bright and zesty, a refreshing twist for spring or summer gatherings.
- Salted Caramel Fudge: The perfect balance of sweet and salty, a gourmet touch to your treat plate.
- Chocolate Peanut Butter Fudge: A timeless classic that never disappoints, combining two favorite flavors.
- Pumpkin Spice Fudge: Ideal for fall, bringing the warm spices of pumpkin pie into a creamy fudge.
Frequently Asked Questions About This Easy Holiday Fudge Recipe
Does It Matter Which Type Of Sprinkles I Use In This Easy Holiday Fudge Recipe?
Yes, the type of sprinkles can indeed matter significantly, both for aesthetic appeal and to prevent potential color bleeding. Nonpareils, which are those tiny, round sprinkles, are often vibrant but can sometimes release their color into the warm fudge mixture, especially if they are mixed in directly. Jimmies, on the other hand, are longer and cylindrical and tend to hold their color and shape much better, making them less prone to bleeding. Sanding sugars offer a beautiful sparkly finish and typically don’t bleed.
To ensure your fudge maintains its pristine white sugar cookie base and vibrant decorations, it’s generally best to gently press sprinkles onto the surface of the fudge *after* it has slightly cooled and begun to set. This method helps to prevent color bleeding and keeps the sprinkles looking crisp and well-defined on top.
Can I Make This Fudge Without Sprinkles?
Absolutely! The sprinkles are entirely optional and primarily serve as a decorative element to enhance the festive sugar cookie aesthetic. Rest assured, the fudge will still taste just as wonderfully delicious and retain its rich, creamy texture even without them. If you prefer a more minimalist look, or simply don’t have sprinkles readily available, feel free to omit them completely.
For alternative toppings or to add a different kind of flair, consider a delicate dusting of powdered sugar for an elegant finish, a drizzle of contrasting white or colored chocolate, a scattering of crushed candy canes for a refreshing minty crunch, or even small chunks of safe-to-eat cookie dough for an extra layer of cookie flavor and texture. Edible glitter can also be used to add a touch of sparkle for a truly magical holiday treat.
How Can I Fix Fudge That Doesn’t Seem to Be Setting Properly?
If your sugar cookie fudge doesn’t set to the desired firm consistency, don’t despair—it can often be salvaged! The most common solution is to attempt to remelt it. Carefully scoop the unset fudge back into a clean, microwave-safe bowl. Add a very small amount (typically 1-2 tablespoons) of additional sweetened condensed milk or even a few more white chocolate chips. Reheat the mixture in the microwave in short, 30-second bursts, stirring vigorously and continuously between each interval. Your goal is to melt it down completely and bring its temperature back up. If you have a candy thermometer, use it here, aiming to reach at least 235°F (113°C) again, as this specific temperature is crucial for proper setting.
Once the mixture is fully combined, smooth, and has reached the correct temperature, quickly pour it back into your prepared pan. Immediately return it to the refrigerator for a few hours until it is completely firm. Keep in mind that any sprinkles or decorative elements you initially added to the surface will likely get mixed into the fudge during this remelting process, but the delicious taste and creamy texture should be successfully restored!
What Factors Typically Cause Fudge Not To Harden Correctly?
Several factors can contribute to fudge failing to harden to the desired consistency. The most frequent culprits include incorrect ingredient proportions, such as adding too much liquid or not enough chocolate, which can throw off the delicate balance needed for a proper set. Another significant reason is insufficient cooking time or temperature; if the fudge mixture doesn’t reach a high enough temperature (ideally around 235-240°F, also known as the soft-ball stage), the sugar crystals won’t properly dissolve and then recrystallize, which is essential for a firm set. Lastly, excessive moisture can also be an issue. Always ensure you are using sweetened condensed milk, not evaporated milk, as they have different compositions critical for fudge recipes. Additionally, always allow adequate cooling time, preferably in the refrigerator, to give the fudge ample opportunity to firm up. Double-checking your measurements and ensuring the mixture reaches the proper temperature during the melting phase are your best defenses against unset fudge.
Are These Sugar Cookie Fudge Squares Suitable To Bring To Cookie Exchanges?
Absolutely, sugar cookie fudge is a fantastic and highly recommended treat to bring to any holiday cookie exchange! Its unique, creamy texture offers a wonderful contrast to traditional baked cookies, ensuring your contribution stands out and provides an exciting variety. The festive flavor profile of sugar cookies, combined with the sheer convenience of a no-bake recipe, makes it a crowd-pleaser that appeals to all ages. Plus, its vibrant, colorful appearance with holiday sprinkles truly embodies the joyous spirit of Christmas, making it a visually appealing addition to any spread.
To make them perfect for sharing and easy handling at a cookie exchange, simply cut the fudge into small, uniform squares, ideally 1-inch to 2-inch pieces. You can present them elegantly on a decorative tray, or even place individual pieces in mini paper liners for an elegant and easy-to-handle presentation. They are sure to be a delightful and memorable addition to any holiday cookie platter, sparking conversations and smiles.
Can I Adapt This Sweet Treat For Other Holidays Or Occasions?
Definitely! One of the most enjoyable aspects of this sugar cookie fudge recipe is its incredible versatility and adaptability for various holidays and celebrations throughout the entire year. The base sugar cookie flavor is delightfully universal and can be easily customized. You can simply change the color and style of your sprinkles to perfectly match the theme of any event or season.
For instance, use cheerful pastel-colored sprinkles for a delightful Easter treat, romantic red and pink sprinkles for a heartfelt Valentine’s Day gesture, or vibrant green and gold for a festive St. Patrick’s Day dessert. For birthdays, a playful medley of rainbow sprinkles can instantly transform it into a joyful birthday fudge. You can also get creative by experimenting with different food colorings added to the melted white chocolate base to further enhance the thematic appeal, creating a dessert that’s not only delicious but also perfectly tailored to your specific celebration.
How Do I Cut Fudge Neatly For A Clean Presentation?
To achieve perfectly neat, clean-cut squares of fudge, there are a few simple tricks you can employ. First and foremost, ensure the fudge is thoroughly chilled and completely firm; attempting to cut warm or soft fudge will result in messy edges. Once firm, remove the fudge from the pan by lifting it out with the parchment paper. For the cleanest cuts, use a very sharp, heavy-duty knife. For even cleaner results, lightly grease the blade with a bit of nonstick cooking spray or a thin layer of butter, wiping it clean with a damp cloth or paper towel between each cut. Press down firmly and steadily through the fudge rather than using a sawing motion. For uniformly sized squares, use a ruler to measure your cuts before or as you slice. You can also lightly score the top of the fudge with the back of your knife before cutting to create a guide for your blade.
Is it Possible to Make this Recipe Dairy-Free or Gluten-Free?
While this specific recipe is written with traditional dairy and gluten-containing ingredients, you can explore making it dairy-free or gluten-free with substitutions. For a dairy-free version, look for high-quality dairy-free white chocolate chips (often made with oat or rice milk) and use a plant-based sweetened condensed milk substitute (many excellent options are made from coconut or oat milk). Ensure your sugar cookie mix is also certified dairy-free, as some may contain milk solids. The butter can be easily replaced with a dairy-free butter alternative. For a gluten-free version, the primary substitution needed is a certified gluten-free sugar cookie mix. Keep in mind that while these substitutions allow for dietary adaptations, the final taste and texture might vary slightly from the original recipe, so be prepared for minor differences.
Pro Tips for Achieving the Best Sugar Cookie Fudge
- Precision in Temperature Control: While microwave fudge is generally more forgiving than traditional stovetop fudge, paying close attention to the temperature of your melted mixture is still highly beneficial. The secret to consistently good fudge, especially for a firm yet creamy texture, often lies in reaching the correct temperature. For this recipe, aiming for 235°F (113°C) helps ensure proper setting and a beautifully smooth consistency. While you may not use a candy thermometer for every batch, understanding its importance for consistency will help you gauge when your mixture is truly ready, particularly if your microwave wattage varies.
- For the Smoothest, Most Polished Finish: After pouring the hot fudge mixture into your prepared pan, gently tap the pan a few times on your countertop. This simple yet effective action helps to release any trapped air bubbles, which would otherwise create imperfections on the surface, resulting in a beautifully smooth and uniform top. For an even more polished look, you can lightly cover the pan with plastic wrap or parchment paper while it cools; this can prevent a “skin” from forming on the surface and helps maintain moisture. Remember, resist the urge to poke, prod, or otherwise disturb the fudge as it sets, as this can create unwelcome indentations and disrupt its final, pristine appearance.
- Prioritize High-Quality Ingredients: In recipes with a limited number of components, the quality of each ingredient truly shines through. Opting for good quality white chocolate chips and a reputable brand of sugar cookie mix can make a noticeable difference in the final flavor, texture, and overall enjoyment of your fudge. Higher quality ingredients generally melt more smoothly and offer a richer taste.
- Avoid Overmixing the Cookie Mix: Once you add the heat-treated sugar cookie mix and vanilla extract to your melted base, stir just until these ingredients are fully combined. Overmixing at this stage can sometimes lead to a tougher, more crumbly fudge texture, rather than the desired creamy consistency. Gentle folding helps to maintain the fudge’s tender crumb and smooth mouthfeel.
- Thorough Chilling is Non-Negotiable: Rushing the cooling and setting process is one of the most common reasons for soft, sticky, or otherwise uncooperative fudge. For picture-perfect, easy-to-slice squares, ensure your fudge is completely firm and thoroughly chilled before you attempt to cut into it. A well-chilled fudge will yield cleaner, sharper cuts and a much more satisfying texture.
Storage and Elegant Serving Suggestions
One of the many delightful benefits of this sugar cookie fudge is its excellent shelf life and its remarkable versatility in serving, making it an ideal candidate for advance holiday preparations and thoughtful gifting.
- Optimal Storage Practices: To ensure your fudge remains fresh, soft, and utterly delicious for as long as possible, store it in an airtight container. At cool room temperature (in a dark, dry pantry), it will keep beautifully for up to 2 weeks. For extended freshness, you can refrigerate the fudge for up to 3 weeks. If you’re planning far in advance for future events or gifts, this fudge freezes exceptionally well for up to 3 months. When you’re ready to enjoy frozen fudge, simply transfer it from the freezer to the refrigerator and allow it to thaw overnight before consuming. For the best slicing experience, cutting the fudge after it has thawed to a slightly firm but not rock-hard state is recommended.
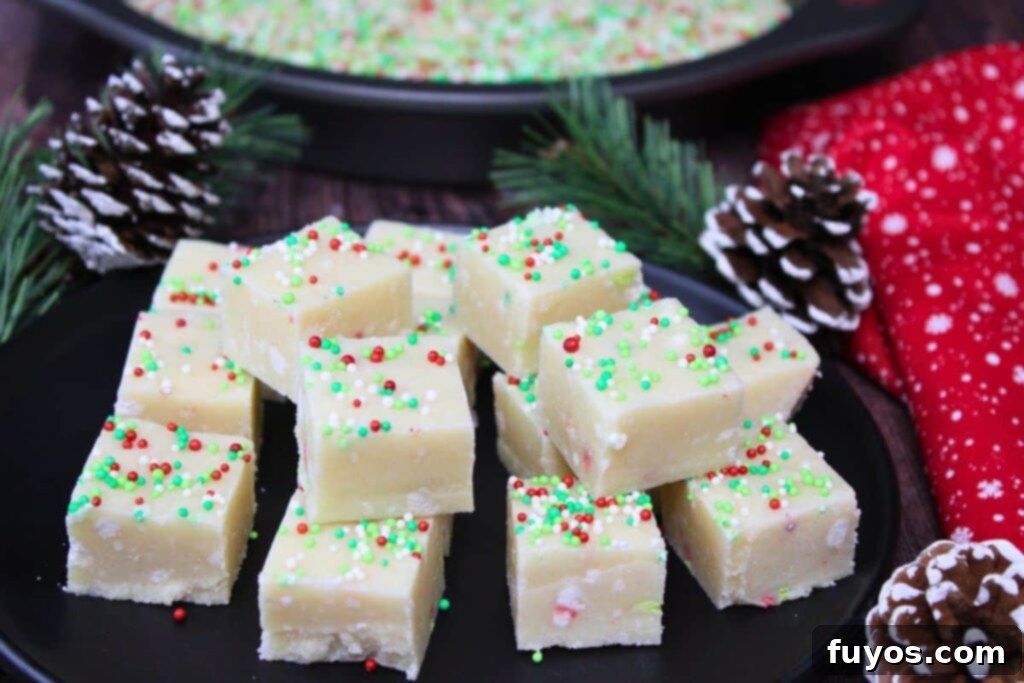
- Creative and Elegant Serving Ideas: This festive fudge is too pretty not to be showcased! Arrange your vibrant, colorful squares on a tiered holiday stand, a charming Christmas cookie tray alongside other seasonal favorites, or a simple yet elegant decorative plate to truly highlight its appealing appearance. For effortless handling at parties and gatherings, consider placing individual bite-sized pieces into mini paper liners or festive cupcake wrappers. This not only adds a touch of sophistication but also makes them easy for guests to grab and enjoy. Furthermore, this homemade fudge makes an absolutely wonderful edible gift; simply stack a few pieces in small cello bags, tie with a festive ribbon, and share the warmth and sweetness of your homemade holiday cheer with friends, family, and neighbors.
- Perfect Pairing Suggestions: Enhance the enjoyment of your sugar cookie fudge by pairing it with complementary beverages. A warm mug of hot cocoa, a soothing cup of spiced tea, or even a classic glass of cold milk all beautifully complement its sweet, buttery flavor. It also makes a delightful and colorful addition to a holiday dessert charcuterie board, offering a creamy counterpoint to crispy cookies and crunchy nuts.
Discover More Effortless Holiday Treats
Christmas Puppy Chow: No Bake Holiday Chex and M&Ms Snack
Nutter Butter Reindeer: No Bake Christmas Cookie Recipe!
Marshmallow Nougat: Easy Homemade Microwave Recipe!
Snowflake Pretzels: No Bake Chocolate Holiday Recipe!
- Sugar Cookie Truffles: Bites of creamy, sweet cookie dough covered in chocolate – another fantastic no-bake delight.
- Gingerbread Truffles: Spicy and sweet, perfectly capturing the essence of gingerbread in a decadent, easy-to-make bite.
- Hot Chocolate Fudge: A comforting classic, this fudge brings the cozy flavors of hot chocolate to a delightful, firm square, perfect for warming up chilly winter evenings.
- Eggnog Fudge: Embrace the rich, distinctive flavor of eggnog in a smooth, creamy fudge, offering a unique and festive twist on a holiday favorite.
- White Chocolate Peppermint Bark: A classic crunchy, minty, no-bake treat that screams Christmas.
- Reindeer Chow (Muddy Buddies): A fun, chocolate-peanut butter, powdered sugar-coated snack mix that’s always a hit with kids and adults.
Final Thoughts on Your Easy Sugar Cookie Fudge Journey
This easy sugar cookie fudge recipe truly stands out as the quintessential no-bake treat for Christmas and the entire holiday season. It masterfully captures all the beloved flavors and festive spirit of classic sugar cookies, yet completely bypasses the need for an oven, minimizing both effort and clean-up. This means more precious time enjoying the holidays with loved ones and less time stressing in the kitchen!
With its simple list of just 6 ingredients and the magic of a microwave, this Christmas cookie fudge offers unparalleled convenience without compromising on an ounce of taste. Each creamy bite delivers that unmistakable, crowd-pleasing sugar cookie flavor, making it an instant hit at any holiday gathering or festive party. Moreover, its make-ahead potential is a genuine game-changer for holiday entertaining. Preparing it a few days in advance allows you to tackle your extensive holiday to-do list with remarkable ease and ensures you have a delightful, homemade dessert ready to impress the moment guests arrive, fresh and perfectly set.
Beyond being a delicious standalone treat, fudge is a wonderful and versatile addition to any holiday cookie platter. Its distinct creamy texture provides a delightful contrast to the crunch of traditional cookies, offering a varied and exciting dessert experience that appeals to all palates. Furthermore, this festive fudge also makes an exquisite edible gift. Its robust nature means it keeps exceptionally well, allowing you to easily create thoughtful, homemade presents for friends, family, neighbors, and colleagues. So, go ahead, whip up a batch (or even two!) of this effortlessly sweet and joyful sugar cookie fudge and infuse your holiday season with unforgettable flavors and ease!
Sugar Cookie Fudge (Easy Microwave Recipe)
Equipment
-
Microwave
-
9″ cake pan (or an 8×8 or 9×9 square baking pan)
-
Parchment paper
-
Microwave safe bowl
-
Measuring cups and spoons
-
Spatula (or spoon)
Ingredients
- 2 ½ cups white chocolate chips
- 14 ounce can sweetened condensed milk
- 2 Tbsp salted butter (or unsalted with a pinch of added salt)
- 1 ¼ cups sugar cookie mix, heat treated (see instructions and notes for heat treatment options for flour safety)
- ½ tsp vanilla extract
- 2 Tbsp holiday sprinkles, divided (or to taste, consider types for color bleeding)
Instructions
-
Line an 8×8 or 9×9 inch square, or a 9-inch round cake pan with parchment paper or some nonstick spray. A cake pan is recommended for a more authentic “cookie” look. Ensure parchment hangs over edges for easy removal.
-
In a large, microwave-safe bowl, combine the white chocolate chips, sweetened condensed milk, and butter.2 ½ cups white chocolate chips, 14 ounce can sweetened condensed milk, 2 Tbsp salted butter
-
Microwave on high in 1-minute intervals, stirring thoroughly after each, until the mixture is fully melted and smooth. For optimal setting, aim for a temperature of 235°F (113°C) using a candy thermometer (typically 5-6 minutes in a 1000W microwave). Reaching this temperature helps ensure a firm, non-sticky fudge.
-
Remove from microwave and stir in the heat-treated sugar cookie mix and vanilla extract until well combined. Gently fold in about 1 tablespoon of the holiday sprinkles. For a smoother fudge, consider sifting the cookie mix before adding to prevent lumps.1 ¼ cups sugar cookie mix, heat treated, ½ tsp vanilla extract, 2 Tbsp holiday sprinkles, divided
-
Pour the fudge into your prepared dish and smooth the top evenly. Immediately scatter the remaining 1 tablespoon (or more, if desired) of holiday sprinkles over the surface, gently pressing them to adhere. Work quickly before the fudge begins to set.
-
Allow the fudge to cool at room temperature for about 4 hours, or refrigerate for 2-3 hours, until fully set and firm. Ensure it’s completely firm for clean slicing.
-
Once set, lift the fudge from the pan using the parchment paper. Slice into 1-inch or 2-inch squares with a sharp knife and enjoy your festive no-bake treat! For neat cuts, wipe the knife blade clean between each slice.
Notes
- For the most authentic sugar cookie appearance and flavor, white chocolate is the ideal choice as your fudge base. Its mild taste and light color complement the cookie flavor perfectly.
- Enhance or alter the flavor profile by swapping vanilla extract with almond, butter, or peppermint extract for a unique twist. Vanilla can be omitted, but it significantly boosts the classic sugar cookie flavor.
- If avoiding sugar cookie mix, use safe-to-eat raw cookie dough chunks for an exciting alternative texture and a more intense cookie dough experience within the fudge.
- Choose any Christmas sprinkles you love! Nonpareils often give a classic cookie topping look, but jimmies or other mixes work beautifully. To prevent color bleeding, particularly with brightly colored sprinkles, press them onto the surface *after* pouring the fudge rather than mixing them into the hot mixture.
- To heat treat your cookie dough mix for food safety (to eliminate potential bacteria from raw flour): spread the mix on a baking sheet and bake at 350°F (175°C) for 5 minutes, or microwave in a bowl, stirring every 30 seconds, for about 2 minutes, until the mix reaches an internal temperature of 165°F (74°C). This step is crucial and should not be skipped.
- Exact nutritional values will vary based on brand and flavor of ingredients, any toppings or mix-ins added, size of squares, and quantity consumed, so please consider this a guideline only.
- For the cleanest cuts and a professional presentation, ensure your fudge is thoroughly chilled. Use a sharp, greased knife and wipe the blade clean between each cut to prevent stickiness and ensure neat edges.
Nutrition
Number of total servings shown is approximate. Actual number of servings will depend on your preferred portion sizes.
Nutritional values shown are general guidelines and reflect information for 1 serving using the ingredients listed, not including any optional ingredients. Actual macros may vary slightly depending on specific brands and types of ingredients used.
To determine the weight of one serving, prepare the recipe as instructed. Weigh the finished recipe, then divide the weight of the finished recipe (not including the weight of the container the food is in) by the desired number of servings. Result will be the weight of one serving.
