Spooky Sweet & Easy: The Ultimate No-Bake Frankenstein Rice Krispie Treats Recipe for Halloween
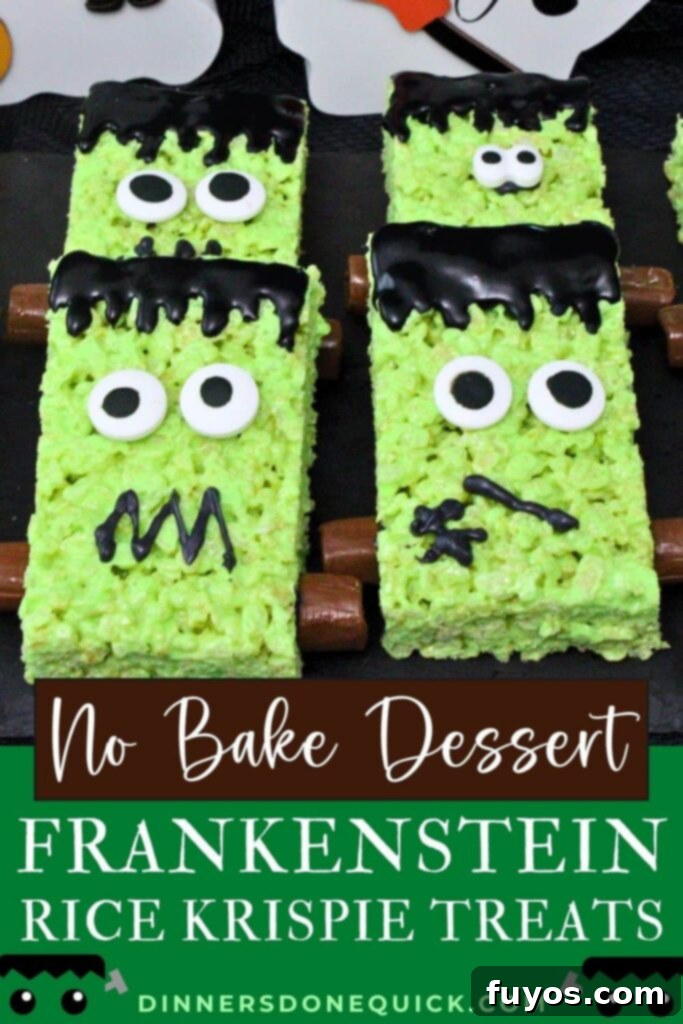
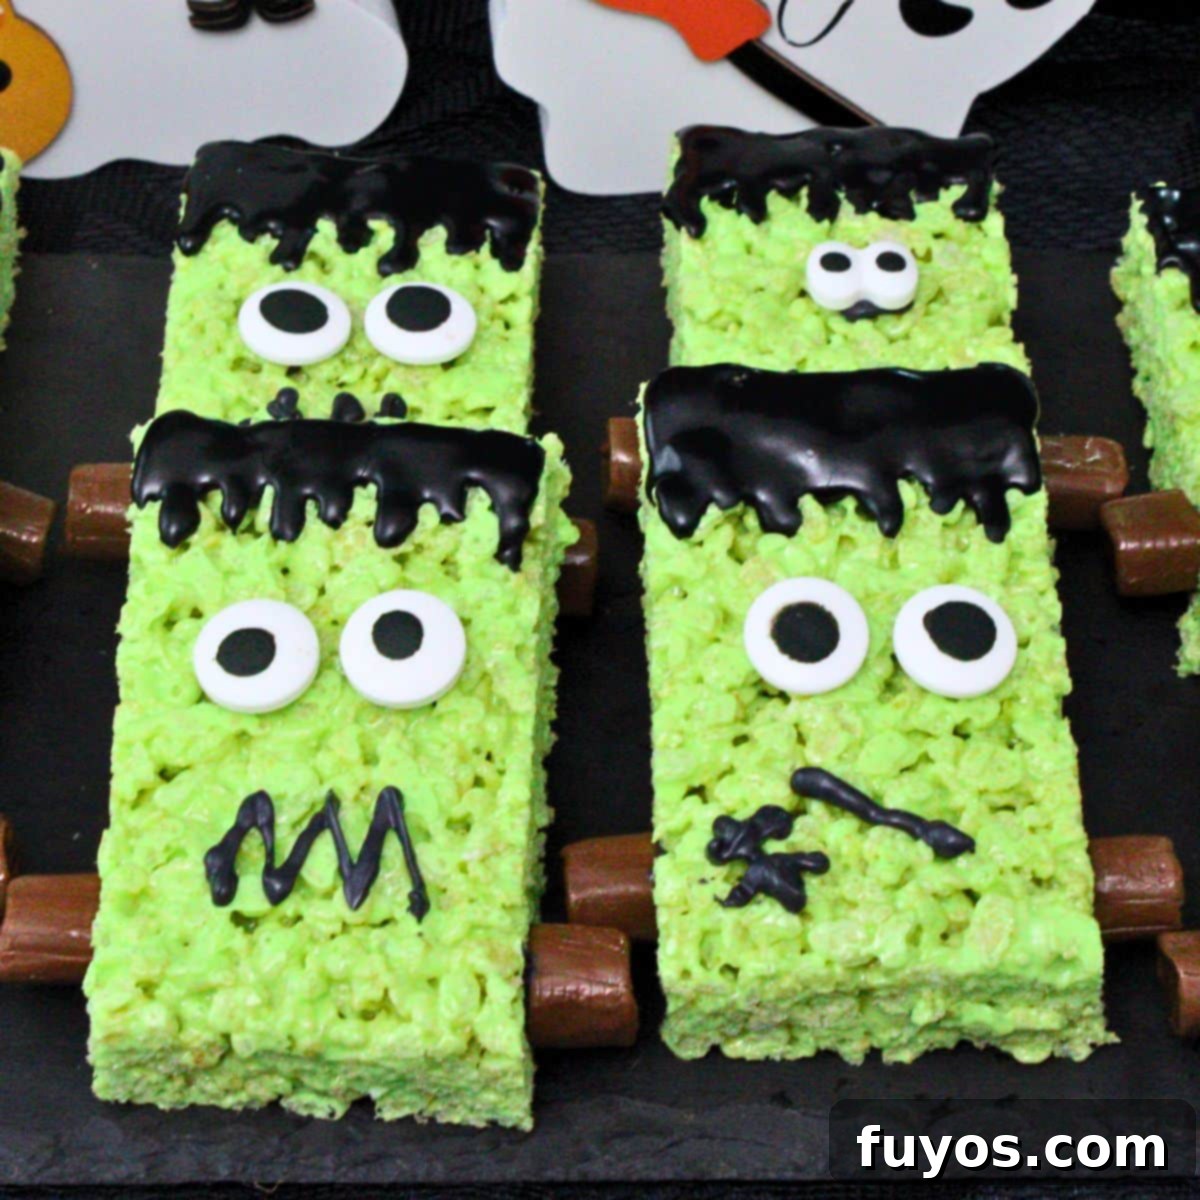
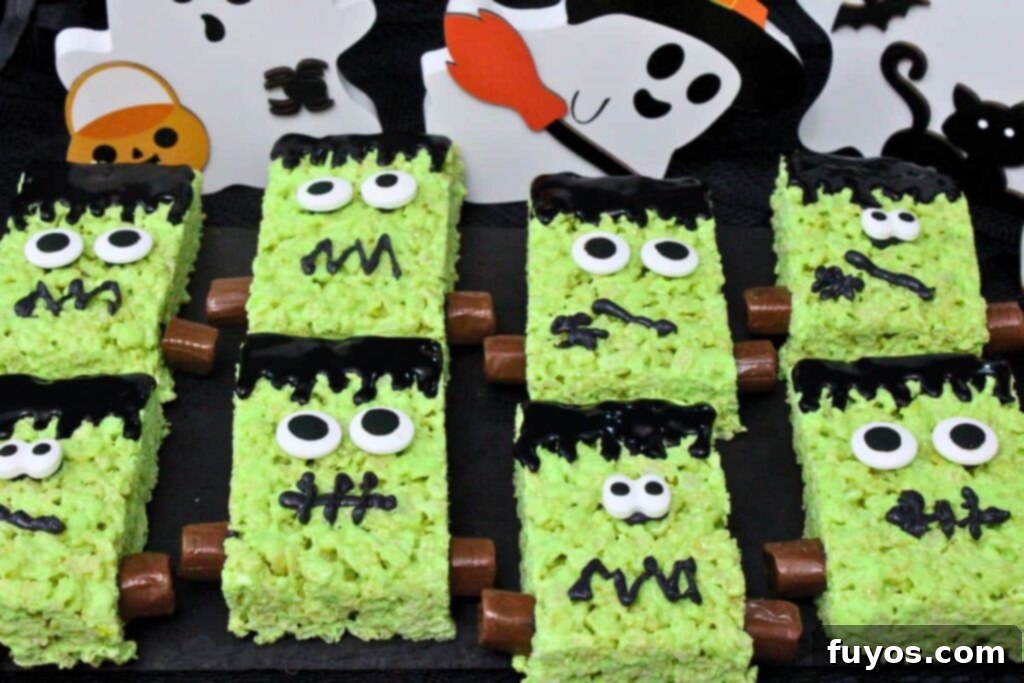
Get ready for some monstrously delicious fun this Halloween with these incredible Frankenstein Rice Krispie Treats! These no-bake delights transform the beloved classic cereal and marshmallow squares into adorable, spooky monsters, perfect for any eerie celebration. With a vibrant green hue, playful candy eyes, and iconic Tootsie Roll bolts, these treats are not just incredibly easy to make but also guarantee to be the star of your Halloween dessert table.
Why You’ll Absolutely Love This Recipe
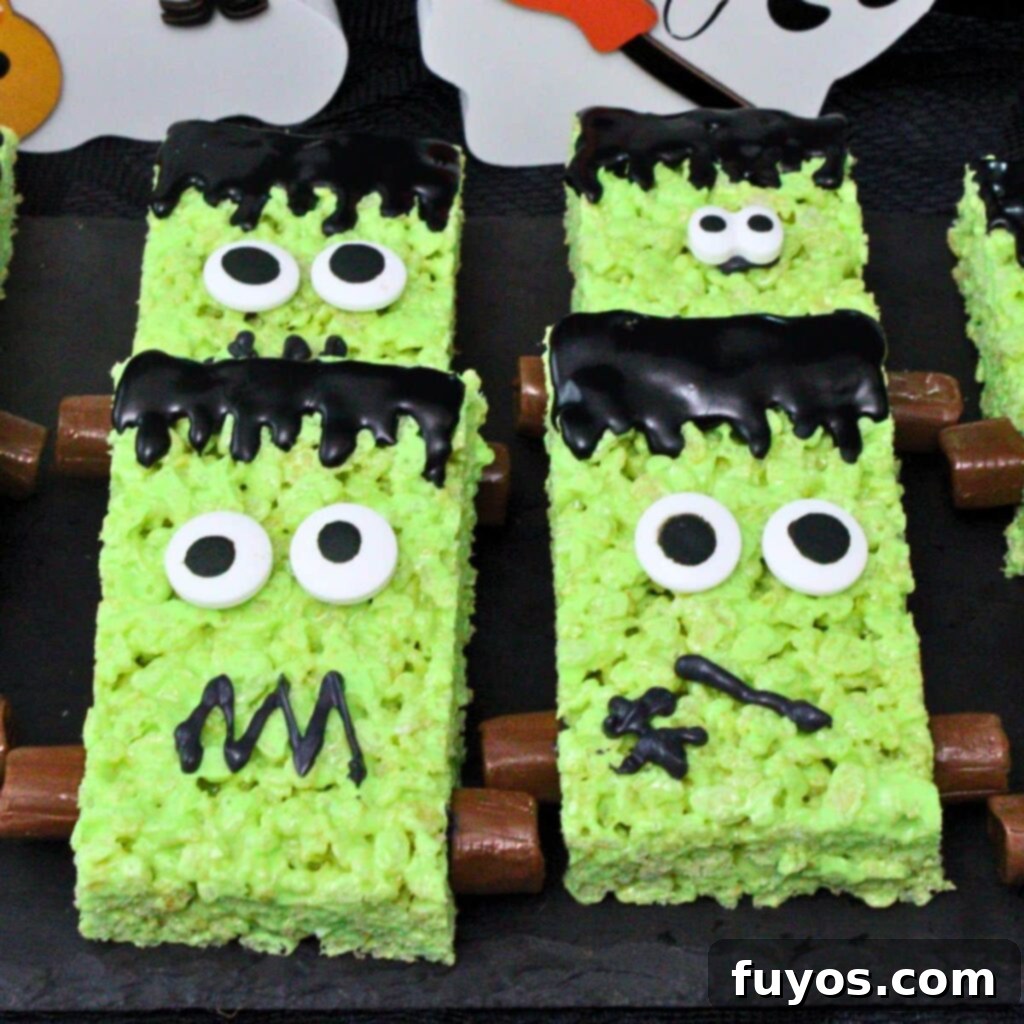
These Frankenstein Rice Krispie treats are more than just a dessert; they’re a full-fledged Halloween experience! They strike the perfect balance between being incredibly fun, delightfully festive, and utterly delicious. Starting with the nostalgic, gooey marshmallow-and-cereal base that everyone adores, these treats then undergo a magical monster transformation. A few drops of green food coloring bring Frankenstein’s signature complexion to life, while whimsical candy eyes and intricate icing “hair” complete the playful monster makeover.
The beauty of this recipe lies in its universal appeal. It delivers a treat that’s comforting and reminiscent of childhood favorites, yet it’s creatively designed to impress at any Halloween gathering. Whether you’re hosting a spooky party, contributing to a school bake sale, or simply looking for a fun and easy snack for classroom celebrations during the Halloween season, these monster-themed Rice Krispie treats will undoubtedly steal the show. Their vibrant appearance and delightful taste make them a hit with both kids and adults, ensuring smiles all around.
Beyond their charm, these treats are incredibly simple to prepare, making them an ideal activity for involving younger family members in the kitchen. Kids will absolutely love helping with the decorating process, adding their own unique touches to each monster. They offer an irresistible contrast of textures: a delightful sweet crunch from the cereal perfectly complemented by the soft, chewy marshmallow. Plus, their quirky and whimsical aesthetic means they serve as much as an eye-catching decoration for your dessert spread as they do a scrumptious snack. They bring a lively, playful energy to any table, setting the perfect mood for spooky season festivities.
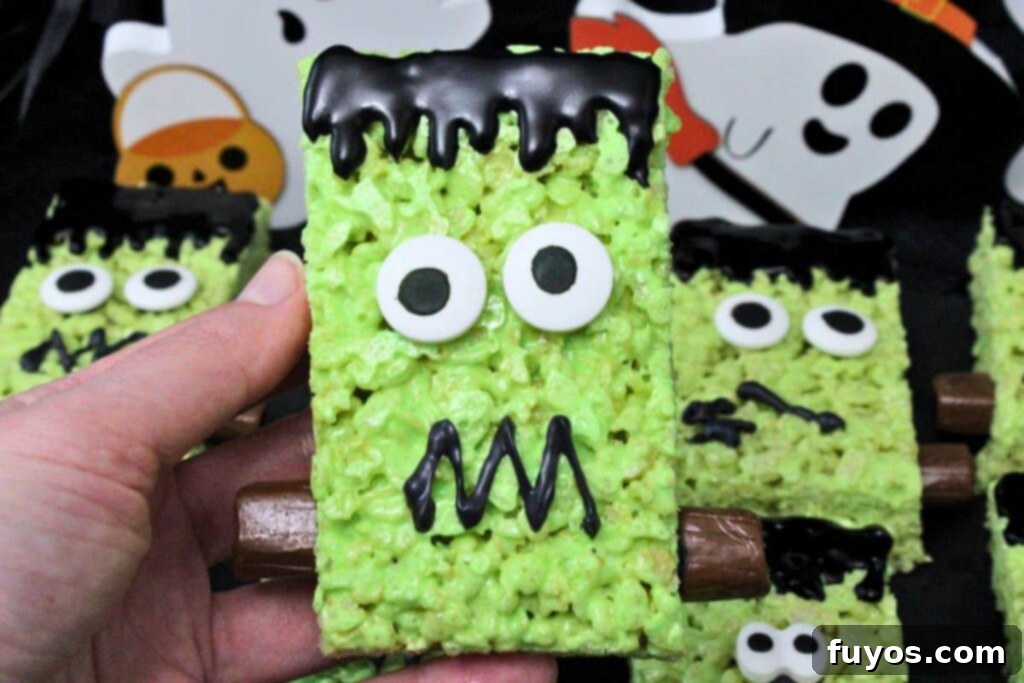
Embodying the true spirit of Halloween, these Rice Krispie treats are a little bit spooky, a little bit silly, and a whole lot of fun. They’re designed to be budget-friendly, requiring only a handful of readily available ingredients, and they come together quickly, making them ideal for last-minute party preparations. Each bite is guaranteed to bring a cheerful spark, whether you’re serving them at a grand monster bash, handing them out as unique Halloween favors, or simply enjoying a cozy evening at home with your family. These treats are an effortless way to add a touch of handmade magic to your holiday celebrations.
Katie’s tip
For more monstrous treats to complete your festive spread, don’t miss out on my Frankenstein Wafer Cookies and Frankenstein Pretzels!
Quick + Easy Recipes
straight to your inbox
Ingredients List
Gathering your ingredients is the first exciting step towards creating these adorable Frankenstein monsters. The beauty of Rice Krispie treats is that they require minimal ingredients, most of which you likely already have in your pantry. However, for these themed treats, you’ll want to add a few special decorative elements to truly bring your monsters to life. Here’s everything you’ll need to make a batch of 10 spooky treats:
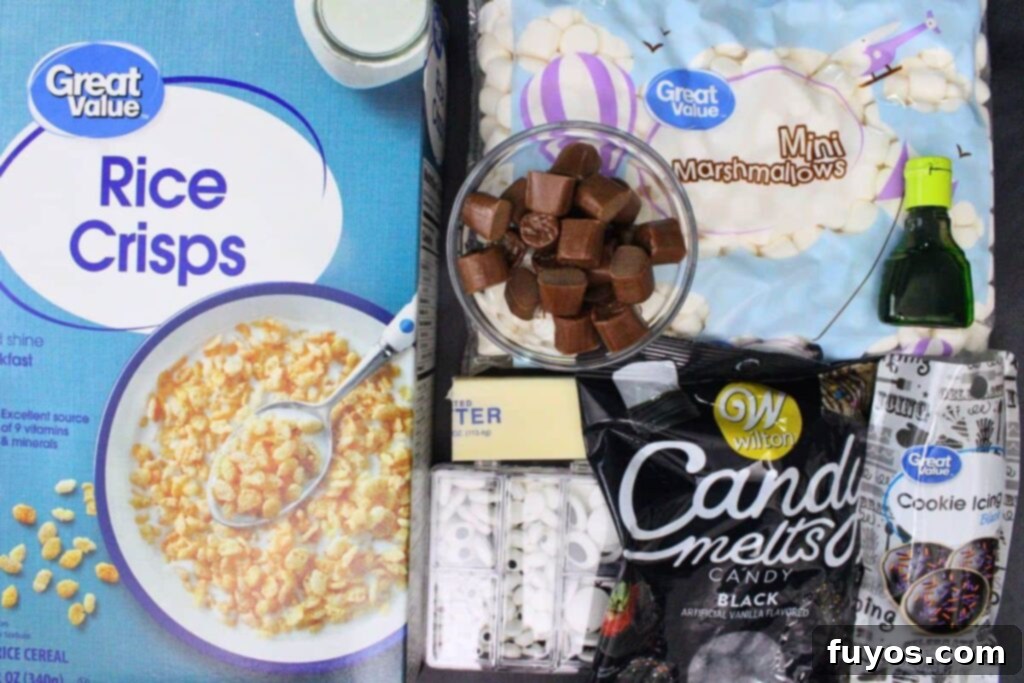
- 6 cups Rice Krispies cereal (or any crispy rice cereal equivalent)
- ¼ cup salted butter (which is equal to 4 tablespoons)
- 10 ounces mini marshmallows
- 12-15 drops neon green food coloring (gel food coloring often provides a more vibrant hue)
- Black cookie icing (specifically for the iconic monster “hair” details)
- 20 large candy eyeballs (these truly make the monsters come alive!)
- 1 cup black candy melts (essential for drawing the mouth and optional scar details)
- 10 Tootsie Rolls, unwrapped and carefully cut in half crosswise (these will form the classic neck bolts)
Ingredient Tips or Substitutions for Your Monster Creations
- While I find mini marshmallows melt the most evenly and quickly, you can certainly substitute them with approximately 40 standard-sized marshmallows. For those who adore an extra gooey and soft Rice Krispie treat, consider increasing the marshmallow quantity to 16 ounces. This will give you a wonderfully stretchy and chewy texture that many find irresistible. Always ensure your marshmallows are fresh, as older, hardened ones can make your treats dry and crumbly.
- For the distinctive monster “hair,” if black cookie icing isn’t on hand, you have several creative alternatives. You could use additional black candy melts to pipe on the hair, or even dip the top edge of your green treats into melted black chocolate for a more solid “haircut.” Another fun option is to add a sprinkle of chocolate jimmies (sprinkles) or even crushed Oreo cookies for a textured, messy hair look, giving each monster a unique personality.
- Should you be without black candy melts, don’t fret! You can achieve similar decorative effects using black decorating gel, black icing in a tube, or even melted dark or semisweet chocolate chips. If using chocolate chips, ensure they are melted smoothly and transferred to a piping bag for precise application of mouths and scars.
- The Tootsie Rolls are fantastic for creating Frankenstein’s iconic neck “bolts.” However, if you’re looking for an alternative, extra mini marshmallows can be shaped or small pieces of pretzel rods can be cut and inserted into the sides of the treats. For a truly unique touch, you could even use small pieces of black licorice or other dark-colored chewy candies.
- While the recipe calls for larger candy eyeballs, which I believe offer the best proportional look for these treats, you are welcome to use smaller ones if that’s what you have. Just consider that smaller eyeballs might look better on slightly smaller cut treats, so you might adjust your cutting size accordingly for optimal monster aesthetics. The key is to have fun with the varying expressions!
Step By Step Instructions: Crafting Your Frankenstein Treats
Creating these Frankenstein Rice Krispie Treats is an incredibly rewarding and straightforward process, requiring just a few simple steps and the magic of your microwave. Follow these detailed instructions to bring your spooky snacks to life with ease and precision.
- Prepare your baking dish: Begin by thoroughly greasing a 13×9 inch baking dish. You can use nonstick cooking spray, a generous coating of butter, or even line it with parchment paper for the easiest removal. This crucial step prevents the sticky marshmallow mixture from adhering to the pan, ensuring your treats come out perfectly formed and intact.
- Melt butter and marshmallows: In a large, microwave-safe bowl, place your ¼ cup of salted butter. Heat it on high for about 30 seconds in a standard 1000W microwave until it’s fully melted. Immediately add the 10 ounces of mini marshmallows to the melted butter and stir them gently to coat. Continue microwaving in short 30-second increments, stirring thoroughly after each interval, until the marshmallows are completely melted and the mixture is smooth and glossy. This usually takes about 1 to 1½ minutes in total. Be careful not to overheat the marshmallows, as this can make them tough.
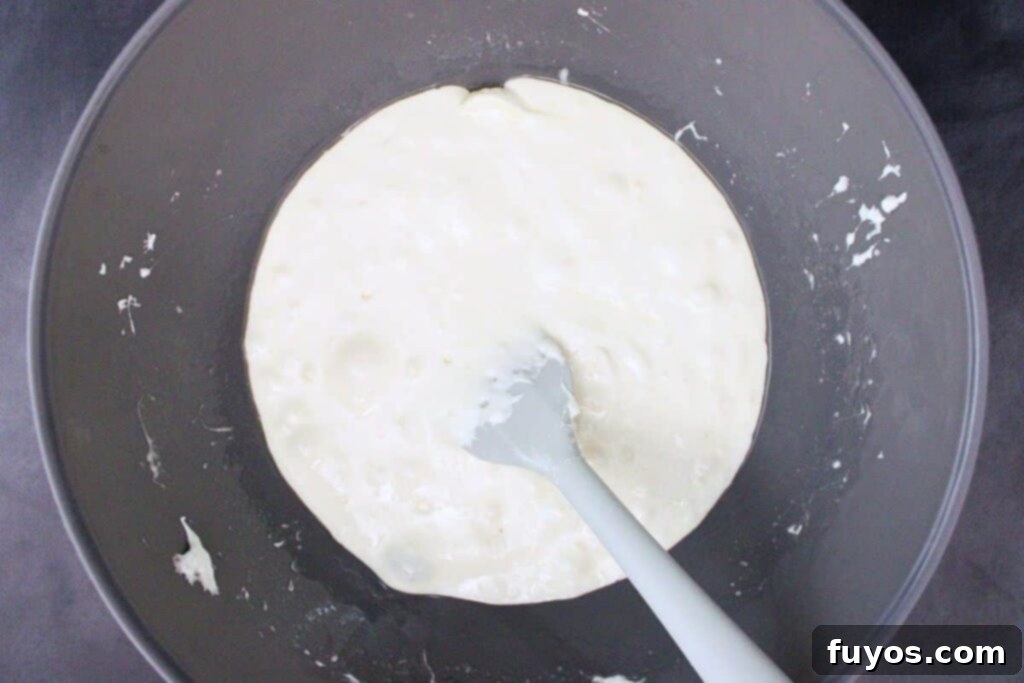
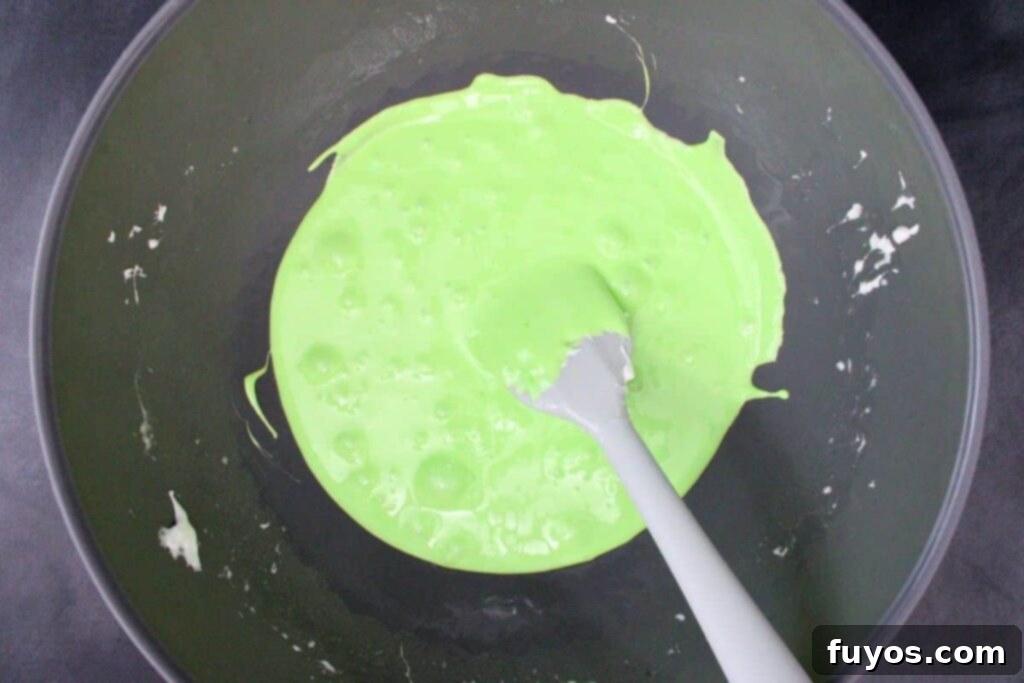
- Add the green coloring: Once your marshmallow mixture is smooth, stir in the neon green food coloring. Start with 12 drops and add more gradually, mixing well after each addition, until you achieve your desired shade of vibrant Frankenstein green. The exact amount may vary based on your food coloring brand and the intensity of color you prefer, so adjust as needed. Stir vigorously to ensure the color is evenly distributed throughout the mixture, creating a consistent monster hue.
- Combine with cereal and press: Gently pour the 6 cups of Rice Krispies cereal into the green marshmallow mixture. Using a sturdy spoon or a rubber spatula, carefully fold the cereal into the marshmallow until every piece is thoroughly coated. Work quickly but gently to avoid crushing the cereal. Once mixed, transfer the sticky mixture into your greased baking dish. To press it into an even layer, lightly grease your hands with butter or cooking spray, or use a piece of wax paper, and gently press down. Avoid packing too firmly, as this can result in dense, hard treats rather than delightfully chewy ones.
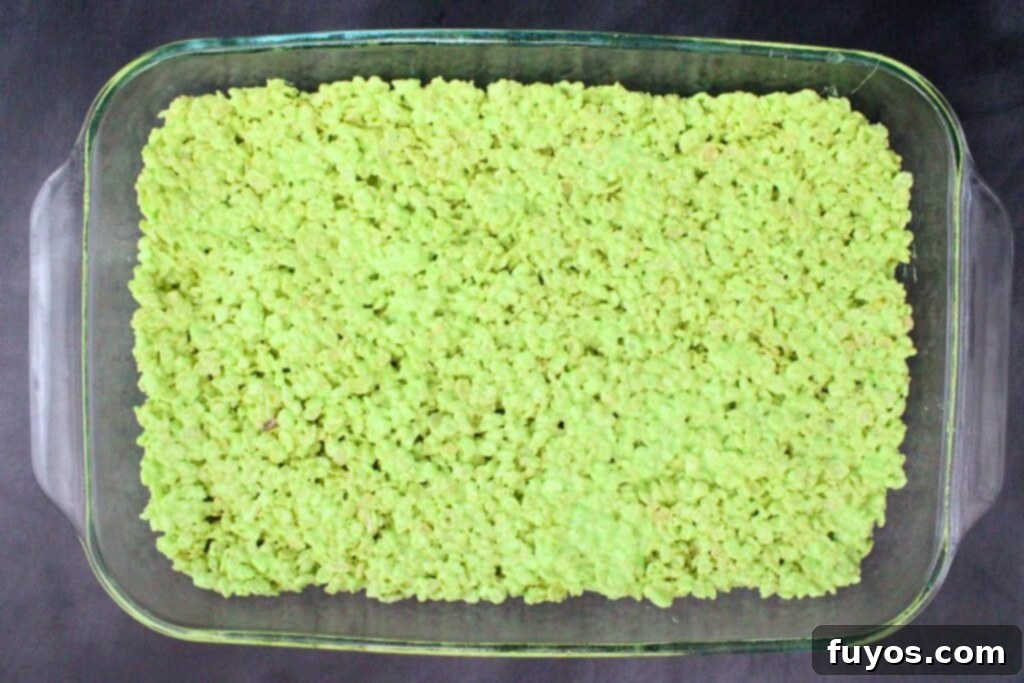
- Cool and cut: Place the baking dish in the refrigerator for approximately 30 minutes. This chilling time is essential to allow the treats to firm up properly, making them easier to cut and decorate. Once firm, remove the slab from the baking dish and place it on a clean cutting board. Trim any uneven edges for a neat finish. To create your Frankenstein shapes, first cut the large rectangle lengthwise down the center, yielding two long, narrower rectangles. Then, cut each of these long rectangles crosswise into 5 equal pieces. This method will give you a total of 10 perfectly sized monster-ready treats.
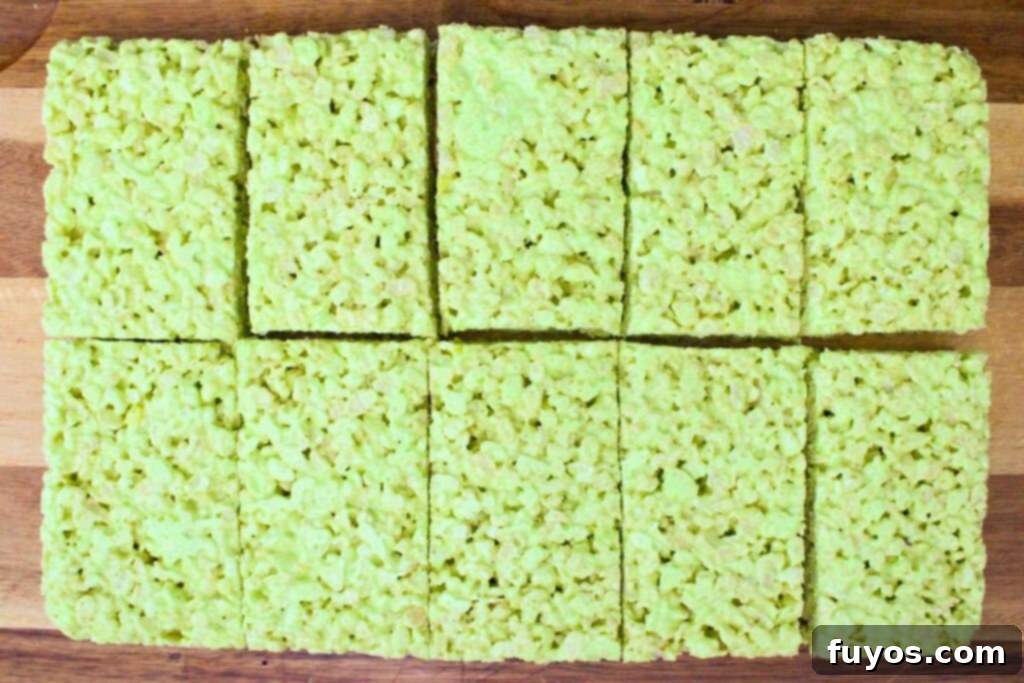
- Add the hair: Now comes the fun part – giving your monsters their signature hairstyles! Using black cookie icing, carefully pipe the “hair” onto the top edge of each green treat. A wavy or zig-zag bottom edge creates a wonderfully playful and fun monster look. If you plan to use melted chocolate for the hair instead, you can proceed directly to the next step, as you’ll be melting chocolate for other decorations anyway.
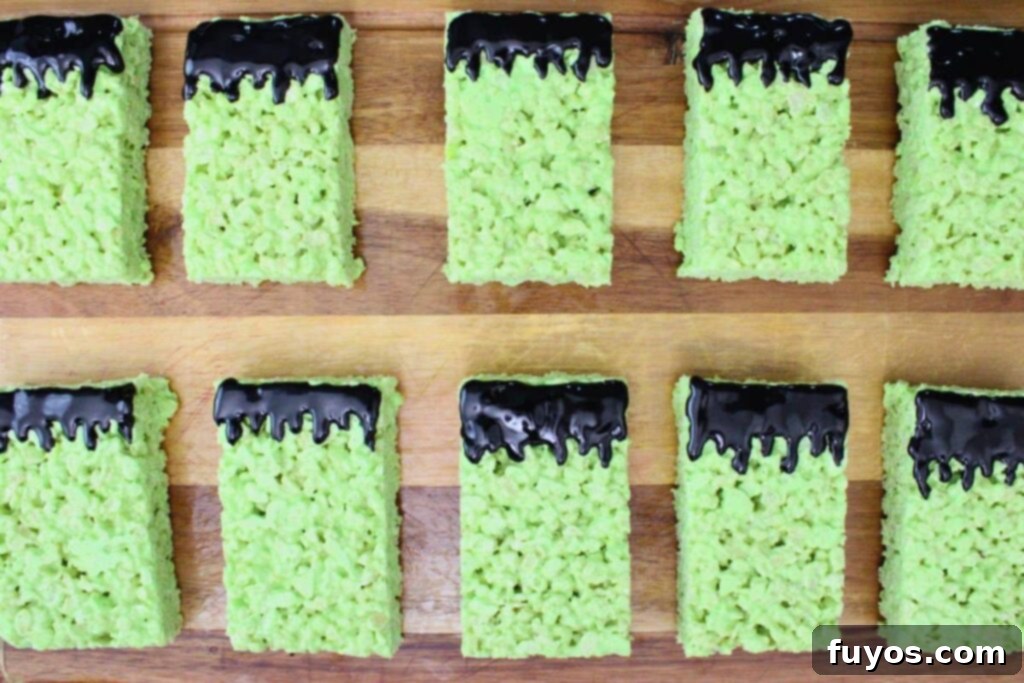
- Melt candy melts: In another clean, microwave-safe bowl, add your black candy melts. Melt them according to the package directions, as melting times and power levels can vary between brands. Typically, this involves microwaving at 50% power for 1 minute, then stirring and continuing in 30-second intervals until the melts are smooth and fully liquefied. Once melted, carefully transfer the warm chocolate to a candy piping bag or a small Ziploc bag, then snip a tiny corner off the bag to create a fine tip for piping.
- Decorate the faces and bolts: Using your melted black candy melts, pipe two small dots of chocolate just below the hairline on each treat. These dots will serve as the adhesive for your candy eyes. Gently press two large candy eyeballs onto these dots. Next, pipe a small dot of chocolate onto each side of the treat near where the “neck” would be, and attach a half Tootsie Roll to each side, forming Frankenstein’s iconic bolts. Finally, with the remaining melted chocolate, draw on a simple mouth and, if you like, a small scar across the forehead to complete your monster’s unique expression. This is where you can get truly creative!
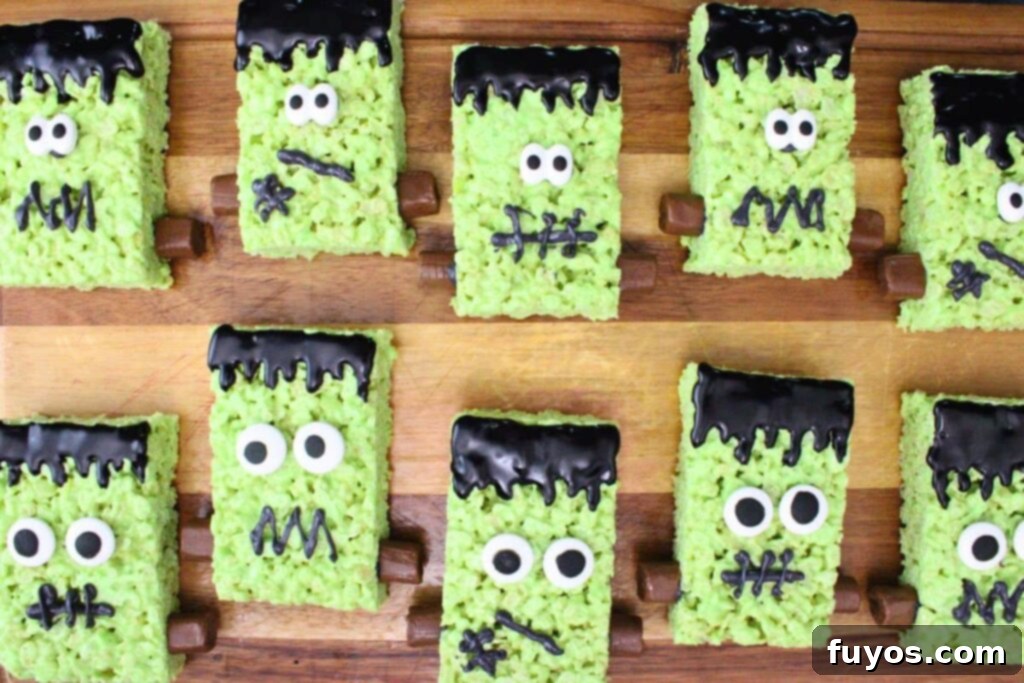
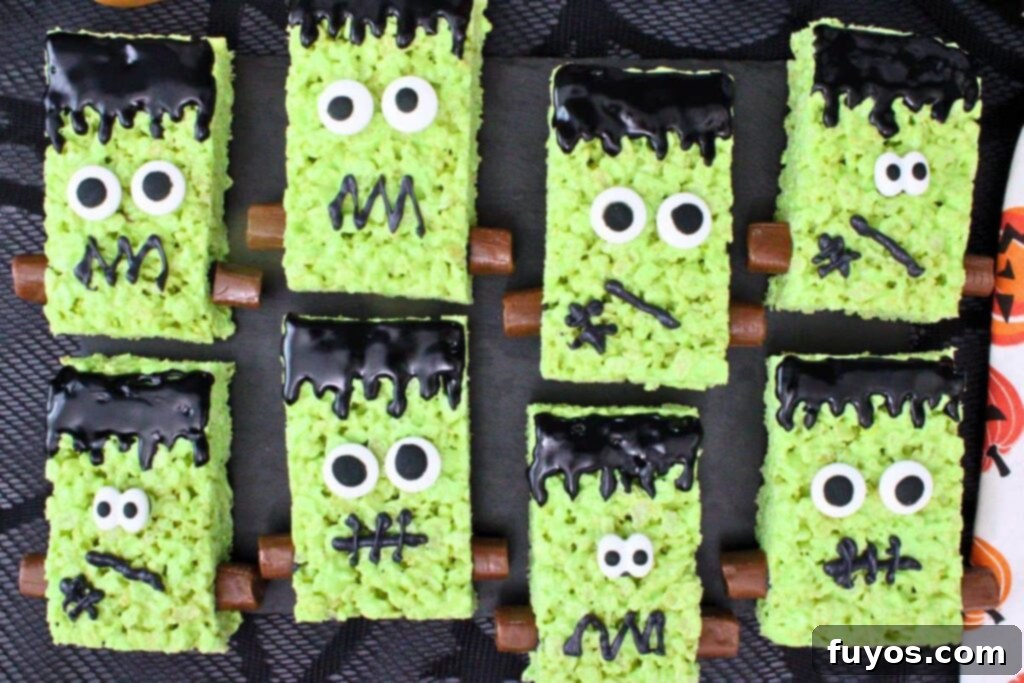
- Chill to set and enjoy: For the final touch, place your decorated Frankenstein treats back into the refrigerator for another 15 minutes or so. This brief chill time allows all the chocolate and icing decorations to firm up and set completely, preventing smudges and ensuring your monsters look perfect. Once set, your spooky, sweet, and fun Frankenstein Rice Krispie Treats are ready to be served and enjoyed!
Pairing Suggestions for a Complete Halloween Feast
To truly elevate your Halloween party and complement these delightful Frankenstein Rice Krispie Treats, consider pairing them with a variety of themed desserts, drinks, and savory snacks. Creating a cohesive spread adds to the festive atmosphere and offers something for every palate.
Spooky Desserts to Sweeten the Deal
- Monster Brownies – Rich, fudgy brownies topped with vibrant green or purple frosting, adorned with extra candy eyes or piped “stitches” made from chocolate, perfectly echoing the Frankenstein theme.
- Witch Hat Cookies – Simple chocolate cookies transformed into adorable witch hats with a melted Hershey’s Kiss and a delicate chocolate “band” piped around the base. They add a touch of classic Halloween charm.
- Candy Corn Bark – A colorful and crunchy layer of white chocolate infused with candy corn pieces, sprinkles, and perhaps a few spooky edible googly eyes. Its vibrant colors offer a fantastic contrast to the green treats and a delightful textural difference.
- Grave Dirt Cups – Layers of chocolate pudding, crushed Oreo “dirt,” and gummy worms, served in clear cups, make for a fun and easy “graveyard” dessert that’s always a hit with kids.
Kid-Friendly Concoctions
- Green “Slime” Punch – A fizzy, bright green drink made with lemon-lime soda, a scoop of tangy lime sherbet, and perhaps some gummy candies floating inside. It’s refreshing and wonderfully spooky!
- Hot Chocolate Cauldrons – Warm and comforting hot chocolate served in festive mugs or small plastic cauldrons, generously topped with fluffy whipped cream and a sprinkle of Halloween-themed sprinkles or crushed chocolate cookies. Perfect for a chilly autumn evening.
- Spooky Milkshakes – Creamy vanilla milkshakes dyed a ghastly green with food coloring, then crowned with a mountain of whipped cream, crushed Oreos, and a few gummy worms peeking out for a truly creepy indulgence.
Adult Beverages with a Spooky Twist
- Zombie Cocktail – A potent and fruity rum-based classic, known for its vibrant color and intriguing name, perfectly fitting the reanimated monster vibe of Frankenstein.
- Midori Sour – This cocktail’s signature bright green hue makes it an ideal thematic pairing for your Frankenstein treats. Its sweet and tart flavor profile is both refreshing and visually striking.
- Black Magic Margarita – A mysteriously dark and dramatic margarita, often made with black food coloring or blackberry liqueur, offering a sophisticated and perfectly eerie adult drink for Halloween nights.
Themed Savory Snacks for Balance
- Pumpkin-Shaped Cheese Balls – A savory, creamy cheese ball molded into the shape of a pumpkin, perhaps with a pretzel stick stem, offers a delightful savory balance against the sweetness of the Rice Krispie treats.
- Mummy Hot Dogs – Hot dogs creatively wrapped in strips of crescent roll dough to resemble mummified figures, with small dots of mustard for “eyes.” These are easy, fun, and always a crowd-pleaser.
- Spiced Popcorn – Lightly coated with warm autumnal spices like cinnamon, nutmeg, or pumpkin spice, this crunchy snack provides a wonderful textural and flavor contrast to the chewy, sweet treats.
- Spiderweb Dip with Crackers – A creamy dip (like a hummus or a cheese spread) spread into a bowl and then decorated with concentric circles of black olive tapenade or balsamic glaze, creating a spooky spiderweb effect. Serve with various crackers or veggie sticks.
Recipe FAQs: Your Questions Answered
How Do You Make Rice Crispy Treats With Marshmallows?
The classic method for making Rice Krispie treats is wonderfully simple and quick! You start by melting butter and marshmallows together in a microwave-safe bowl or a saucepan over low heat until the mixture is completely smooth and gooey. Once melted, you gently stir in the crispy rice cereal until every flake is evenly coated with the sweet marshmallow mixture. The final step involves pressing this mixture into a greased baking pan, allowing it to cool and firm up, and then cutting it into your desired squares or shapes. For our fun Frankenstein treats (or any other themed Rice Krispie creation), the only additional step is to incorporate food coloring into the melted marshmallow mixture before adding the cereal, and then decorating with elements like candy melts, candy eyes, sprinkles, or piped chocolate details to bring your characters to life.
Can I Make This Recipe Gluten Free?
Yes, absolutely! It’s entirely possible to make this Frankenstein Rice Krispie Treats recipe gluten-free, allowing more people to enjoy this spooky snack. The main ingredient to watch out for is the rice cereal itself, as traditional Rice Krispies cereal often contains malt flavoring, which is derived from barley and therefore not gluten-free. Fortunately, many brands now offer certified gluten-free crispy rice cereals; simply look for labels explicitly stating “gluten-free.” Beyond the cereal, it’s also important to double-check that your marshmallows and any decorative elements you choose (like candy eyes, candy melts, and icing) are also certified gluten-free, as ingredients can sometimes vary. With these careful swaps, you’ll easily create a delicious and safe gluten-free version of your Frankenstein Rice Krispie treats.
Can You Make Rice Krispie Treats With Vegan Marshmallows?
You most certainly can! Making Rice Krispie treats with vegan marshmallows is a fantastic option for those following a plant-based diet. Vegan marshmallows are designed to melt and behave very similarly to traditional gelatin-based marshmallows, though they might take a little bit longer to fully break down and become smooth, so be patient and stir frequently. When making this substitution, remember to also use a plant-based butter substitute (like a vegan butter stick or coconut oil) instead of dairy butter. As with the gluten-free version, ensure that all your other ingredients, including the crispy rice cereal and any decorations, are confirmed to be vegan-friendly. This simple adjustment ensures that your delicious and creatively themed Frankenstein Rice Krispie treats can be enjoyed by everyone, regardless of their dietary needs or preferences!
How Far in Advance Can I Make These Frankenstein Rice Krispie Treats?
These delightful treats are perfect for making ahead, which is ideal for reducing stress during busy Halloween preparations! You can prepare and decorate your Frankenstein Rice Krispie treats up to 2-3 days in advance. To keep them fresh, soft, and chewy, store them in an airtight container at room temperature. Layering them with wax paper or parchment paper between each treat will prevent them from sticking together. If you need to store them for a longer period, they can also be frozen, which is excellent for meal prep or larger batches for events further out.
Tips For the Best Frankenstein Rice Krispie Treats
To ensure your Frankenstein Rice Krispie treats are not only visually spectacular but also perfectly chewy and delicious, keep these expert tips in mind. These small details can make a big difference in the final outcome of your monster masterpieces.
- Always Use Fresh Marshmallows: The quality of your marshmallows is paramount to the texture of your treats. Older, stale marshmallows tend to become dry and hard, resulting in a crumbly mixture that’s difficult to work with and a less enjoyable final product. Fresh marshmallows, on the other hand, melt down smoothly and consistently, guaranteeing that signature perfectly chewy, gooey texture that everyone loves in a Rice Krispie treat.
- Never Overpack the Mixture: When you press the cereal and marshmallow mixture into the baking pan, resist the urge to pack it down too firmly. Using a buttered spatula or a piece of wax paper, press the mixture gently and evenly into the pan. Overpacking compresses the air out of the treats, making them dense, hard, and less appealing to chew. A light touch will ensure they remain wonderfully soft and gooey.
- Achieve a Bright, Even Color: For that vibrant Frankenstein green, always add your food coloring to the melted marshmallow mixture *before* you stir in the cereal. This allows you to mix the color thoroughly and evenly, ensuring a consistent, vivid green hue throughout your treats. If you add it after the cereal, you might end up with patchy coloring and overworked cereal.
- Ensure Neat, Clean Cuts: Patience is a virtue when it comes to cutting! Allow your Rice Krispie treats to cool completely and firm up (ideally in the refrigerator for 30 minutes) before attempting to cut them. For the cleanest cuts, use a sharp chef’s knife that has been lightly greased with butter or sprayed with nonstick cooking spray. Re-grease the knife periodically as it becomes sticky. This technique prevents the treats from tearing and gives you beautifully defined monster shapes.
- Get the Kids Involved: These Frankenstein treats are an ideal project for little hands! Kids absolutely love helping with the decorating phase. Encourage them to add their own creative flair with the icing, sprinkles, extra candy pieces, or even unique scar designs. Not only does this make for a fun family activity and cherished memories, but it also means each monster will have its own unique, charming personality, making them extra special and perfectly party-ready.
Storage and Presentation for Your Spooky Treats
Once you’ve crafted your adorable army of Frankenstein Rice Krispie treats, knowing how to properly store and present them will ensure they stay fresh and impress all your guests. These tips will help you manage your treats for any occasion, from casual family snacking to elaborate Halloween parties.
Smart Storage Tips for Freshness
- Room Temperature Storage is Key: For optimal chewiness and flavor, store your Frankenstein Rice Krispie treats in an airtight container at room temperature. They will remain wonderfully fresh and soft for up to 3 days. To prevent them from sticking together, especially with the decorations, layer the treats with pieces of wax paper or parchment paper between each one. This ensures they maintain their individual monster charm.
- Refrigeration for Warmer Climates: While generally not necessary, if you live in a particularly warm or humid environment, or if your decorations need extra firming, you can refrigerate the treats. However, be aware that chilling can make them a bit harder and less chewy than at room temperature. If refrigerating, allow them to sit out at room temperature for about 10-15 minutes before serving to soften them up slightly and restore some of that delightful chewiness.
- Freezing for Long-Term Enjoyment: For extended storage, these treats freeze beautifully! Wrap each individual Frankenstein treat tightly in plastic wrap to protect it from freezer burn. Then, place the wrapped treats in a freezer-safe bag or container, removing as much air as possible. They can be frozen for up to 6 weeks. When you’re ready to enjoy them, simply thaw the treats at room temperature for a couple of hours before serving, and they’ll be almost as good as fresh!
Creative Serving Tips for a Spooktacular Display
- Themed Platter Presentation: Arrange your Frankenstein treats artfully on a dark-colored platter – think black slate, deep purple, or even a spooky orange. Add some small Halloween-themed decorations, like plastic spiders, mini skeletons, or cobwebs, to create an impressive and inviting centerpiece for your dessert table.
- Individual Party Favors: For parties or as a charming alternative to trick-or-treating, wrap each Frankenstein treat individually in clear cellophane bags. Tie them with fun orange, black, or green ribbons, or even small Halloween-themed ties. These make perfect grab-and-go treats or delightful party favors for your guests.
- Add Sticks for Easy Snacking: For a fun, carnival-like presentation, carefully insert a popsicle stick or a sturdy wooden skewer into the base of each treat. Once on sticks, you can arrange them upright in a decorative jar, a themed vase, or a foam block covered with fabric. This turns them into “monster pops” – making them super easy for guests to pick up and enjoy without sticky fingers!
- Mini Monster Bites: Instead of cutting into standard rectangles, you could cut smaller squares or even use cookie cutters (after trimming edges) to make mini Frankenstein treats. These bite-sized monsters are great for little ones or for offering a wider variety on your dessert bar.
More No-Bake Halloween Treats
Halloween Puppy Chow: Monster Munch Muddy Buddies!
Halloween Crack Candy: No Bake Saltine Cracker Toffee!
- Vampire Fudge – A rich, dark chocolate fudge with a swirl of red raspberry or cherry sauce, resembling dripping blood, perfect for a gothic Halloween theme.
- Pumpkin Chocolate Covered Cherries – Sweet, juicy maraschino cherries dipped in melted chocolate and decorated with orange and green drizzles to look like mini pumpkins. A simple yet elegant no-bake bite.
Final Thoughts on Your Frankenstein Rice Krispie Treats
These delightful and easy-to-make Frankenstein Rice Krispie treats are guaranteed to infuse your home with the joyous and playful spirit of Halloween! Their unique spooky-fun appearance makes them an instant hit, capturing the imagination of anyone who sees them. As a fantastic no-bake option, they require only a microwave and a few simple steps, making them incredibly convenient for busy schedules. The best part? They can be prepared well in advance, taking the stress out of last-minute party planning and allowing you more time to enjoy the festivities.
This effortless Halloween treat is a true crowd-pleaser, adored by kids and adults alike for its whimsical charm and delicious flavor. What’s more, these monsters are super customizable! Unleash your creativity by experimenting with different types of icing, adding various sprinkles, or using different shades of chocolate to decorate each unique monster face. It’s an ideal activity for family bonding, allowing kids to participate in the decorating process and express their artistic side, making each treat a cherished, handmade creation.
To ensure your Halloween dessert table is completely spectacular and filled with a variety of spooky delights, don’t forget to explore all of my other fantastic No-Bake Halloween Treats. You’ll find a wide array of easy and imaginative recipes to complement your Frankenstein Rice Krispie Treats and make your seasonal celebrations truly unforgettable. Happy Halloween baking!
Easy Halloween Frankenstein Rice Krispie Treats
Equipment
-
Microwave
-
Large microwave safe bowl
-
Spatula (or spoon; for mixing)
-
Measuring cup
-
Cutting board
-
13×9 pan
-
Chef’s knife (or similar)
-
Candy piping bag (or Ziploc)
-
Nonstick spray
Ingredients
- 6 cups Rice Krispies cereal (or generic equivalent)
- ¼ cup salted butter (4 Tbsp)
- 10 ounces mini marshmallows
- 12-15 drops neon green food coloring
- Black cookie icing (for hair)
- 20 large candy eyeballs
- 1 cup black candy melts (for the mouth and scar detail)
- 10 Tootsie Rolls (unwrapped and cut in half crosswise)
Instructions
-
Grease a 13×9 inch baking dish with nonstick spray or butter (alternatively, you can line it with parchment paper for easier removal).
-
Add your butter to a large microwave-safe bowl. Heat on high until it melts (this usually takes about 30 seconds in a 1000W microwave). Then, add the mini marshmallows and stir them to coat thoroughly in the melted butter. Continue cooking in 30-second increments, stirring well after each heating, until the marshmallows are completely melted and the mixture is smooth (this process generally takes a total of 1 to 1½ minutes).¼ cup salted butter, 10 ounces mini marshmallows
-
Stir in the neon green food coloring until you achieve your desired shade of vibrant green (I used approximately 14 drops for the treats pictured, but the amount can vary based on your food coloring brand and desired intensity, so adjust as needed for a consistent color).12-15 drops neon green food coloring
-
Pour in the crispy rice cereal and gently stir (using a sturdy spoon or spatula) until the cereal is completely and evenly coated in the green marshmallow mixture. Then, carefully press the mixture into a single, even layer in your greased baking dish (grease your hands or spatula with nonstick spray to prevent sticking and make this step easier, ensuring gentle pressing).6 cups Rice Krispies cereal
-
Cool the treats in the refrigerator for about 30 minutes, or until they are firm enough to handle and cut. Afterwards, carefully remove the entire slab from the baking dish, place it on a cutting board, and trim any uneven edges for a clean look. To create your monsters, cut the Rice Krispie treat slab lengthwise down the center (resulting in two long, narrow rectangles), then cut each of those rectangles crosswise to create 5 individual pieces (giving you a total of 10 treats ready for decorating).
-
Add the distinctive “hair” to your monsters using black cookie icing. Pipe a wavy or zig-zag pattern along the top edge for a fun, monster-like hairstyle. If you prefer to use melted chocolate for the hair, you can skip this step for now and integrate it with the next chocolate melting step.Black cookie icing
-
In another microwave-safe bowl, add your black candy melts. Melt them according to the package directions (my brand suggests microwaving at 50% power for 1 minute, then stirring and continuing in 30-second intervals until smooth and fully melted, but instructions can vary). Once melted, transfer the chocolate to a candy piping bag or a small Ziploc bag and snip a tiny corner off the tip for precise piping.1 cup black candy melts
-
Pipe two small dots of melted chocolate just beneath the hairline you created, and use these dots to attach the large candy eyes, pressing them gently into place. Next, pipe a small dot of chocolate onto each side of the treats, near the “neck” area, and firmly attach a half Tootsie Roll to each dot to form the iconic neck bolts. Finally, use the melted chocolate to draw on a whimsical mouth and, if desired, a playful scar detail (this is optional but adds to the monster’s charm) to complete all the festive decorations.20 large candy eyeballs, 10 Tootsie Rolls
-
Return the decorated treats to the refrigerator for another 15 minutes or so to allow all the chocolate and icing decorations to fully harden and set. Once firm, your delightful Frankenstein Rice Krispie Treats are ready to be served and enjoyed by all your spooky guests!
Notes
- While mini marshmallows generally melt best and create the smoothest mixture, you can use approximately 40 standard-sized marshmallows as a substitute. For an even gooier and chewier texture, feel free to increase the marshmallow quantity to up to 16 ounces. Always ensure your marshmallows are fresh for the best results!
- If black cookie icing for the hair isn’t available, creative alternatives include using additional melted black candy melts to pipe the hair, dipping the top of the treats into melted chocolate for a solid ‘hairline’, or even sprinkling chocolate jimmies (sprinkles) for a textured, messy hair effect.
- In the absence of black candy melts, you can use black decorating gel, black icing from a tube, or melted dark or semisweet chocolate chips as effective alternatives for facial details like mouths and scars.
- The Tootsie Rolls are ideal for creating Frankenstein’s signature neck “bolts.” Other fun and functional substitutes include extra mini marshmallows shaped appropriately, or small pieces of pretzel rods for a salty-sweet contrast and a different texture.
- You are welcome to use smaller candy eyeballs if you prefer, but the larger ones tend to offer a more impactful and proportionally balanced look for these particular treats. If opting for smaller eyeballs, you might consider cutting your Rice Krispie treats into slightly smaller sizes to maintain an appealing monster aesthetic.
- Please note that exact nutritional values can vary significantly based on the specific brand and flavor of ingredients used, the choice of decorating elements, and the precise quantity consumed. Therefore, the nutritional information provided should be considered as a general guideline only.
Nutrition
Number of total servings shown is approximate. Actual number of servings will depend on your preferred portion sizes.
Nutritional values shown are general guidelines and reflect information for 1 serving using the ingredients listed, not including any optional ingredients. Actual macros may vary slightly depending on specific brands and types of ingredients used.
To determine the weight of one serving, prepare the recipe as instructed. Weigh the finished recipe, then divide the weight of the finished recipe (not including the weight of the container the food is in) by the desired number of servings. Result will be the weight of one serving.
Did you try this recipe?
Mention @TheDinnersDoneQuick or tag #dinnersdonequick! for even more!
Pin Recipe
Leave A Review
