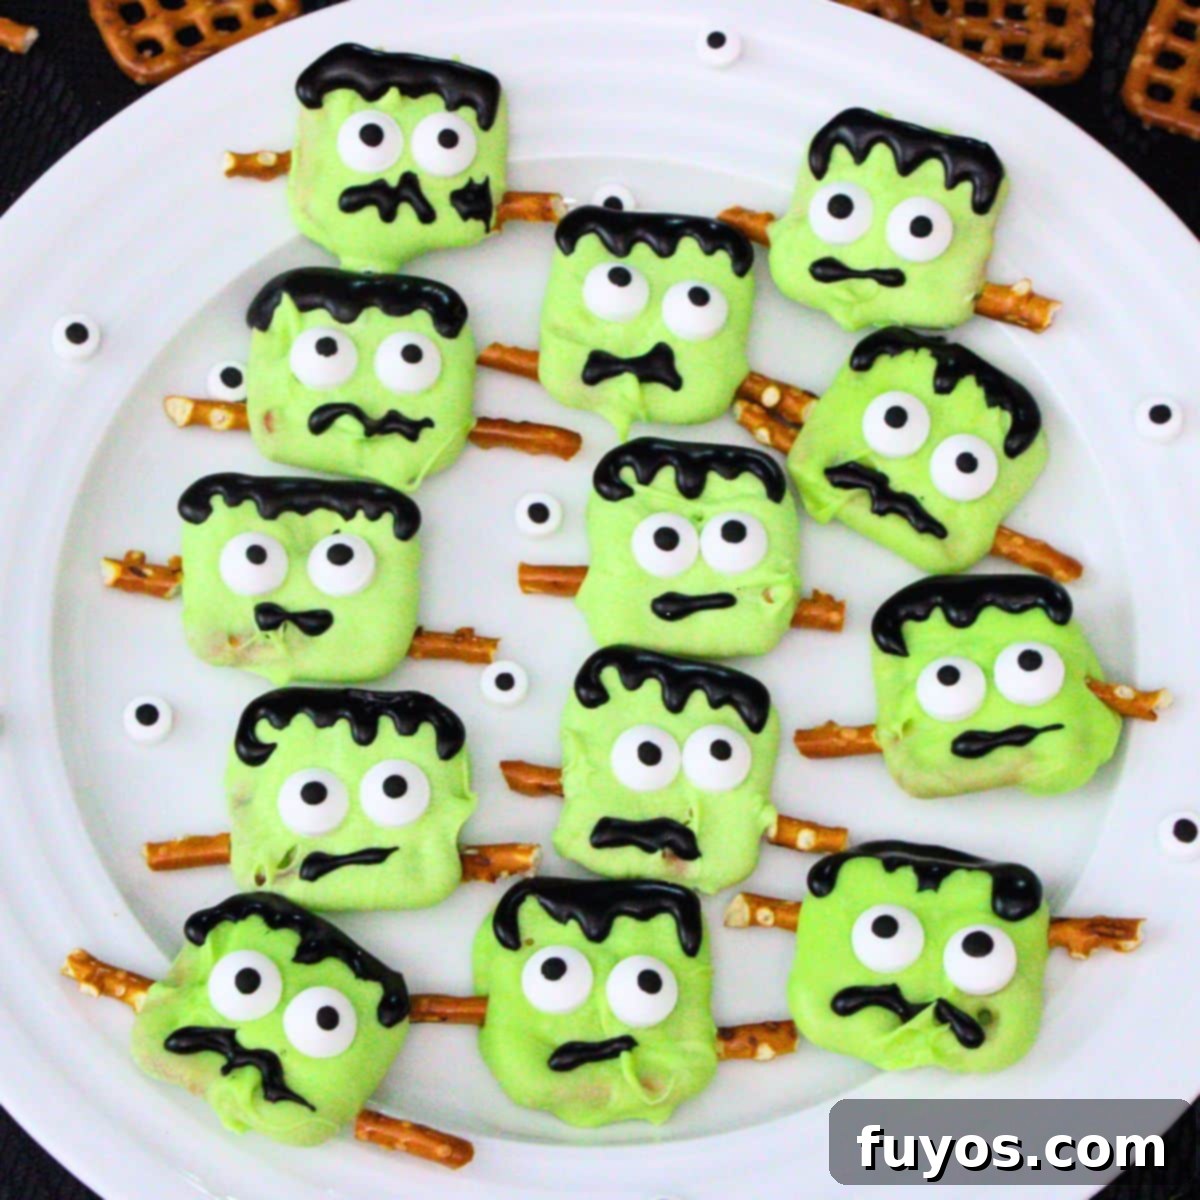
Spooktacular Frankenstein Pretzels: Your Ultimate Guide to Easy No-Bake Halloween Treats
Get ready to bring some monstrously good fun to your Halloween celebrations with these adorable and delicious Frankenstein pretzels! Combining the perfect balance of sweet, salty, and an irresistible crunch, these no-bake chocolate-covered pretzels are a Halloween tradition in many households, and for good reason. They are incredibly easy to make, highly customizable for all skill levels, store beautifully, and are an absolute hit with both kids and adults. Whether you’re planning a full-blown Halloween bash or just looking for a simple, festive treat to enjoy with family, these spooky snacks are sure to be a showstopper on any dessert table.
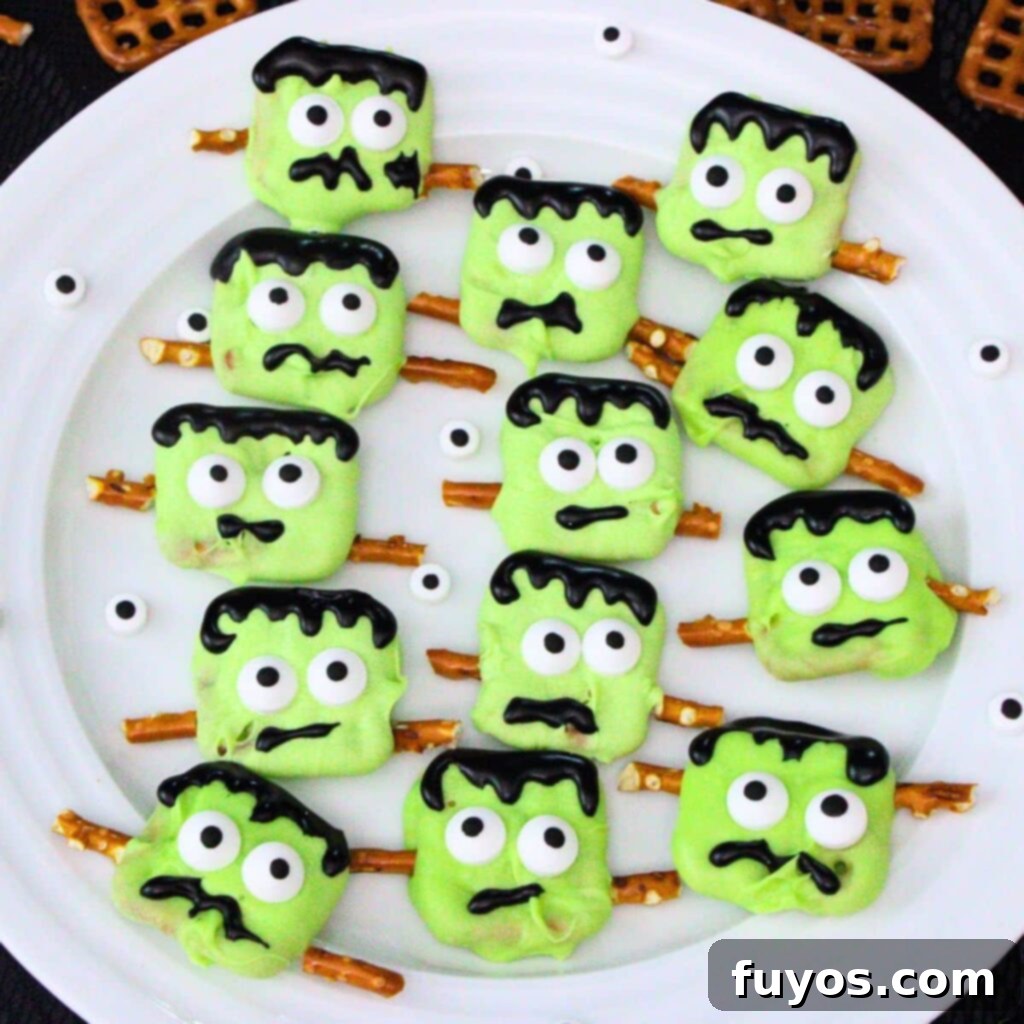
Why These Frankenstein Pretzels Are a Must-Make for Halloween
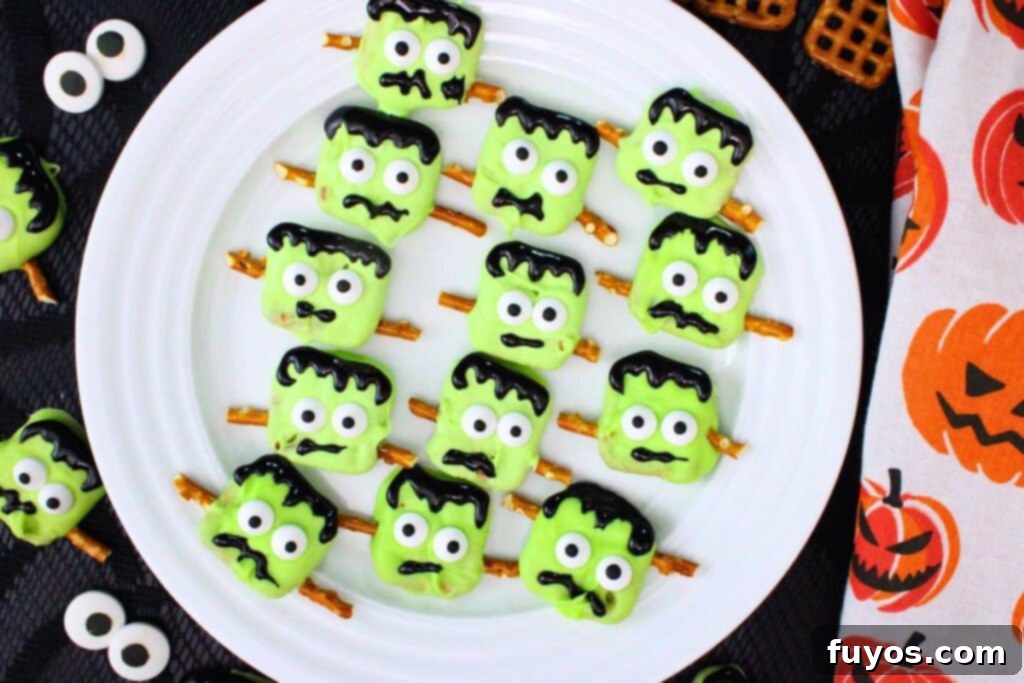
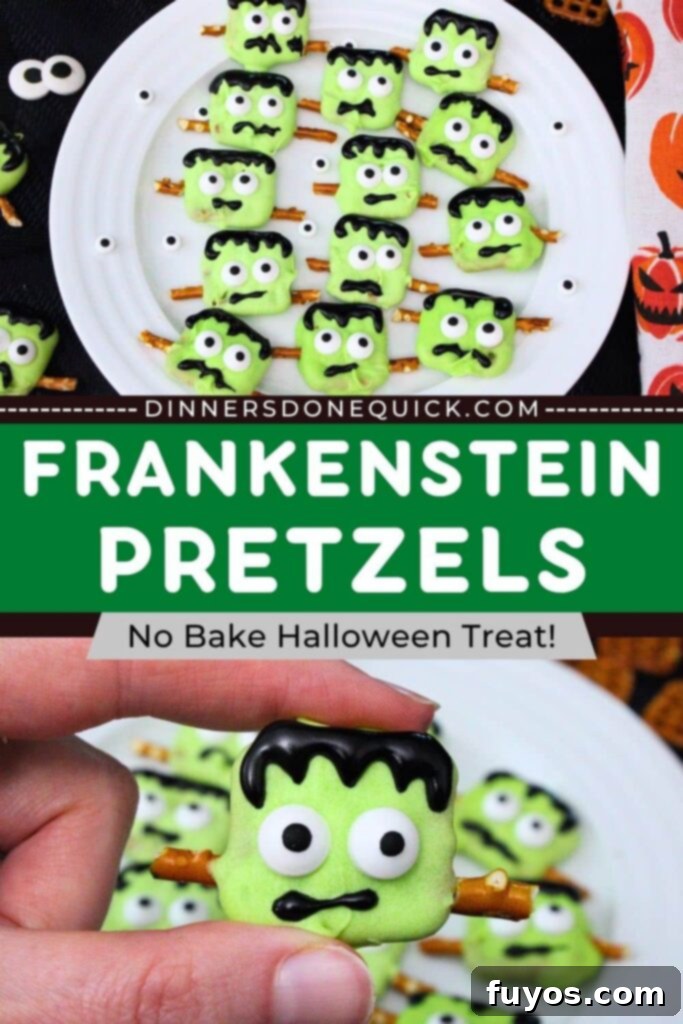
There’s a reason Frankenstein pretzels consistently rank among the most popular easy Halloween treats. They offer a delightful blend of playful aesthetics and satisfying flavor, making them the quintessential festive snack for any Halloween gathering or monster-themed party. The bright green candy coating, paired with whimsical candy eyes and drawn-on faces, creates an instantly recognizable and utterly charming monster that everyone will love.
What makes this recipe truly special is its incredible simplicity. You only need a few basic ingredients and a microwave to transform ordinary pretzels into extraordinary Halloween characters. This “no-bake” aspect means less time in the kitchen and more time enjoying the festivities. Despite their straightforward preparation, these cute monster faces are guaranteed to draw admiring glances from your party-goers, adding an instant festive touch to your dessert spread.
Serving these chocolate-covered Frankenstein pretzels at parties is a breeze. They are perfectly handheld, mess-free, and incredibly kid-friendly, making them an ideal choice for little fingers and busy adults alike. Plus, their vibrant green hue and comical expressions instantly elevate the Halloween ambiance of any dessert table, making them a decorative and delicious centerpiece.
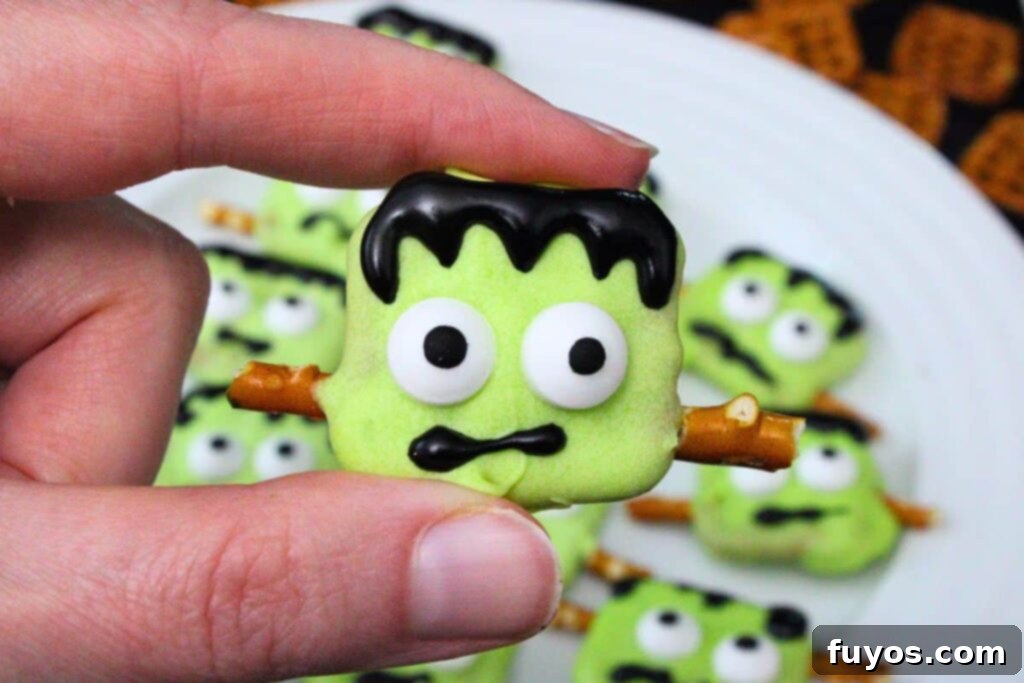
Whether you’re engaging your little ones in a fun baking (or rather, no-baking) project, preparing spooky snacks to hand out, or looking for a quirky accompaniment to adult Halloween cocktails, these Frankenstein pretzels bring a unique, creative, and spooky twist to classic sweet and salty treats. Their universal appeal ensures that everyone, from the tiniest goblins to the seasoned monsters, will find something to adore in these delightful creations. They’re a fantastic way to celebrate the spooky season and create lasting memories with minimal effort.
Quick + Easy Recipes
straight to your inbox
Essential Ingredients for Your Monster Pretzels
Crafting these Frankenstein pretzels requires only a handful of readily available ingredients. You’ll transform simple snacks into spooky masterpieces with just a few key items. Here’s what you’ll need to gather:
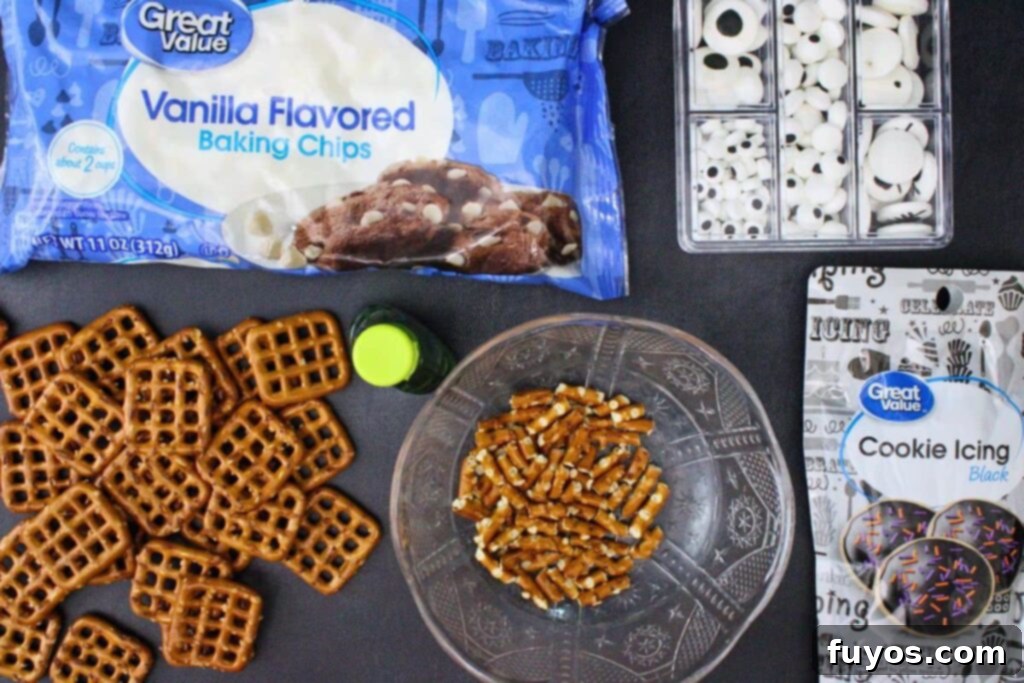
- 24 square pretzels (pretzel snaps): These are ideal for mimicking Frankenstein’s head shape.
- 11 ounce bag white chocolate chips (or 10 ounces green candy melts): Green candy melts offer the easiest and most vibrant green color. If using white chocolate chips, you’ll need food coloring.
- Neon green food coloring: Essential if you’re using white chocolate chips to achieve that signature Frankenstein hue. Gel-based food coloring is highly recommended.
- 48 candy eyeballs: These instantly bring your monsters to life with quirky expressions.
- 8 pretzel sticks, broken into 6 pieces each: These small pieces serve as Frankenstein’s iconic neck bolts. Alternatively, use extra square pretzel bits.
- Black cookie icing (or melted semisweet chocolate chips): Perfect for drawing hair, mouths, and any additional spooky facial features.
Ingredient Tips and Smart Substitutions
Flexibility is key when it comes to creative Halloween treats. Here are some helpful tips and substitutions to ensure your Frankenstein pretzels are a monstrous success:
- For dietary needs, this recipe works wonderfully with gluten-free pretzels. Ensure they are square snaps for the best shape. If square snaps aren’t available, pretzel rods can also be used; simply dip the top half and decorate accordingly.
- Achieving the perfect “monster green” is crucial. The simplest method is using already-tinted candy melts, preferably a vibrant or light green variety. These melt smoothly and offer consistent color. If specialty candy melts are hard to find, white chocolate chips are a great alternative. When coloring white chocolate, always opt for neon green gel food coloring. Liquid-based food colorings can cause chocolate to seize and become clumpy, which you want to avoid for smooth coating.
- No candy eyes on hand? No problem! You can easily create eyes by using small dots of white chocolate or white candy melts, allowing them to set slightly, then adding a tiny dot of dark chocolate or black candy melts in the center for the pupils. This offers a charming homemade touch.
- Instead of pre-made black cookie icing, you have several creative options for Frankenstein’s hair and mouth. Melted semisweet or dark chocolate can be piped using a piping bag with a fine tip, or even a Ziploc bag with a tiny corner snipped off. Black candy melts are another excellent choice. For a textured look, you can also use chocolate jimmies (brown sprinkles) to create a spiky hairstyle. Don’t limit yourself to just hair and a mouth; feel free to add decorative elements like a scar across the monster’s face with black or red icing or chocolate for extra spooky detail. Customization is what makes these treats so fun!
Step-by-Step Instructions to Create Your Frankenstein Pretzels
Let’s get started on bringing these adorable monsters to life! This simple, no-bake recipe is perfect for involving the whole family.
- Prepare your workspace: Begin by lining a cookie sheet (or a similar flat surface) with parchment paper or a silicone baking mat. This ensures your chocolate-covered pretzels won’t stick and makes cleanup a breeze.
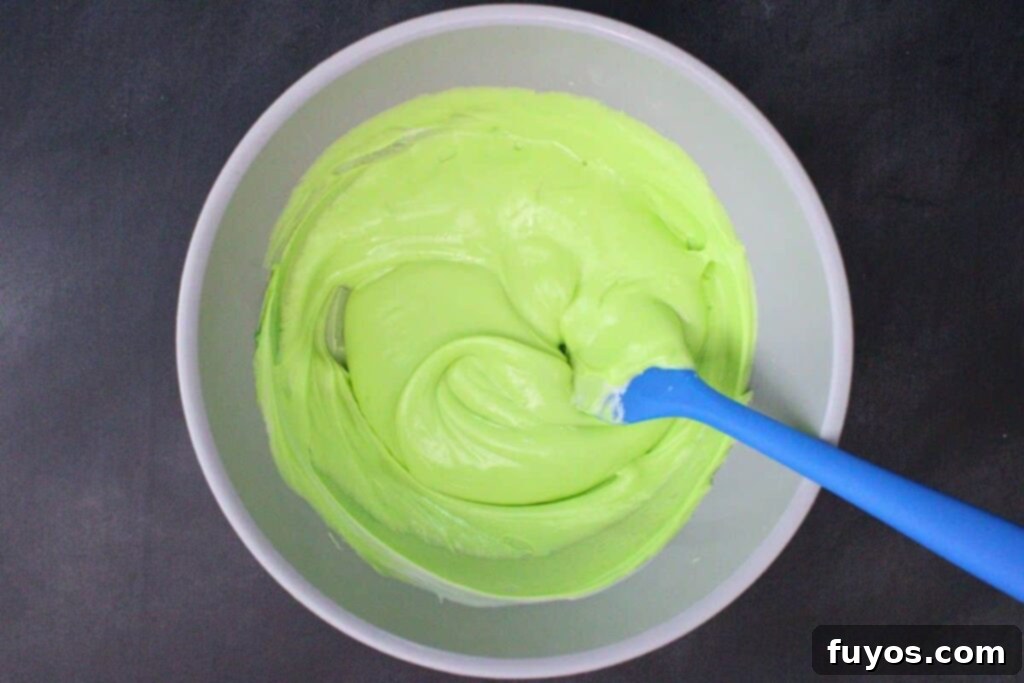
- Melt the chocolate: Add your white chocolate chips or green candy melts to a microwave-safe bowl. If using white chocolate chips, microwave on high for 1 minute, then stir thoroughly. Continue microwaving in 30-second increments, stirring well after each, until the chocolate is completely melted and smooth. If using neon green food coloring, add it at this stage, stirring until you achieve your desired vibrant green shade (I typically use about 10 drops of McCormick brand, but this can vary by brand). If using candy melts, always follow the specific package directions, as melting times and power settings can differ, though usually, 50% power for about 2 minutes total is a good starting point.
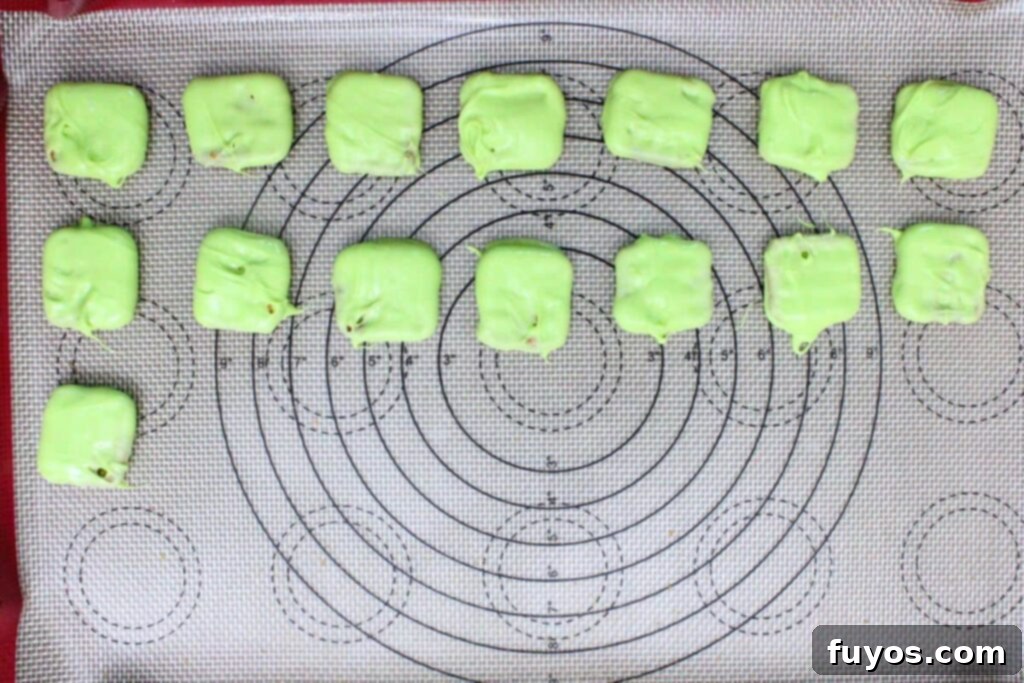
- Dip the pretzels: Using a fork or kitchen tweezers, carefully dip each square pretzel into the melted green chocolate. Ensure the pretzel is fully coated. Gently shake off any excess chocolate back into the bowl to prevent pooling, then carefully place the dipped pretzel onto your parchment-lined sheet. Remember to leave sufficient space between pretzels, especially on the sides, to accommodate the “bolts” you’ll add in the next step. Repeat this process until all your pretzels are coated. Work in batches if necessary to keep the chocolate from setting.
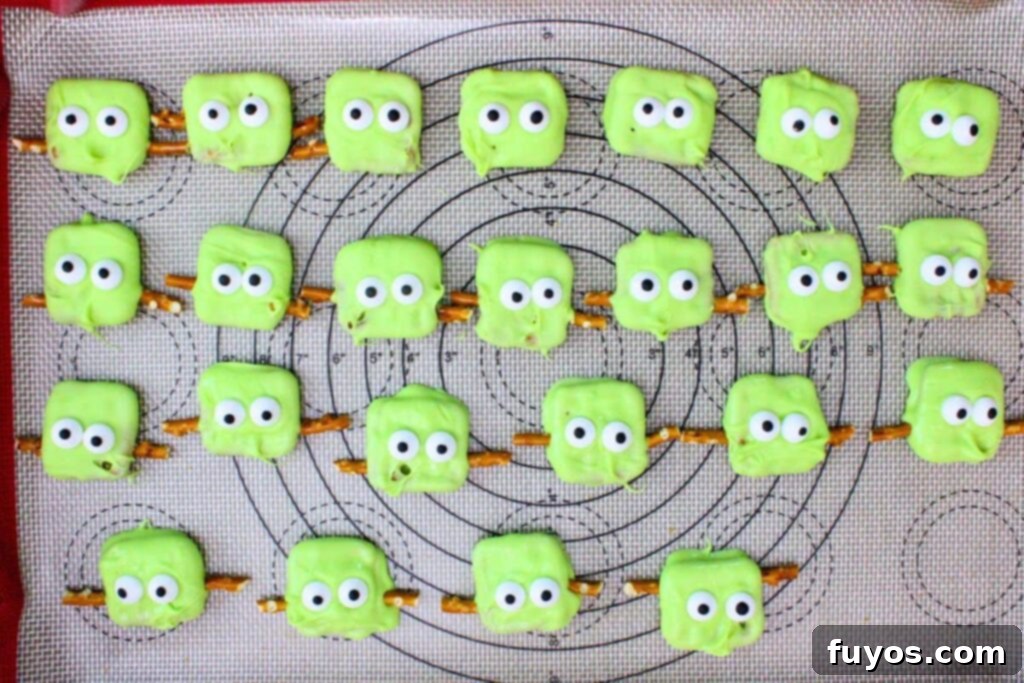
- Add eyes and bolts: This step requires speed! While the chocolate coating is still wet and pliable, quickly place two candy eyeballs onto each pretzel, positioning them between one-half and two-thirds of the way up (this leaves enough room for the hair later). Immediately after, add a small piece of broken pretzel rod to each side of the pretzel near the bottom, creating Frankenstein’s signature neck bolts. Press gently to ensure they adhere securely to the wet chocolate.
- Allow to set: Let the chocolate coating set completely. This can take a while at room temperature, especially in humid conditions. To speed things up, place the cookie sheet in the refrigerator for about 15 minutes, or until the chocolate is firm to the touch.
- Decorate the faces: Once the chocolate is fully set, it’s time for the creative fun! Use your black cookie icing or melted chocolate (transferred to a piping bag or a Ziploc with a tiny snip) to pipe on hair along the top edge of the pretzel and a small mouth below the eyes. Don’t hesitate to add any other facial features you desire, such as a scar or stitches, to give each monster a unique personality. A toothpick can be very helpful for achieving fine details.
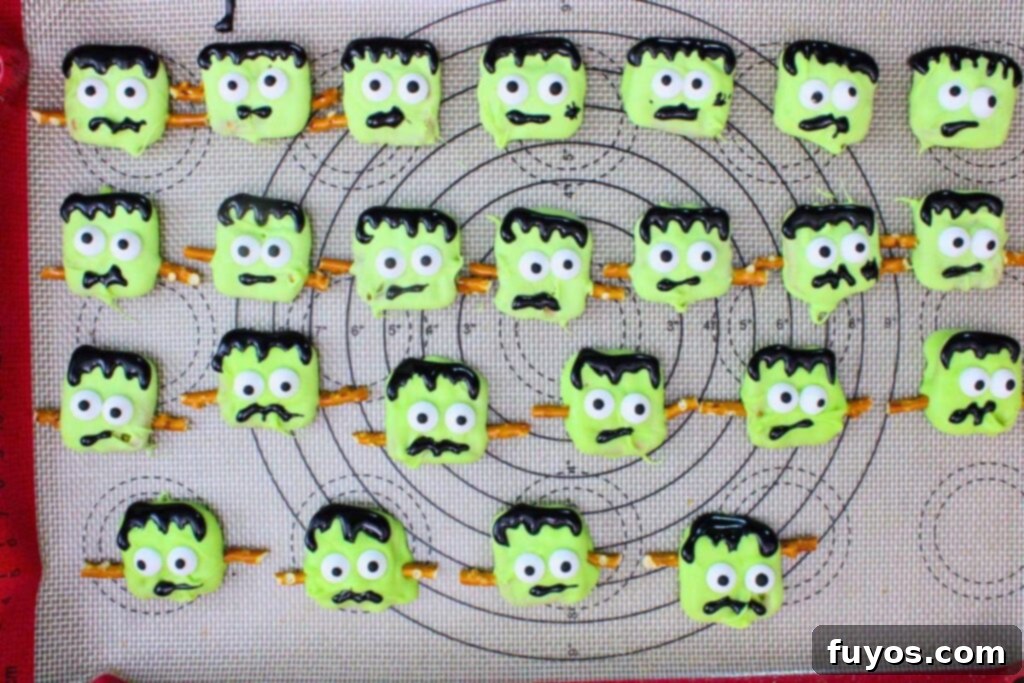
- Final setting and enjoyment: Allow the piped icing or chocolate decorations to set fully. You can pop them back into the fridge briefly if needed. Once hardened, your delightful Frankenstein pretzels are ready to be served and enjoyed by all!
Perfect Pairing Suggestions for Your Halloween Treat Table
These Frankenstein pretzels are fantastic on their own, but they also make an excellent addition to a wider spread of Halloween goodies. Here are some ideas to complete your spooky feast:
Other Desserts to Delight
- Monster cookies: Keep the playful, spooky theme alive by pairing your crunchy pretzels with soft, chewy monster cookies. The contrast in textures will be a delightful experience for your guests.
- Halloween brownies or brookies: The rich, fudgy chocolate of brownies or brookies provides a perfect complement to the sweet and salty pretzel coating. Cut them into spooky shapes for extra festive flair.
- Candy corn cupcakes: Add a burst of classic Halloween color and sweetness with vibrant candy corn cupcakes. They’ll help round out your dessert display with their iconic look.
Savory Party Snacks to Balance the Sweet
- Popcorn mixes: Offer light and salty popcorn mixes as a delightful counterpoint to the sweetness of the pretzels. You can even make a spooky mix with food coloring or candy.
- Mini pigs in a blanket: These classic crowd-pleasing finger foods are a savory staple that keeps the snack table varied. For an extra themed touch, try my Air Fryer Mummy Dogs – they’re always a hit!
- Cheese dip with crackers: Provide creamy, savory options like a classic cheese dip to prevent sugar overload and satisfy diverse palates.
Drinks to Quench Your Thirst
- Green Halloween punch: Naturally matching the Frankenstein theme, a bright green punch (spiked or non-alcoholic) adds to the spooky visual appeal. For a fun, kid-friendly option, try my Frankenstein Floats!
- Chocolate milk or hot cocoa: Enhance the chocolatey elements in your pretzel coating with a comforting glass of chocolate milk or a warm mug of hot cocoa.
- Fruity party cocktails and mocktails: Offer refreshing, tart fruity beverages to complement the sweet treats. For the adults, a vibrant green Ghostbusters Cocktail perfectly matches the color theme and adds a fun pop culture reference!
Recipe FAQs: Your Questions Answered
What Kind of Pretzels Should I Use for Frankenstein Pretzels?
Square pretzels, often called “snaps,” are the absolute best choice for making Frankenstein pretzels. Their flat, squared shape perfectly mimics the iconic rectangular head of Frankenstein’s monster, providing an ideal canvas for decoration. This shape also makes them easy to dip and allows for ample space to add the candy eyes, hair, and neck bolts. While square pretzels are highly recommended, you can also use pretzel rods. When using rods, simply dip the top half and decorate that portion. They offer a slightly different aesthetic and less decorating surface, but are still easy to hold and display, and can create a fun “Frankenstein finger” look!
What is the Best Chocolate for Dipping These Treats?
For the smoothest finish and most vibrant color, melting wafers or high-quality candy melts are ideal. Brands like Wilton or Ghirardelli often offer excellent melting properties and come in a variety of festive colors, including bright Halloween green. These specialized melts are designed to melt smoothly without seizing and set firmly, ensuring your Frankenstein pretzels hold their shape and decorations beautifully. If green candy melts are unavailable, you can use good quality white chocolate chips. When tinting white chocolate, it’s crucial to use oil-based food coloring (specifically gel or powder forms) rather than water-based liquid dyes. Water can cause the chocolate to “seize,” turning it thick, lumpy, and unusable. For the facial details, dark chocolate chips or black candy melts work perfectly for drawing hair and mouth. Alternatively, black cookie icing in a tube provides a convenient and easy-to-use option for fine lines and expressive features.
What’s the Easiest Way to Melt Chocolate for Dipping?
The microwave method is generally the quickest and easiest way to melt chocolate for dipping. Place your chocolate chips or candy melts in a microwave-safe bowl. Heat them in short bursts, typically 30 seconds at a time (or 50% power for candy melts to prevent overheating), stirring thoroughly after each interval. Continue this process until the chocolate is smooth and melted, with no lumps remaining. Constant stirring helps to distribute the heat evenly and prevents scorching. If you prefer a more controlled melting process, a double boiler is an excellent alternative. This method uses indirect heat from simmering water to gently melt the chocolate, keeping it warm and smooth for an extended period, which is beneficial when decorating multiple pretzels and ensuring a consistent coating.
Pro Tips for Crafting the Best Frankenstein Pretzels
Achieving picture-perfect Frankenstein pretzels is easy with these insider tips and tricks:
- If your chocolate happens to seize from too much coloring (or if you just want to make dipping smoother), don’t panic! You can often salvage it by stirring in 1-2 teaspoons of coconut oil or vegetable shortening. This helps to re-emulsify the chocolate and restore its smooth, dippable consistency.
- This recipe is incredibly versatile and scales easily up or down. Whether you’re making a small batch for a family movie night or a large quantity for a classroom party, feel free to adjust the ingredient amounts to suit your preferences and the size of your crowd.
- When dipping the chocolate and attaching the eyes and bolts, it’s crucial to work quickly. The chocolate will start to set fairly rapidly, especially if it’s cool. If the chocolate sets too much, your decorations won’t adhere properly. If working with many pretzels, consider working in smaller batches. You can always re-warm the chocolate in the microwave in short bursts if it begins to thicken.
- The smoothness of the chocolate coating depends significantly on how well you tap off the excess and the tool you use for dipping. However, remember these are monsters! Embrace any charming imperfections; they often add character and make each Frankenstein pretzel truly unique.
- Make it a family affair! Kitchen helpers, especially the little ones, can have a blast assisting with adding the candy eyeballs and the pretzel rod “bolts” while you do the dipping. It’s a fantastic activity for all ages and creates wonderful Halloween memories.
- For even smoother results, ensure your pretzels are completely dry before dipping. Any moisture can cause the chocolate to seize.
Storage and Creative Serving Ideas
Once your adorable Frankenstein pretzels are complete, knowing how to store them and present them creatively will ensure they’re enjoyed to the fullest.
Smart Storage Tips
- Store coated pretzels in an airtight container at room temperature for up to two weeks. This is usually sufficient for holiday treats.
- Avoid refrigeration if possible: While quick chilling helps the chocolate set, prolonged refrigeration can cause the chocolate to “sweat” or develop condensation when brought back to room temperature, affecting their appearance.
- To prevent decorations from sticking or smudging, layer the pretzels with parchment paper or wax paper between layers in your container.
- If you’re preparing these no-bake Halloween treats ahead of time, always wait until the coating is fully hardened before stacking or packing them. This prevents unsightly smudges or fingerprints.
Serving & Presentation Tips for a Spooky Spread
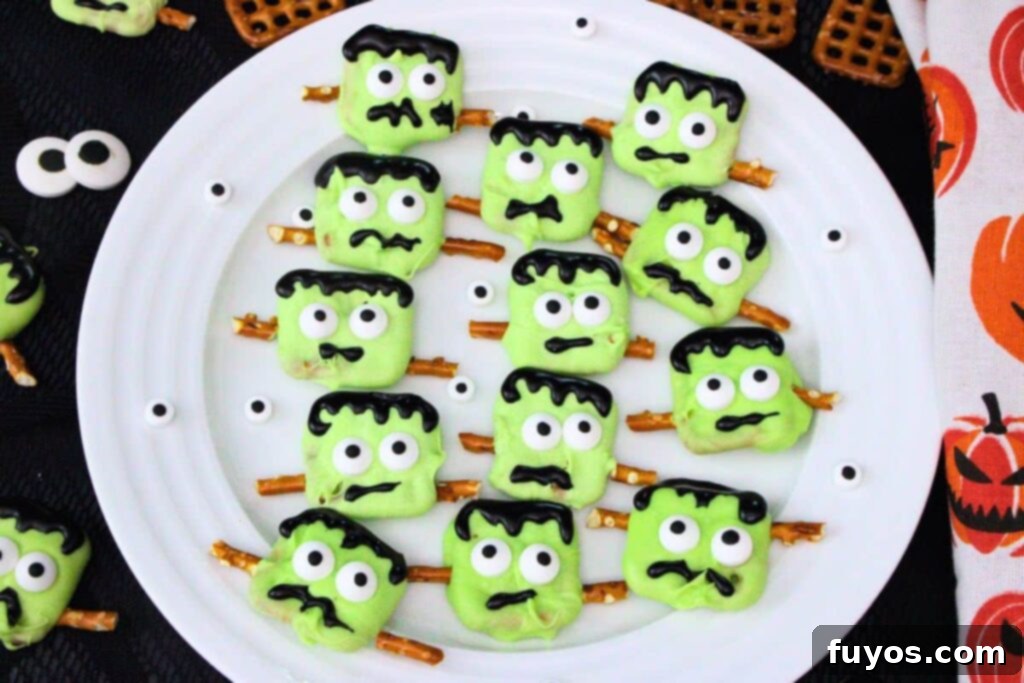
- Create a playful variety platter: Don’t make all your Frankenstein faces the same! Experiment with different expressions like surprised, grumpy, goofy, or mischievous. A platter filled with a range of monster personalities will be a fantastic conversation starter.
- Theme your dessert board: Pair your Frankenstein pretzels with other spooky snacks like mummy brownies or ghost strawberries for a truly cohesive Halloween dessert board. For a full Frankenstein theme, consider adding Frankenstein Wafer Cookies and Frankenstein Rice Krispie Treats.
- Individual treat bags: For classroom parties, Halloween favors, or trick-or-treat handouts, wrap individual Frankenstein pretzels in clear treat bags tied with festive Halloween ribbon. They make charming and delicious giveaways!
- Decorate with green accents: Place your pretzels on a black or purple platter to make the green pop. Scatter some extra candy eyes or Halloween sprinkles around the base for added visual interest.
Explore More Halloween Pretzel Creations!
If you loved making these Frankenstein pretzels, you’re in for a treat! The world of Halloween pretzels is full of fun, easy, and creative ideas. Expand your spooky snack repertoire with these other fantastic pretzel recipes that are perfect for the season:
Ghost Pretzels: Fun No Bake Halloween Treat!
- Halloween Pretzel Rods: Long, crunchy pretzel rods dipped and decorated are perfect for turning into witches’ brooms, mummies, or even creepy crawlies.
- Pretzel Pumpkins: Use round pretzels or pretzel snaps, coat them in orange chocolate, and add green stems for adorable, edible mini pumpkins.
- Caramel Apple Pretzel Bites: A delightful combination of sweet caramel, crisp apple, and salty pretzel, these bites are a harvest festival favorite that can also be given a spooky twist with Halloween sprinkles.
Final Spooky Thoughts on Frankenstein Pretzels
These delightful Frankenstein Halloween pretzels truly encapsulate everything you could want in a festive treat! They’re incredibly fun to make, require no baking, and deliver an irresistible combination of crunchy, salty, and sweet flavors that make them perfect for any Halloween party. With their charmingly spooky faces, they are guaranteed to light up your dessert table and bring smiles to ghouls and goblins of all ages. The best part? Each pretzel can be customized with unique expressions, making every monster a one-of-a-kind creation.
Whether you’re hosting a grand Halloween celebration or simply looking for a creative activity to do with the kids, these chocolate-covered pretzels are a fantastic choice. They’re kid-friendly, adult-approved, and undeniably delicious, ensuring your spooky season is filled with monstrously good treats. Don’t wait—try this recipe for your next Halloween gathering or anytime you’re in the mood for some spooky fun!
For even more fantastic Halloween dessert ideas to complete your spread, be sure to explore all of my No Bake Halloween Treats for endless inspiration!
Halloween Frankenstein Chocolate Covered Pretzels
Equipment
-
Microwave
-
Microwave safe bowl
-
Spatula (or spoon; for stirring)
-
Fork (or tweezers; for dipping)
-
Silicone baking mat (or parchment paper)
-
Baking sheet (or similar)
Ingredients
- 24 square pretzels (aka pretzel snaps)
- 11 ounce bag white chocolate chips (or 10 ounces light green candy melts)
- 10 drops neon green food coloring (only if using white chocolate chips)
- 48 candy eyeballs
- 8 pretzel sticks, broken into 6 pieces each (or use some extra square pretzels)
- Black cookie icing or melted semisweet chocolate chips (for decorating)
Instructions
-
Line a cookie sheet (or similar) with parchment paper or a silicone baking mat
-
Add your chocolate to a microwave safe bowl. If using white chocolate chips, microwave on high for 1 minute, stir, and cook in additional 30-second increments, stirring after each, until melted and smooth. Add the food coloring (if using) until desired shade is reached (I use 10 drops McCormick brand, but other brands will vary). For candy melts, follow the package directions as they can vary, but usually require cooking at 50% power for 2 minutes or so in total11 ounce bag white chocolate chips, 10 drops neon green food coloring
-
Use a fork or kitchen tweezers to dip your pretzels into the melted green chocolate until fully coated. Shake off excess chocolate, then place the dipped pretzel onto the parchment or baking mat lined sheet (leave enough space to fit the pretzel bits on the sides in the next step)24 square pretzels
-
While the chocolate is still wet, place two candy eyeballs between ½ and ⅔ up the pretzel (you want enough space to add hair later). Add a piece of pretzel rod to the sides of the pretzel near the bottom to form Frankenstein’s bolts. Work in batches if needed48 candy eyeballs, 8 pretzel sticks, broken into 6 pieces each
-
Allow the chocolate to set (pop them in the fridge for 15 minutes or so to make this easier, as room temp is affected by humidity and actual temperature and can take a while)
-
Pipe on the hair (using the cookie icing or melted chocolate) and a mouth, plus any other facial features you want (like a scar) – use a toothpick as needed for fine detailingBlack cookie icing or melted semisweet chocolate chips
-
Let the icing or chocolate set (pop them back in the fridge if you like) and enjoy!
Notes
- You can substitute gluten-free pretzels
- The easiest way to get monster green chocolate is by using colored candy melts (vibrant green or light green). However, if your local grocery stores and craft stores don’t have them, you can use white chocolate chips and add neon green food coloring instead (gel works better than liquid based ones to keep the chocolate from seizing)
- Instead of black cookie icing, you can use melted semisweet or dark chocolate (in a piping bag or Ziploc), black candy melts, or even chocolate jimmies to create the hair. You can also use jimmies for the mouth, and add decorate elements like a scar with black or red icing or chocolate too – customize them as you like!
- Exact nutritional values will vary based on brand and flavor of ingredients, decorations used, assumes the use of all chocolate (which won’t be the case), and actual quantity consumed, so please consider this a guideline only
Nutrition
Number of total servings shown is approximate. Actual number of servings will depend on your preferred portion sizes.
Nutritional values shown are general guidelines and reflect information for 1 serving using the ingredients listed, not including any optional ingredients. Actual macros may vary slightly depending on specific brands and types of ingredients used.
To determine the weight of one serving, prepare the recipe as instructed. Weigh the finished recipe, then divide the weight of the finished recipe (not including the weight of the container the food is in) by the desired number of servings. Result will be the weight of one serving.
Did you try this recipe?
Mention @TheDinnersDoneQuick or tag #dinnersdonequick! for even more!
Pin Recipe
Leave A Review
@melissas_healthykitchen Welcome to episode 1 of my SPOOKY EATS SERIES, today it’s how to make the cutest chocolate dipped Frankenstein pretzels. Make sure to follow along for more fun, delicious, spooky eats. What you’ll need: Snap pretzels White chocolate chips with no artificial dye in green or you can use green candy melts Black sprinkles of choice Red sprinkles of choice Candy eyes Pretzel sticks Instructions: 1. Melt your white chocolate chips with some refined coconut oil. I do 20 second intervals in microwave and mix every time until it’s just about melted. You want to be careful not to over heat. Then mix in green food coloring until you reach desired green color. 2. Dip your snaps in melted chocolate with a fork and place on parchment paper. 3. Sprinkle black sprinkle on top, add candy eyes, red sprinkle on side, black sprinkle on bottom for mouth, and stick to broken pretzel sticks on side 4. Refrigerate until the chocolate is set . . #spookyeats #spookyfood #halloweenfood #halloweenpartyfood #funfood #spookytreats #spookycute #halloweentreats #chocolatedippedpretzels #festivefood #holidayfood
♬ Monster Mash – Bobby “Boris” Pickett & The Crypt-Kickers
