Ultimate No-Bake Fourth of July Bark: Easy Patriotic Red, White, and Blue Dessert Recipe
Get ready to celebrate Independence Day with an incredibly easy and dazzling sweet treat! This Fourth of July Bark recipe is the ultimate no-bake dessert, perfectly blending vibrant red, white, and blue colors to make your patriotic festivities truly special. The best part? There’s absolutely no oven or stove required, making it the ideal confection for beating the summer heat. Whether you’re hosting a backyard barbecue, attending a picnic, or simply looking for a fun, festive activity with the kids, this patriotic bark delivers on both taste and visual appeal. It’s a delightful way to add a splash of color and sweetness to any summer gathering, offering a cool and satisfying crunch that everyone will love.
What is Patriotic Fourth of July Bark?
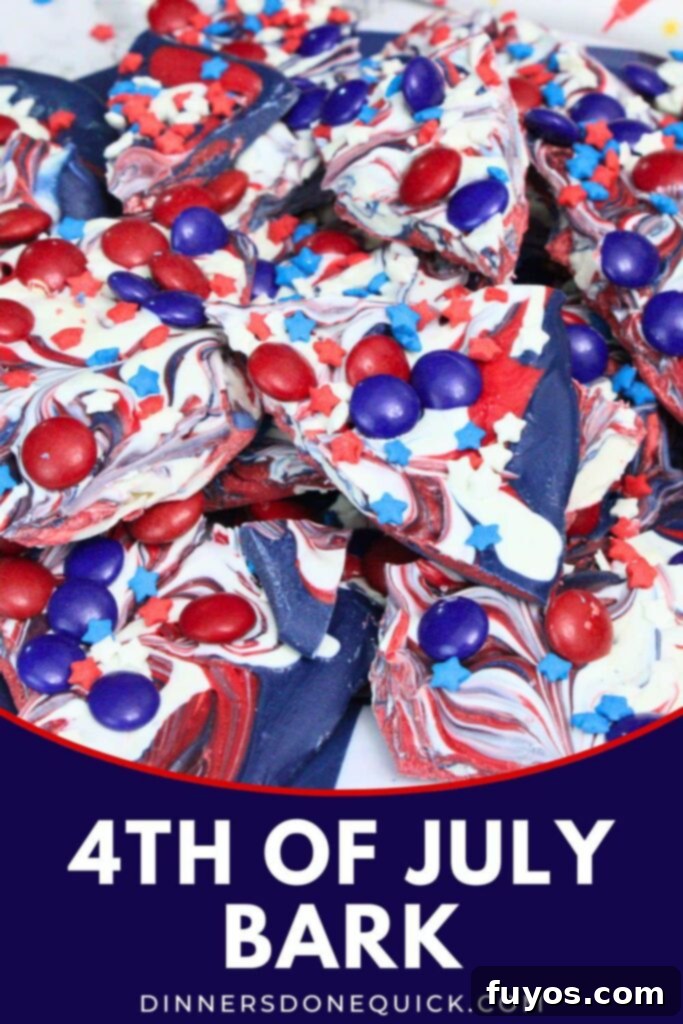
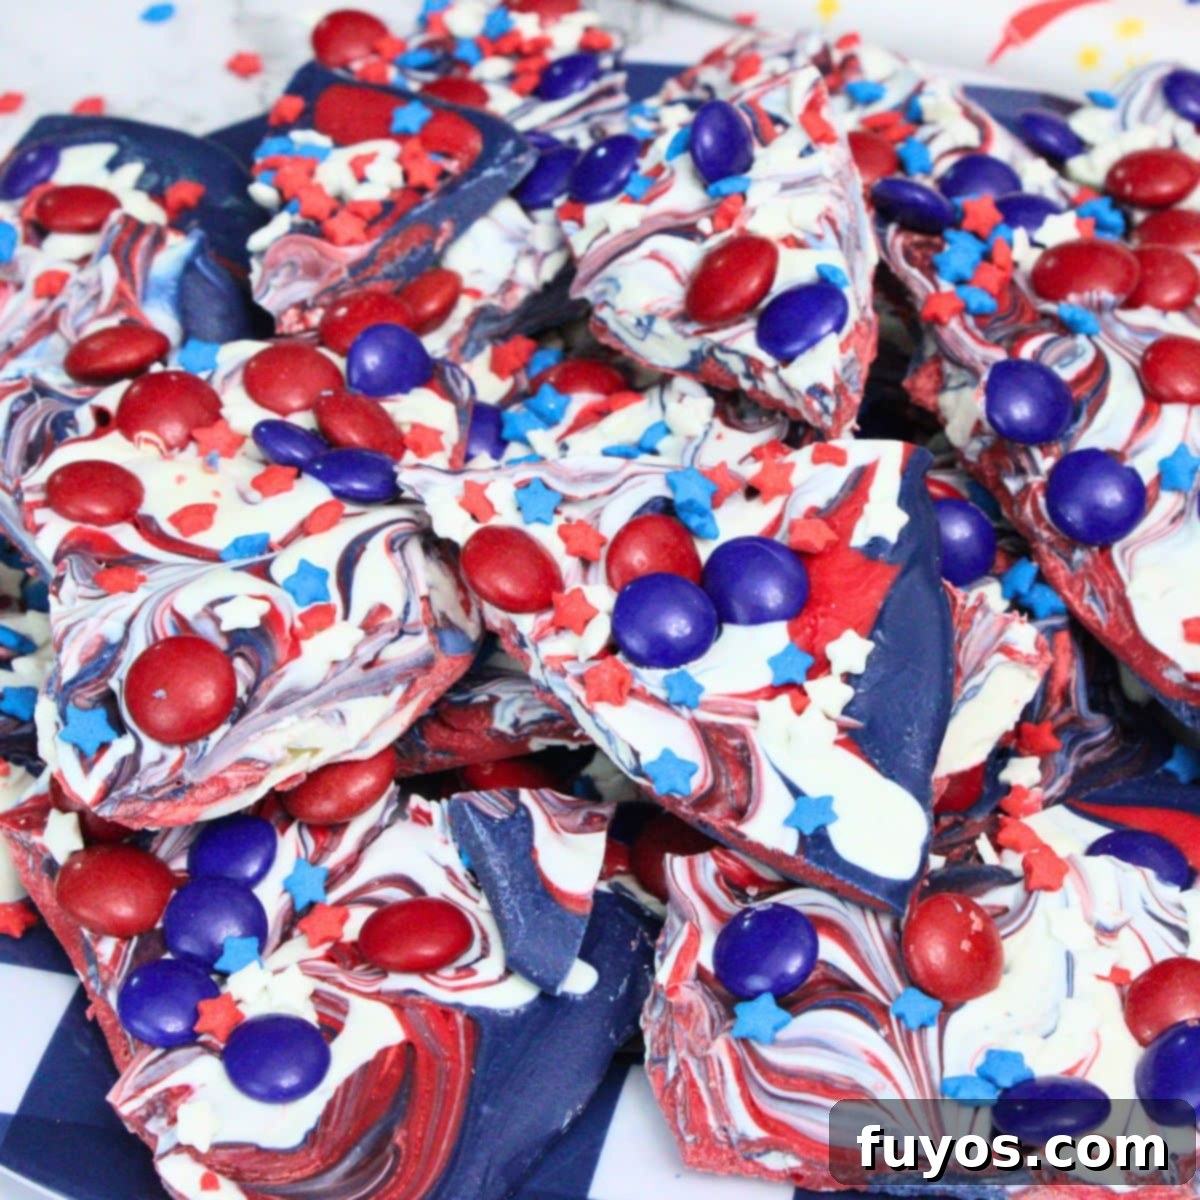
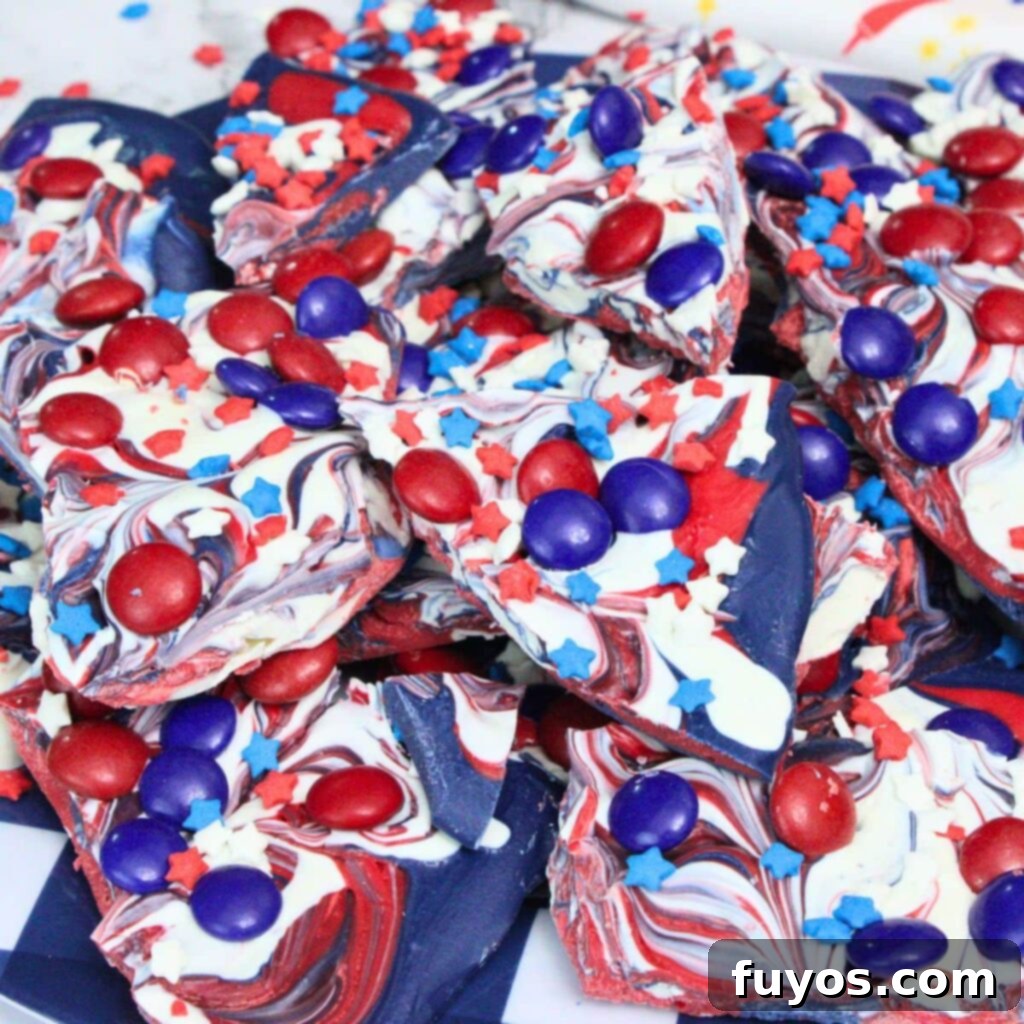
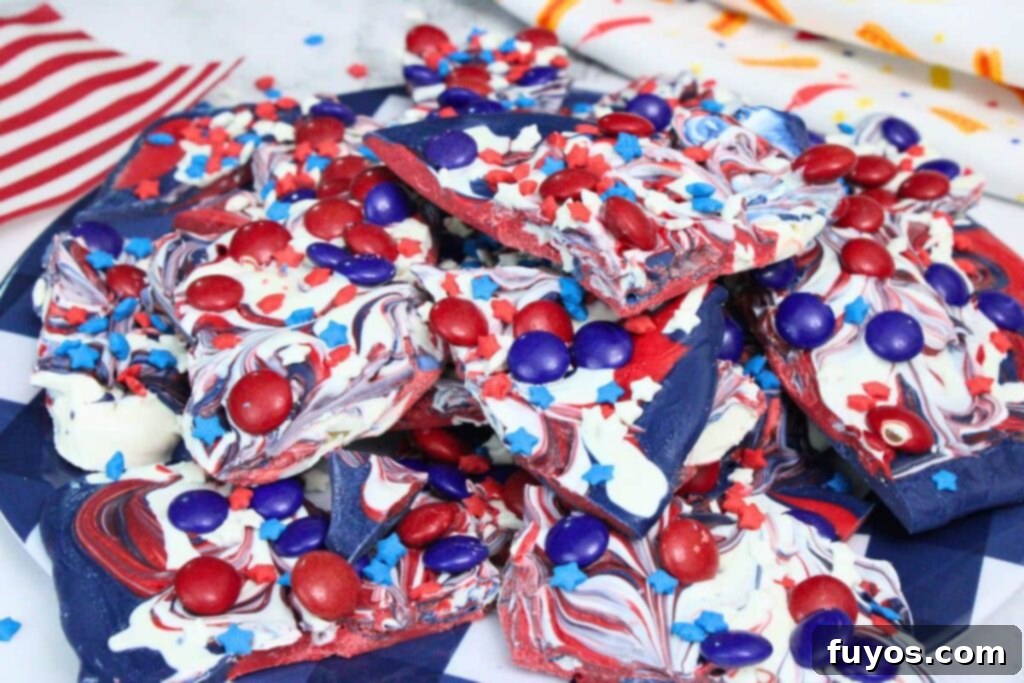
Fourth of July bark is a wonderfully festive, no-bake confection designed to capture the spirit of American independence with its iconic red, white, and blue hues. At its core, it’s a type of candy bark made by melting down colored candy melts (or chocolate) and swirling them together to create a beautiful, marbled effect. Once the vibrant layers are set, the bark is generously topped with an array of red, white, and blue candies, sprinkles, or even fresh fruit, adding both texture and an extra burst of patriotic flair. After cooling and hardening, it’s traditionally broken into irregular, shard-like pieces, much like conventional chocolate bark, making it easy to share and enjoy. While it’s the star of the show for the 4th of July, this versatile treat is equally fantastic for other national holidays such as Memorial Day and Labor Day, serving as a fuss-free and visually stunning dessert that requires no baking whatsoever.
Why You’ll Love Making This Red, White, and Blue Bark
There are countless reasons why this patriotic bark recipe will become your go-to dessert for summer celebrations. Its simplicity, striking appearance, and delicious flavor make it an absolute winner for any occasion:
- Effortlessly Easy to Prepare: This easy patriotic bark is a dream come true for busy hosts and novice bakers alike. There’s absolutely no baking involved, and the entire process, from melting to decorating, comes together in a flash. You can whip up a batch in under 30 minutes of active prep time, leaving you more time to enjoy your festivities. It’s truly a fool-proof recipe that guarantees impressive results every time.
- Perfect for Parties and Gatherings: With its vibrant red, white, and blue colors, this bark is an instant showstopper on any dessert table. It’s inherently fun and festive, making it ideal for large gatherings, picnics, or celebratory barbecues. Plus, breaking it into pieces makes it incredibly easy to serve in batches, catering to both kids and adults who will all adore this sweet, crunchy treat. Its eye-catching appeal ensures it’s often the first dessert to disappear!
- Infinitely Customizable to Your Taste: One of the greatest joys of making this bark is its incredible versatility. You can easily adjust the toppings to suit your personal preferences, dietary needs, or whatever you happen to have on hand. Imagine topping it with classic red, white, and/or blue M&M candies, colorful jimmies, fluffy mini marshmallows for a soft bite, crunchy freeze-dried berries for a natural fruit flavor, or even Pop Rocks for a surprising, fizzy “fireworks” sensation in your mouth! The possibilities are endless, allowing you to create a unique bark every time.
Quick + Easy Recipes
straight to your inbox
Essential Ingredients for Your Patriotic Bark
Crafting this stunning Fourth of July bark requires just a handful of easily accessible ingredients. The key is to select good quality candy melts for the best melting consistency and vibrant colors. Here’s what you’ll need to create this patriotic masterpiece:
- 12 ounce bag bright white candy melts
- 12 ounce bag red candy melts
- 12 ounce bag dark blue candy melts
- ½ cup red and blue candies (like M&Ms)
- 2 Tbsp patriotic sprinkles (I use red white and blue star sprinkles)
Ingredient Tips and Smart Substitutions
To ensure your Fourth of July bark is nothing short of spectacular, consider these helpful tips and creative substitutions for your ingredients:
- You can also use white chocolate chips, white almond bark, or a chopped white chocolate bar instead of the bright white candy melts. However, I highly recommend opting for the bright white candy melts as they tend to produce a purer, more brilliant white color without the slight “yellowed” tint that can sometimes occur with traditional white chocolate. This ensures your white layer truly pops against the red and blue. If you happen to have leftover white candy melts, consider saving them for other festive projects, like making some Grinch Bark for Christmas!
- If you’re looking to add another layer of flavor and complexity, you can add a thin base layer of milk or semi-sweet chocolate underneath the colored melts. This creates a delightful chocolatey foundation and can add a nice contrast to the sweetness of the candy melts. Just be aware that this will alter the overall aesthetic, making the bottom of your bark brown rather than one of the patriotic colors.
- When choosing your blue candy melts, royal blue candy melts are an excellent alternative if dark blue isn’t readily available. The key is to avoid lighter “baby blue” shades, as these won’t provide the deep, rich blue necessary to achieve that classic patriotic look.
- The beauty of this bark lies in its adaptability when it comes to toppings! Any combination of red, white, and blue candies works wonderfully, so feel free to use your absolute favorites. Explore options like red, white, and/or blue sprinkles (jimmies, nonpareils, confetti), shimmering sanding sugar, elegant mini or regular pearls, or even a playful mix of all! For a truly unique and exciting twist, try adding Pop Rocks – they create a surprising crackle and pop, perfectly emulating “fireworks” in your mouth! For those who prefer a salty-sweet combination, scattering crushed pretzels or nuts (like almonds or peanuts) can add a delightful crunch and balance. Alternatively, if you’re aiming for a fresher, slightly healthier option, you can substitute fresh blueberries and sliced strawberries or raspberries for some of the candies, though note that fresh fruit will reduce the bark’s shelf life significantly.
Simple Step-by-Step Instructions for Making Patriotic Bark
Creating this eye-catching Fourth of July bark is a straightforward and enjoyable process. Follow these easy steps to craft your stunning, no-bake treat:
- Prepare your baking surface: Begin by lining a large baking sheet (or cookie sheet) with either parchment paper or a silicone baking mat. This crucial step prevents sticking and makes for easy removal and cleanup.
- Separate your candy melts: Divide your red, white, and blue candy melts into three separate microwave-safe bowls. Keeping them separate ensures their distinct vibrant colors when melted.
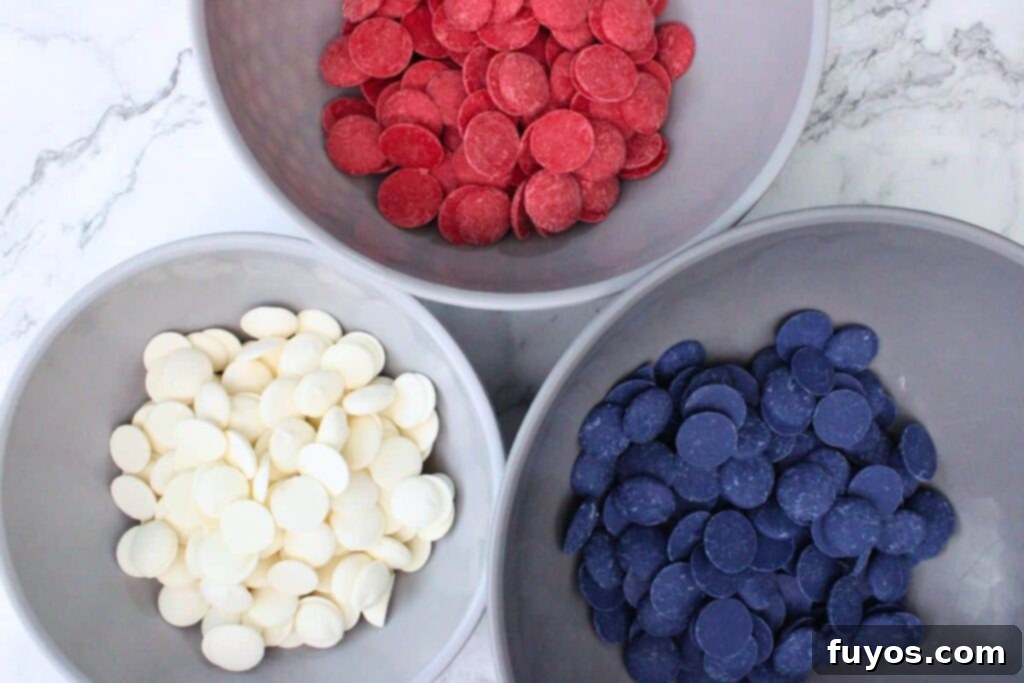
- Melt the candy melts: Place one bowl of candy melts in the microwave and heat at 50% power (or on the defrost setting) for 30 seconds. Remove and stir thoroughly. Repeat this process, using additional 30-second increments and stirring well after each, until the wafers are completely melted and smooth. The key is low and slow melting to prevent scorching. *Always refer to your specific candy melt bag directions, as different brands and microwave wattages may vary.* Repeat this melting process for the other two colors.
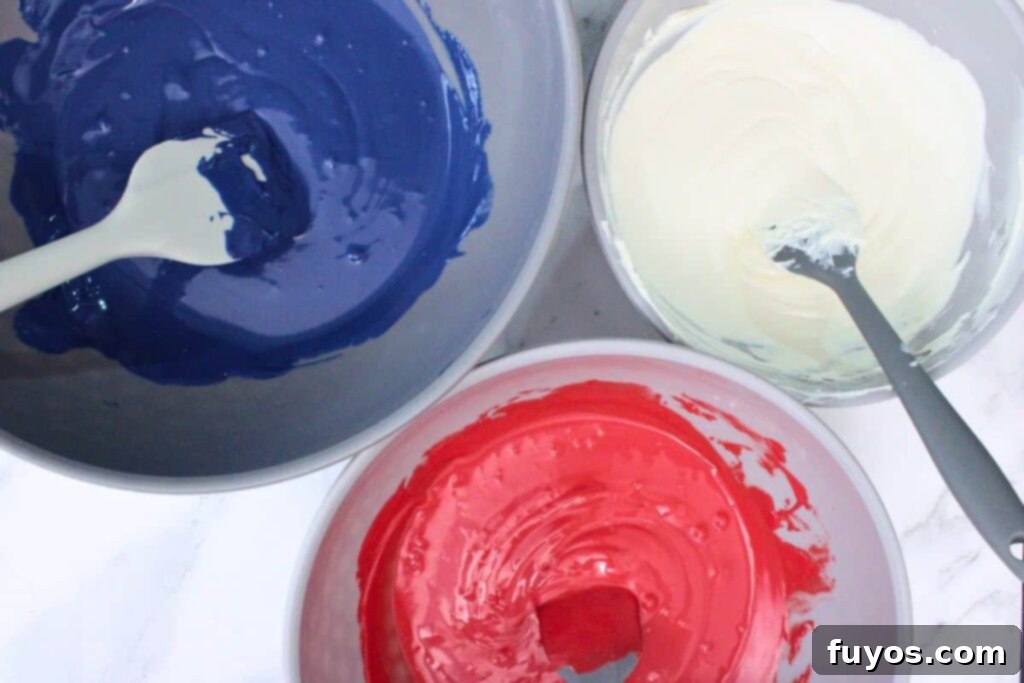
- Assemble and marble the bark: Once all three colors are melted, swiftly pour the melted chocolates onto the prepared parchment paper or baking mat, alternating the red, white, and blue colors in large dollops or lines. *If any of your melted colors have started to set or thicken, re-warm them briefly in the microwave (10-15 seconds) to loosen them up before pouring.* Immediately use a silicone or rubber spatula to gently smooth the melted chocolate into an even layer, aiming for about ¼” to ½” thick. Before the chocolate sets, take a butter knife and gently run it back and forth across the top of the colored melts to create a beautiful, marbled, or swirled design.
- Decorate with patriotic toppings: While the chocolate is still wet and pliable, generously add the red, white, and blue candies along with your star sprinkles evenly over the entire surface of the bark. *Gently press the toppings into the chocolate to ensure they adhere well and won’t fall off once the bark hardens.* This step is where your bark truly comes alive!
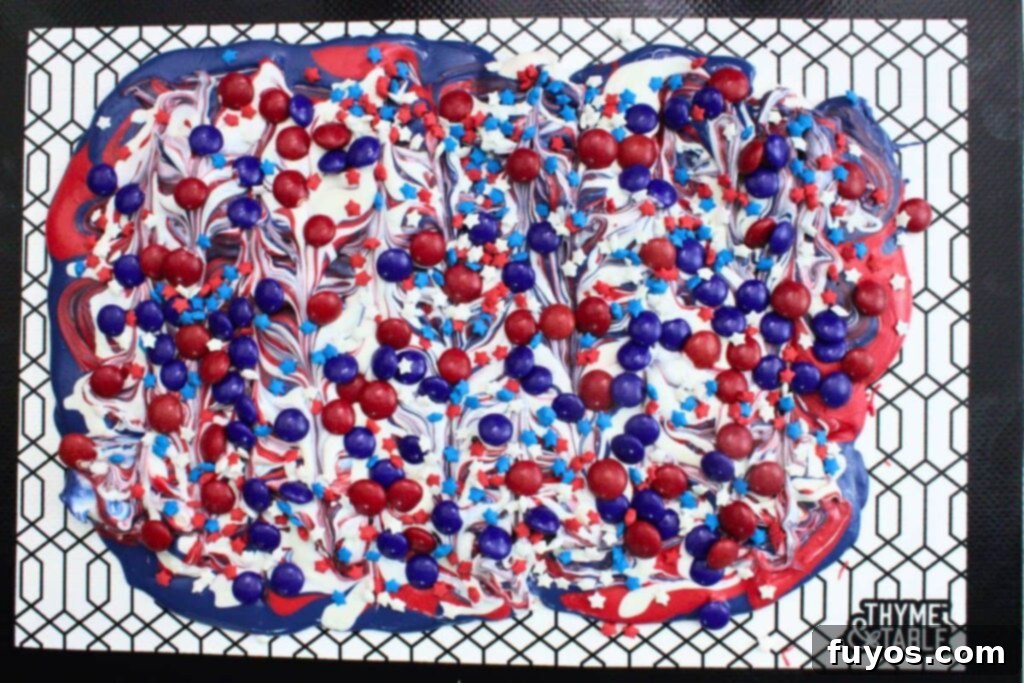
- Set the bark: Carefully transfer the baking sheet with the chocolate bark to the refrigerator for approximately one hour, or to the freezer for a quicker setting time of about 30 minutes. You want the bark to be completely hardened and fully set before the next step.
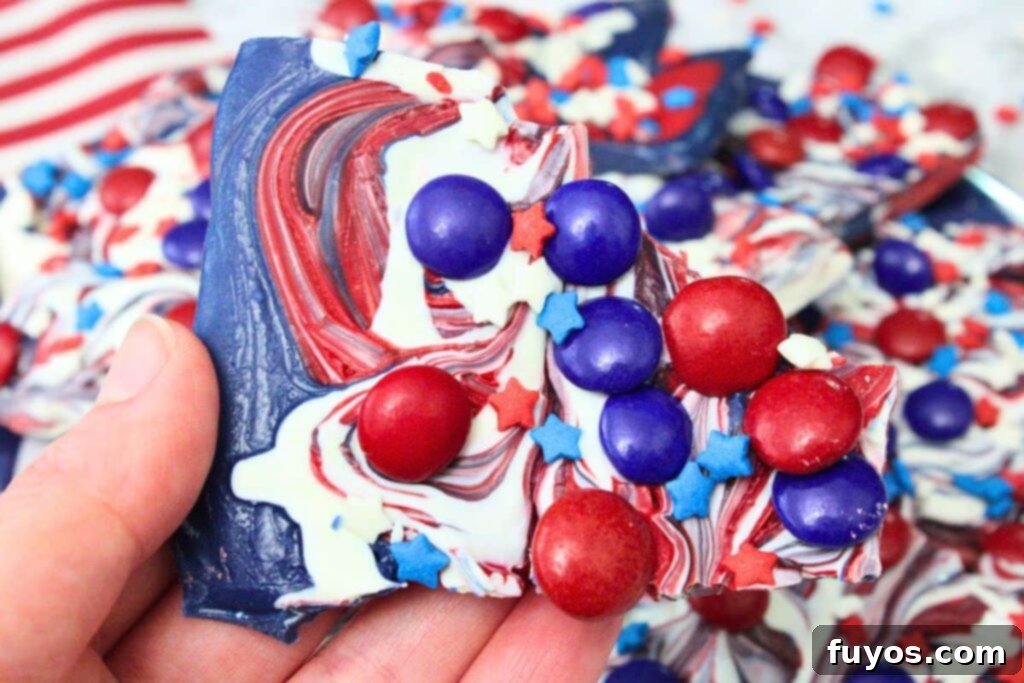
- Break and enjoy: Once the bark is thoroughly chilled and solid, remove it from the refrigerator or freezer. Now comes the fun part! Break it into irregular, bite-sized pieces using your hands, a kitchen mallet (for a more dramatic break), or a sharp knife. Arrange your beautiful patriotic bark on a serving platter and enjoy this delightful, crunchy treat!
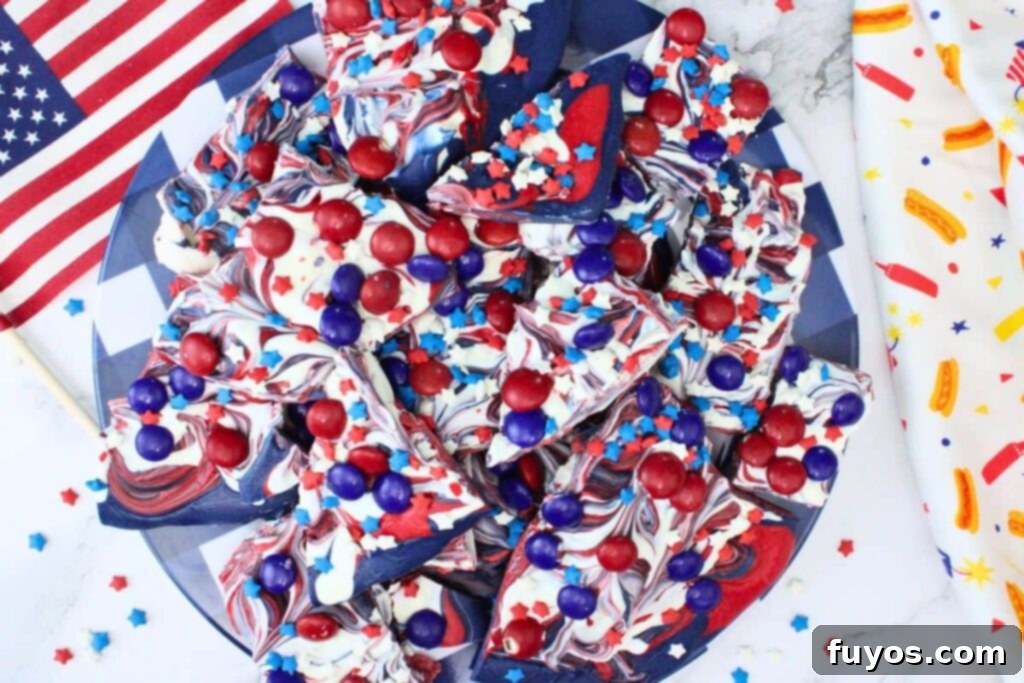
Creative Serving Suggestions for Your Fourth of July Bark
This versatile Fourth of July bark isn’t just a standalone dessert; it can be incorporated into a variety of festive presentations and pairings. Here are some creative ways to serve and enjoy your patriotic treat:
Elegant Party Platters or Dessert Boards
Elevate your holiday spread by arranging broken pieces of bark on a vibrant red, white, and blue-themed dessert platter. Surround it with other complementary treats like fresh, juicy strawberries, plump blueberries, miniature cupcakes, and classic sugar cookies. This creates a visually stunning and abundant display that invites guests to indulge. For an extra touch, I often love serving my Air Fryer Sugar Cookie Fruit Pizza alongside this bark for a delicious fruit-and-cookie combo!
For the adult crowd, consider pairing this sweet bark with festive beverages like refreshing Red White and Blue Shots or celebratory Red White and Blue Margaritas for a complete patriotic experience.
Convenient Individual Treat Bags or Cups
If you’re hosting a large event, attending a parade, or want easy grab-and-go options, portioning the bark is a fantastic idea. Place a few pieces of the bark in clear cellophane treat bags, tied with festive red, white, or blue ribbons, or simply serve them in small, themed paper cups. This makes them perfect for distributing at BBQs, sending home as party favors, enjoying while watching fireworks, or for a hassle-free picnic dessert.
Crunchy Ice Cream Toppers
Add an exciting textural element to your favorite frozen desserts! Break the bark into smaller, irregular chunks and sprinkle them generously over scoops of creamy vanilla, strawberry, or blueberry ice cream. The crispness of the bark provides a delightful contrast to the smooth ice cream, creating an extra sweet crunch with every bite.
Part of a Patriotic Charcuterie Board
Create a balanced and appealing sweet-and-savory charcuterie board that features your Fourth of July bark as a key component. Arrange the bark alongside cubes of sharp white cheddar cheese, an assortment of fresh berries (strawberries, blueberries, raspberries), salty pretzels, decadent chocolate-covered nuts, and my irresistible Red White and Blue Strawberries. This offers a diverse selection of flavors and textures, catering to all palates.
Festive Cupcake or Cake Decorations
For an instant upgrade to your baked goods, use shards or smaller pieces of the bark as a beautiful topping or garnish. Simply press larger pieces into the frosting of cupcakes, or artfully arrange them on a sheet cake, individual cheesecake slices, or even a pie. This simple trick adds an immediate festive touch with minimal effort, transforming ordinary desserts into patriotic delights.
Common Questions About Chocolate Bark (Recipe FAQs)
Here are some frequently asked questions to help you master your Fourth of July bark:
Does Homemade Chocolate Bark Melt Easily?
Yes, homemade chocolate bark, especially when made with candy melts or untempered chocolate, can melt more easily than commercially produced, tempered chocolate. This is because tempering chocolate involves a specific heating and cooling process that stabilizes its crystalline structure, making it more resistant to melting at room temperature. For optimal enjoyment and to prevent a melty mess, it’s always best to store your bark in a cool, dry place. During warmer months or when serving at outdoor events, refrigeration is highly recommended to maintain its solid, snappy texture.
How Long Does Chocolate Bark Last?
When stored properly in an airtight container in a cool, dry place, your homemade chocolate bark can last for up to 2 to 3 weeks. To extend its shelf life even further, especially in humid conditions or if you want to make it well in advance, keep it refrigerated. When refrigerating, ensure it’s well-sealed to prevent it from absorbing any unwanted odors from other foods in the fridge. For the best flavor and texture, consuming it within the first week is ideal, but it will remain perfectly safe and delicious for longer if stored correctly.
How Long Does Chocolate Bark Take to Set?
Typically, chocolate bark will take around 1 to 2 hours to fully set at room temperature. However, the exact setting time can vary based on several factors, including the thickness of your bark, the ambient temperature, and the humidity levels in your environment. To significantly speed up the process, you can place the bark in the refrigerator for about 30 to 60 minutes. If you’re really pressed for time, the freezer can set it even quicker, in about 20 to 30 minutes. *Be careful not to leave it in the freezer for too long (e.g., more than 30 minutes), as prolonged exposure can lead to condensation forming on the bark once it’s brought back to room temperature, affecting its appearance and texture.*
Expert Tips for Crafting the Best Patriotic Bark
To ensure your Fourth of July bark turns out perfect every time, keep these valuable tips in mind:
- Understand Your Microwave: Exact melting times for candy melts can vary significantly based on your microwave’s wattage, the specific brand of candy melts you’re using, and even the size and material of your melting bowl. For reference, I use a 1000W microwave, and it typically takes about 2 ½ to 3 minutes of total melting time per color, in 30-second intervals. Always start with less time and stir often.
- Re-warm as Needed: It’s crucial to work relatively quickly once your candy melts are ready. If any of your chocolate colors have started to thicken significantly or harden while you’re waiting for other colors to melt or before you can pour, simply pop it back into the microwave for a short burst (about 10-15 seconds) and stir well. This will loosen it back up, ensuring a smooth pour and beautiful marble effect.
- Avoid Overheating: Melting candy melts slowly and at reduced power is key. Overheating can cause the melts to seize, becoming thick and crumbly, or even burn, which will affect both the taste and texture of your bark. If your chocolate seems too thick even after proper melting, you can sometimes add a very small amount of coconut oil or vegetable shortening (½ teaspoon at a time) to thin it out, but be cautious not to add too much.
- Use Quality Ingredients: While generic brands can work, investing in good quality candy melts will yield better results in terms of melting consistency, vibrant color, and flavor.
- Keep Hands Dry: Moisture is the enemy of melting chocolate and candy melts. Ensure your bowls, spatulas, and hands are completely dry before you begin, as even a tiny drop of water can cause the chocolate to seize.
- Experiment with Thickness: While the recipe suggests ¼” – ½” thickness, you can adjust this to your preference. Thicker bark offers a more substantial bite, while thinner bark is snappier and melts in your mouth quicker. Just remember that thicker bark will require a slightly longer setting time.
Storage Tips for Fresh and Delicious Bark
Proper storage is essential to keep your Fourth of July bark fresh, crisp, and ready to enjoy. Here’s how to store it effectively:
- Room Temperature Storage: For short-term storage (up to 2 weeks), keep your patriotic bark in an airtight container at a cool room temperature. It’s crucial to store it away from direct sunlight, heat sources, or any warm areas, as this will cause the bark to melt and become soft.
- Refrigeration for Longer Freshness: If you’re in a warmer climate, plan to store the bark for longer than two weeks, or want to ensure maximum crispness, place it in a sealed airtight container in the refrigerator. It will stay fresh for up to 3 weeks. To prevent pieces from sticking together, layer them with parchment or wax paper in between. Allow it to come to room temperature for a few minutes before serving for the best texture and flavor.
- Freezing for Extended Shelf Life: Yes, you can freeze chocolate bark! For storage up to 2 months, wrap the bark tightly in plastic wrap or parchment paper, then place it inside a freezer-safe bag or an airtight container. When you’re ready to enjoy it, thaw the bark in the refrigerator overnight. This gradual thawing process helps to avoid condensation from forming on the surface, which can lead to texture changes and a dull appearance.
Explore More Easy Summer Bark Recipes
Easy S’mores Bark With Golden Grahams and Marshmallows!
Strawberry Banana Bark: 4 Ingredient Sweet Treat Recipe!
- Key Lime Pie Bark
Final Thoughts on This Festive Fourth of July Bark
This Fourth of July bark recipe stands out as one of my absolute favorite summer treats, and for good reason! It’s incredibly easy to make, delivering a delightful crunch and vibrant visual appeal that’s sure to be a hit with both kids and adults. Its no-bake nature is a huge advantage, especially during the sweltering heat of summer, eliminating the need to turn on your oven or stove. This means less time cooking and more time enjoying the celebrations with loved ones.
The beauty of this red, white, and blue bark extends beyond just July 4th; it’s equally perfect for commemorating Memorial Day or Labor Day. Its patriotic theme makes it a versatile addition to any summer holiday gathering. Serve it as a refreshing dessert option at your next backyard barbecue, or pack some along for an enjoyable picnic in the park or a vibrant community event. The ease of preparation also means you can make it well in advance, allowing you to focus on other aspects of your party planning.
I typically prepare a batch in the morning, let it chill and set throughout the day, and then simply break it into pieces just before serving. This low-stress approach is ideal for maximizing relaxation and quality time with friends and family during those precious summer days. This Fourth of July bark isn’t just a dessert; it’s a hassle-free, delicious way to add joy and patriotism to your summer celebrations.
Easy Fourth of July Bark Recipe
Equipment
-
Microwave
-
3 Microwave safe bowl
-
Measuring cups
-
Silicone baking mat (or parchment paper)
-
Baking sheet (or similar)
-
Spatula
Ingredients
- 12 ounce bag bright white candy melts
- 12 ounce bag red candy melts
- 12 ounce bag dark or royal blue candy melts
- ½ cup red and blue chocolate candies (like M&Ms)
- 2 Tbsp red, white, and blue star sprinkles (or similar)
Instructions
-
Line a baking sheet (or cookie sheet) with parchment paper or a silicone baking mat
-
Add the red, white, and blue candy melts to 3 separate microwave safe bowls12 ounce bag bright white candy melts, 12 ounce bag red candy melts, 12 ounce bag dark or royal blue candy melts
-
Microwave at 50% power (or the defrost setting) for 30 seconds, then stir. Repeat using additional 30 second increments until wafers are melted and smooth. Check your specific bag directions, as different brands may vary
-
Pour the melted chocolate onto the parchment paper or baking mat, alternating colors. If the first one you melted has started to set up, re-warm it briefly before pouring
-
Smooth with a silicone or rubber spatula to create an even layer, about ¼” – ½” thick, then run a butter knife back and forth across the top to create a marble design
-
Then, add the red, white, and blue candies along with the star sprinkles evenly over top of the wet chocolate. Press gently to make sure they stick into the chocolate½ cup red and blue chocolate candies, 2 Tbsp red, white, and blue star sprinkles
-
Transfer the chocolate to the refrigerator for about an hour (or the freezer for 30 minutes) until the bark is hardened and fully set
-
Break into pieces (use your hands, a mallet, or a sharp knife) and enjoy!
Notes
- You can also use white chocolate chips, white almond bark, or a chopped bar instead of the bright white candy melts. However, I find it’s slightly more “yellowed” so I prefer the bright white here.
- If you like, add a base layer of milk or semi-sweet chocolate underneath (for flavor) and add the colored melts on top. Of course, this does change the overall look
- Any combination of red, white, and blue candies works, so use your favorites! Try red, white, and/or blue sprinkles, sanding sugar, pearls (mini or regular), or a combination! Pop Rocks are also fun since they emulate “fireworks” in your mouth!
- Add some crushed pretzels or nuts for a salty touch. Feel free to substitute blueberries and strawberries or raspberries instead of candies here, too (but note the bark won’t keep as long)
- Exact nutritional values will vary based on brand and flavor of ingredients, toppings used, size and thickness of pieces, and quantity consumed, so please consider this a guideline only
Nutrition
Number of total servings shown is approximate. Actual number of servings will depend on your preferred portion sizes.
Nutritional values shown are general guidelines and reflect information for 1 serving using the ingredients listed, not including any optional ingredients. Actual macros may vary slightly depending on specific brands and types of ingredients used.
To determine the weight of one serving, prepare the recipe as instructed. Weigh the finished recipe, then divide the weight of the finished recipe (not including the weight of the container the food is in) by the desired number of servings. Result will be the weight of one serving.

Did you try this recipe?
Mention @TheDinnersDoneQuick or tag #dinnersdonequick! for even more!
Pin Recipe
Leave A Review
