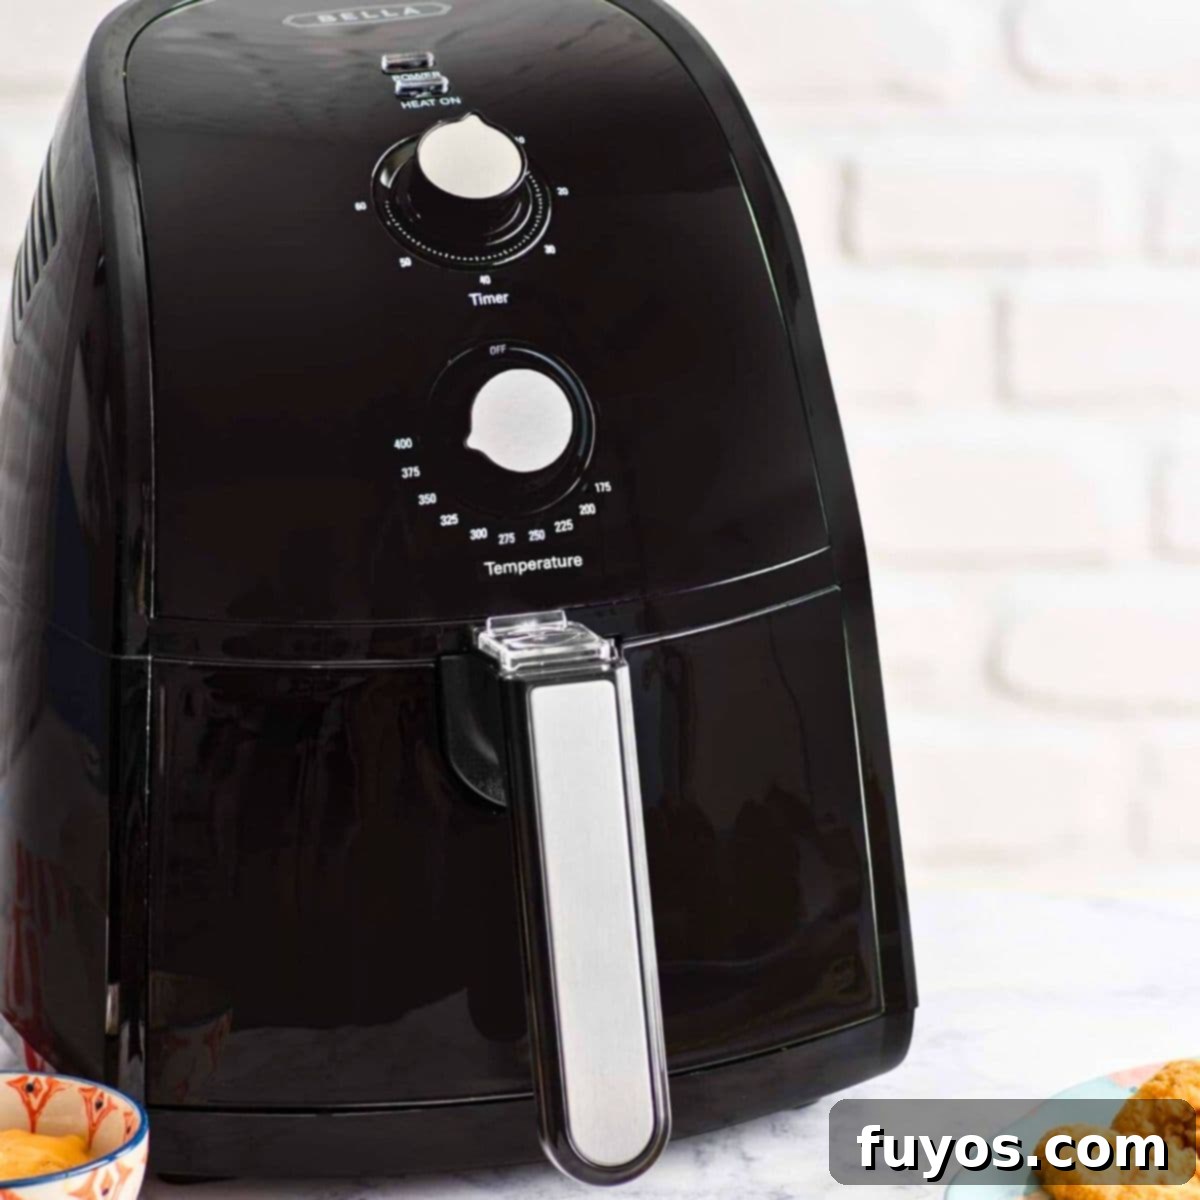
Mastering Your Bella Air Fryer: A Comprehensive User Guide for Every Model
Welcome to the world of air frying with your Bella appliance! Whether you’ve just unboxed a brand-new Bella air fryer, inherited one from a friend, or discovered a great deal on a used model, understanding how to operate it efficiently is key to enjoying perfectly crispy meals. Many users find themselves without a manual, or simply need a quick refresher on the controls. This comprehensive guide is designed to walk you through the process, covering various Bella air fryer models and their unique features.
While Bella offers a diverse range of air fryers, from compact 2-quart models to spacious 8-quart Pro Series units, the fundamental principles of operation remain largely consistent. You’ll quickly discover that once you grasp the basics, mastering your specific Bella air fryer model becomes incredibly intuitive.
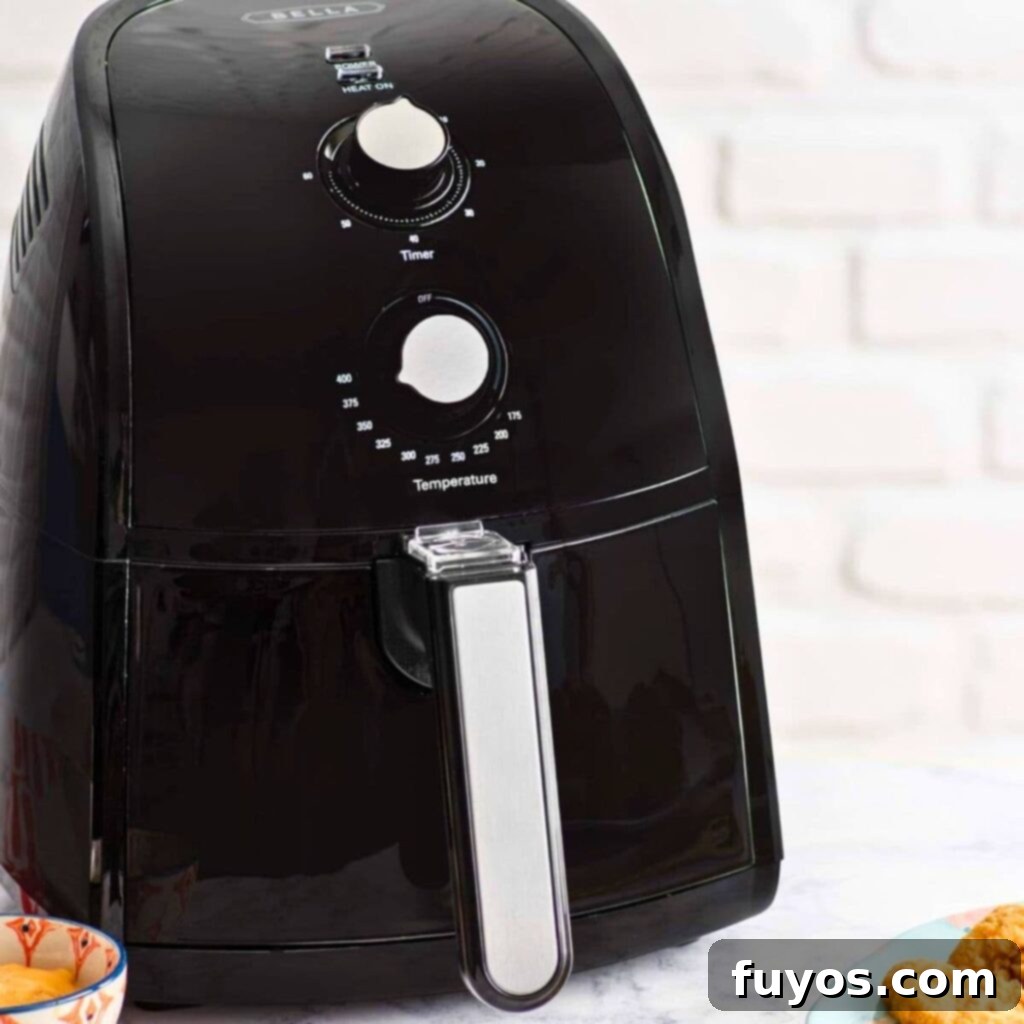
This guide will demystify the controls, explain essential functions like turning on and preheating, and provide step-by-step instructions for some of Bella’s most popular air fryer models. Even if your exact model isn’t listed, you’ll likely find a similar one that operates in the same way, giving you the confidence to start cooking.
Let’s dive in and transform your cooking experience with your new Bella air fryer!
Quick + Easy Recipes
Delicious air fryer recipes delivered straight to your inbox!
Getting Started: Turning On Your Bella Air Fryer
Turning on your Bella air fryer is the first step towards culinary perfection. The process varies slightly depending on whether you have a manual (analog) or digital model. Understanding this distinction is crucial for smooth operation.
For manual Bella air fryer models, the simplicity is a key advantage. To activate the unit, simply plug the power cord firmly into a grounded electrical outlet. Many manual models will illuminate a power indicator light (often orange or green) once plugged in, signifying it’s ready for temperature and time settings.
If you own a digital Bella air fryer, the process is a bit more interactive. After plugging in the appliance, ensure the air fryer basket is correctly and fully inserted into the main unit. This is a crucial safety feature; the air fryer will not power on or operate if the basket is not securely in place. Once plugged in and the basket is inserted, either touch the dedicated power button on the digital display, or in some models, simply touching any part of the touchscreen will activate the display and illuminate the power button.
Should your Bella air fryer fail to turn on after following these steps, don’t worry. There are common troubleshooting steps you can take. For more detailed guidance, you can refer to our comprehensive guide on why your air fryer won’t turn on and how to troubleshoot it.
Preheating Your Bella Air Fryer for Optimal Results
Preheating your air fryer is an important step often overlooked, yet it significantly impacts the crispiness and even cooking of your food. A preheated air fryer ensures that food starts cooking immediately at the desired temperature, sealing in moisture and achieving that signature crispy exterior. Bella air fryers, depending on their model, offer a straightforward way to preheat:
- Manual Models: Locate the manual temperature knob, typically on the front face of the unit, and turn it to your desired cooking temperature. The air fryer will then begin heating up.
- Digital Models: On digital touchscreen models, you will usually find dedicated ‘+/-‘ buttons adjacent to a thermometer-shaped icon. Use these buttons to set the desired temperature. In some minimalist digital designs, the temperature controls might only appear after the unit is powered on and the touchscreen is activated.
A common recommendation for most Bella air fryer models is to preheat for approximately 3 minutes. This brief period is usually sufficient to bring the internal temperature up to speed. You can simply add these 3 minutes to your recipe’s total cooking time. For instance, if a recipe calls for 10 minutes at 375°F, you would set your air fryer for 13 minutes, allowing the initial 3 minutes for preheating before your food truly begins to cook.
It’s worth noting that some of Bella’s larger, more powerful ‘Pro Series’ units are designed to heat up exceptionally fast. These advanced models often do not require a separate preheating phase, as they reach the target temperature almost instantly upon starting the cook cycle. Always consult your specific model’s manual for precise preheating instructions, but as a general rule, if it’s a Pro Series, it might be an exception.
Understanding the preheating process for your Bella air fryer ensures consistent cooking results, leading to tastier and perfectly textured dishes every time. And if you’re exploring other brands, you might find our guide on how to preheat a Ninja air fryer equally useful.
Essential Tips for Air Frying with Your Bella
Beyond knowing how to operate your specific model, a few general air frying tips can significantly enhance your cooking results and extend the life of your Bella appliance. These practices apply across most air fryer brands and models, ensuring you get the most out of your investment.
- Don’t Overcrowd the Basket: Air fryers work by circulating hot air around the food. If you pack the basket too tightly, the air cannot circulate effectively, leading to uneven cooking and a lack of crispiness. Cook in batches if necessary, allowing enough space for air to flow around each piece of food.
- Use a Little Oil: While air frying drastically reduces the need for oil, a light spritz of cooking oil (like olive, avocado, or grapeseed oil) on your food can make a big difference in achieving a golden-brown and crispy finish. Avoid aerosol sprays with propellants that can damage the non-stick coating over time; use an oil mister instead.
- Shake or Flip Food Regularly: For even cooking and browning, especially with smaller items like fries or chicken wings, remember to shake the basket halfway through the cooking time. For larger items, flipping them with tongs is recommended.
- Cut Food Evenly: Uniformly sized pieces of food will cook at the same rate. This is particularly important for raw ingredients like potatoes or vegetables to ensure everything is perfectly done simultaneously.
- Consider Using Liners: For easier cleanup and to prevent food from sticking, you can use parchment paper liners specifically designed for air fryers. Make sure the liner does not obstruct airflow and is only placed in the basket once food is added to weigh it down. Never preheat an air fryer with an empty liner.
- Check for Doneness: Air fryer cooking times can vary based on the model, food density, and desired crispness. Always use a meat thermometer for proteins and adjust cooking times as needed.
By following these simple guidelines, you’ll consistently achieve delicious, perfectly cooked results with your Bella air fryer, making it a go-to appliance in your kitchen.
Operating the Bella 2-Quart Air Fryer (Analog Model)
The Bella 2-Quart Air Fryer is an excellent compact choice, perfect for individuals or couples. Its analog controls make it incredibly straightforward to use. Here’s a step-by-step guide to get you cooking:
- Connect Power: Begin by plugging the power cord firmly into a standard electrical outlet. You should observe a power indicator light, typically orange, illuminating on the unit’s front, signaling it’s ready for operation.
- Set Temperature: Locate the gear-shaped or round temperature dial, usually positioned on the top front of the appliance. Turn this dial clockwise or counter-clockwise to select your desired cooking temperature.
- Load Food: Carefully place your food into the air fryer basket. Remember our earlier tip: avoid overcrowding to ensure even and crispy results.
- Set Timer: Find the timer dial, generally in the middle of the air fryer’s front panel. Turn this dial clockwise to set your cooking time.
- Factor in Preheat Time: For optimal results, add approximately 3 minutes to your recipe’s recommended cooking time for preheating. For example, if your recipe says 10 minutes, set the timer for 13 minutes. This initial period allows the air fryer to reach the target temperature before actual cooking begins.
- Initiate Cooking: Once the timer knob is set and released, the “heat on” light should illuminate, indicating that the air fryer has begun its heating and cooking cycle.
- Completion Alert: When the set cooking time elapses, the air fryer will typically ding, and the “heat on” light will turn off, signaling the end of the cooking process.
- Basket Security Reminder: A critical safety note: your Bella 2-quart air fryer will not activate or operate unless the air fryer basket is fully and securely pushed into its housing. Always ensure it clicks into place before setting the timer.
This user-friendly model is ideal for quick snacks or small meals. For a complete and official copy of the Bella 2-quart analog air fryer manual, you can access it directly here.
Operating the Bella 2.6-Quart (2.5L) Air Fryer
Similar in operation to its 2-quart sibling, the Bella 2.6-quart (2.5L) air fryer offers a slightly larger capacity for those who need a bit more space. This model also typically features manual controls, ensuring ease of use. Here’s how to get started:
- Power Connection: Insert the power cord into an electrical outlet. The power light on the front panel should glow orange, confirming the unit has power.
- Temperature Selection: Adjust the temperature by turning the knob situated in the middle of the air fryer’s front face. Rotate it to align with your recipe’s desired cooking temperature.
- Add Food: Place your ingredients into the air fryer basket. Ensure there’s sufficient room for hot air to circulate freely around the food for best results.
- Set Cooking Time: Twist the timer knob, usually located near the top of the unit, in a clockwise direction to set the required cooking duration.
- Include Preheat Time: As with most Bella manual models, it’s advisable to add an extra 3 minutes to your recipe’s cook time to account for preheating. This helps the unit reach its optimal cooking temperature before your food starts to cook, leading to better texture and doneness.
- Start Cooking Cycle: Releasing the timer knob will initiate the cooking process, and a green “heat on” light will illuminate, indicating the air fryer is actively heating.
- Cycle Completion: Once the set time has passed, the air fryer will emit an audible ding, and the “heat on” light will switch off, signaling that your food is ready.
This model is a reliable choice for daily air frying needs. For a detailed guide, the complete manual for the Bella 2.5L air fryer is available here.
Top Starter Air Fryer Recommendation
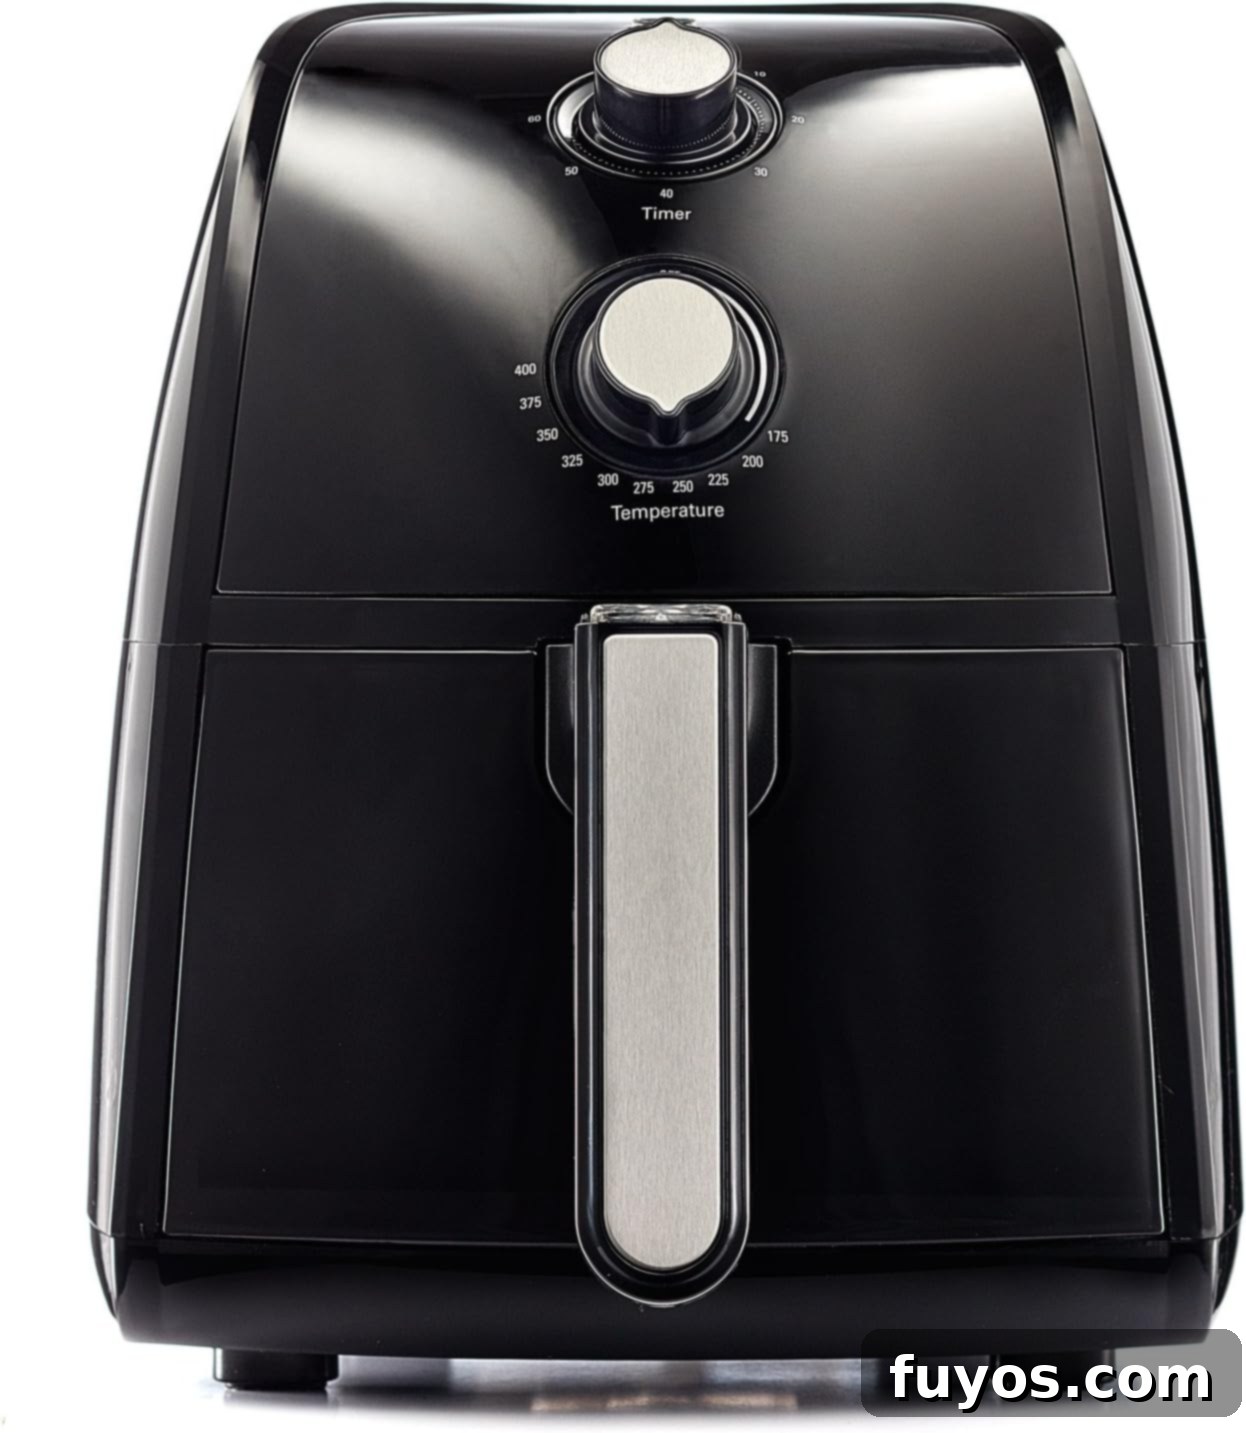
Consider the Bella 2.5L Air Fryer, an excellent choice for beginners or those with limited kitchen space.
Operating the Bella Pro Series 3.7-Quart Digital Air Fryer
The Bella Pro Series 3.7-Quart air fryer introduces digital controls and a sleeker design, offering a more precise cooking experience. While it might look different from manual models, its operation is user-friendly once you understand the touchscreen interface. Here’s how to navigate your digital Bella Pro Series:
- Initial Setup: Plug the air fryer’s power cord into a suitable electrical outlet. Ensure the air fryer basket is completely and securely inserted into the main unit. This step is vital for the unit to power on.
- Activate Display: To access the digital menu, gently touch the central round screen on the front of the unit. The display will illuminate, and the power icon (often green) should be lit, indicating it’s ready.
- Set Cooking Time: On the digital menu, you’ll typically find a ‘U-shaped’ layout of controls. Locate the ‘+’ icon on the top-left side (often accompanied by a clock symbol) and tap it to increase your desired cooking time in minutes. There will also be a corresponding ‘-‘ icon to decrease the time if needed.
- Set Temperature: Similarly, use the ‘+’ icon on the rightmost side (often with a thermometer symbol) to adjust the cooking temperature. A ‘-‘ option will also be available to lower the temperature if you overshot your target. These symbols usually have an orange indicator beneath them to distinguish between time and temperature settings.
- No Preheating Required: A significant advantage of the Bella Pro Series 3.7-quart unit is its rapid heating capability. Unlike many smaller air fryers, this model does not require a dedicated preheating phase, saving you valuable time. Simply set your desired time and temperature, and you’re good to go.
- Start Cooking: Once your time and temperature are set, press the main power button again to initiate the cooking process.
- Cooking Indicator: During operation, a fan-shaped icon will blink in the center of the screen, confirming that the unit is actively cooking.
- Cycle Completion: Upon completion of the cooking cycle, the air fryer will emit a series of beeps. The fan will continue to run for approximately 20 additional seconds to help dissipate heat and cool down the unit safely.
This model also features convenient preset cooking programs. By selecting the ‘M’ icon (for ‘Menu’) on the display, you can scroll through 7 pre-programmed options, including:
- French Fries
- Roast
- Shrimp
- Cake
- Chicken
- Steak
- Fish
Once you select a program, the air fryer will automatically adjust to the recommended time and temperature and begin cooking. You retain the flexibility to manually alter these settings during the program if your recipe or preference requires it.
The touchscreen interface of this Bella air fryer can sometimes seem a bit enigmatic initially, especially if you’re expecting physical buttons. However, once you realize it’s a touch-sensitive display, it becomes very intuitive and simple to operate. If the touchscreen isn’t responding or displaying controls, always double-check that the unit is properly plugged in and that the fryer basket is fully and securely inserted.
For comprehensive details and additional instructions, the full manual for the Bella 3.7-quart digital air fryer is readily available here.
Operating the Bella 4.6-Quart Digital Air Fryer
The Bella 4.6-Quart Digital Air Fryer offers a generous cooking capacity, suitable for small to medium-sized families, combined with the precision of digital controls. Its intuitive interface makes air frying a breeze. Follow these steps to prepare your favorite meals:
- Power On: Connect the air fryer’s power cord securely into a wall outlet. Upon connection, a subtle power button icon should become visible, usually located at the bottom-left corner of the digital display.
- Activate Menu: Press this faint power button to illuminate the full digital menu and access the various settings.
- Set Cooking Time: Look for a clock-shaped symbol on the right side of the display. Tap this icon, then use the ‘+’ and ‘-‘ buttons, typically found in the bottom-center of the menu, to accurately set your desired cooking duration.
- Set Temperature: On the left side of the display, you’ll find a thermometer-shaped icon. Press this, then utilize the same ‘+’ and ‘-‘ buttons to adjust and set your preferred cooking temperature.
- Start Cook Cycle: Once both time and temperature are configured, press the power button once more. This action will initiate the cooking cycle, and your Bella air fryer will begin heating and circulating air.
A standout feature of the Bella 4.6-Quart Digital Air Fryer is its array of preset cooking functions. By pressing the ‘M’ (Menu) button, you can cycle through 9 pre-programmed settings designed for popular dishes. Once you select a preset, the air fryer will automatically begin cooking with optimized time and temperature settings, taking the guesswork out of meal preparation.
For detailed instructions and a comprehensive understanding of all features, the complete manual for the Bella 4.6-quart digital air fryer is available for your reference here.
It’s important to note that Bella also offers a manual version of the 4.6-quart air fryer, which foregoes the digital display. If you own this analog model, its operation will be consistent with the instructions provided earlier for the 2-Quart Bella air fryer, utilizing physical knobs for time and temperature adjustments.
Operating the Bella Pro Series 6-Quart Air Fryer
The Bella Pro Series 6-Quart Air Fryer is designed for those who need a larger capacity without compromising on modern digital convenience. This model is generally more intuitive than some of its predecessors, as its controls are visible even when the unit is off. Here’s a guide to using this powerful appliance:
- Power Connection: Plug the air fryer’s power cord firmly into an electrical outlet.
- Turn On: Locate and press the “power/on” button, typically positioned on the left side of the digital display panel, to activate the unit.
- Adjust Settings: To modify the cooking time or temperature, use the dedicated up and down arrow buttons. These arrows are usually situated above and below the time and temperature readouts on the display. As you press them, the digital display will clearly show your selected settings.
- Start Cooking: Once your desired time and temperature are set, press the “power/on” button again. This action will initiate the air frying cycle.
- Cooking Indicator: A fan-shaped icon will illuminate or appear on the display, providing a visual cue that the air fryer is actively cooking.
- Cycle Completion: When the cooking cycle concludes, the display will show “END,” and the unit will emit a series of beeps to alert you that your food is ready.
This model also boasts 8 convenient preset programs, accessible via the “Menu” button located on the right-hand side of the display. Tapping this button will allow you to cycle through options displayed at the top of the screen. Each preset comes with pre-programmed time and temperature recommendations, which serve as an excellent starting point. You have the flexibility to manually adjust these settings during the program to perfectly match your recipe and preferences.
The Bella Pro Series 6-Quart air fryer, with its clearly marked buttons and immediate display, offers a very user-friendly digital experience, making it easier to start cooking right out of the box without the initial confusion of hidden touch controls.
For comprehensive operational details and troubleshooting, the complete manual for the Bella Pro Series 6-Quart air fryer can be found and downloaded here.
Recommended for Everyday Use
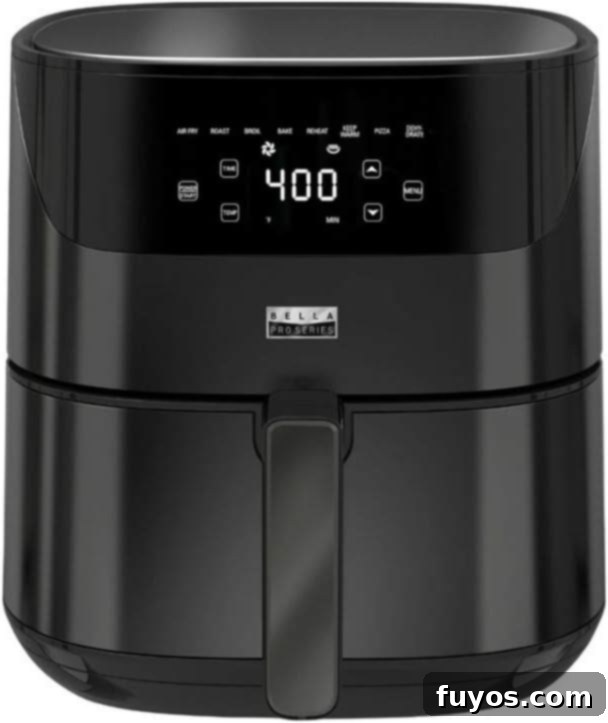
The Bella Pro Series 6-Qt Air Fryer is an excellent choice for a busy kitchen.
It’s important to note that if you own the 4.2-quart version of the Bella Pro Series, its control panel and operational steps are identical to those of the 6-quart model, with the primary difference being the appliance’s capacity and sometimes its exterior finish (e.g., silver instead of black).
Operating the Bella Pro Series 8-Quart Air Fryer
For larger families or those who frequently entertain, the Bella Pro Series 8-Quart Air Fryer is an indispensable kitchen appliance. This high-capacity digital air fryer combines robust performance with user-friendly controls. Here’s how to put your 8-quart Pro Series model to work:
- Initial Power Up: Connect the air fryer’s power cord into a functioning electrical outlet.
- Activate Unit: Press the “power/on” button, typically located on the right side of the unit’s display panel, to turn on the air fryer and illuminate its digital interface.
- Adjust Time and Temperature: To set your desired cooking duration, use the ‘+’ and ‘-‘ symbols positioned above and below the clock icon on one side of the display. For temperature adjustments, use the ‘+’ and ‘-‘ symbols corresponding to the thermometer icon on the other side. The clear digital display will show your current selections.
- Start Cooking Cycle: Once you’ve set your preferred time and temperature, press the “power/on” button again to initiate the cooking process.
- Monitor Cooking: A fan-shaped icon will appear on the display, serving as a visual indicator that the air fryer is actively running and circulating hot air.
- Cycle Completion: When the air frying cycle is finished, the unit will emit an audible beep to alert you that your meal is ready.
A distinguishing feature of the Bella 8-quart air fryer Pro Series is its ‘P’ icon, which stands for programs, contrasting with the ‘M’ (Menu) found on many other Bella models. However, like its 6-quart counterpart, it offers 8 convenient preset programs. On this model, these presets are intuitively displayed along the bottom of the touchscreen interface. These pre-programmed settings are perfect for quickly starting common dishes, though you always have the option to manually adjust time and temperature for customized results.
This large-capacity model is an ideal solution for families who need to cook generous portions or prepare multiple dishes simultaneously. If you’re exploring other options for high-capacity air fryers, be sure to check out our detailed recommendations for the best air fryers for large families.
Top Large Capacity Air Fryer
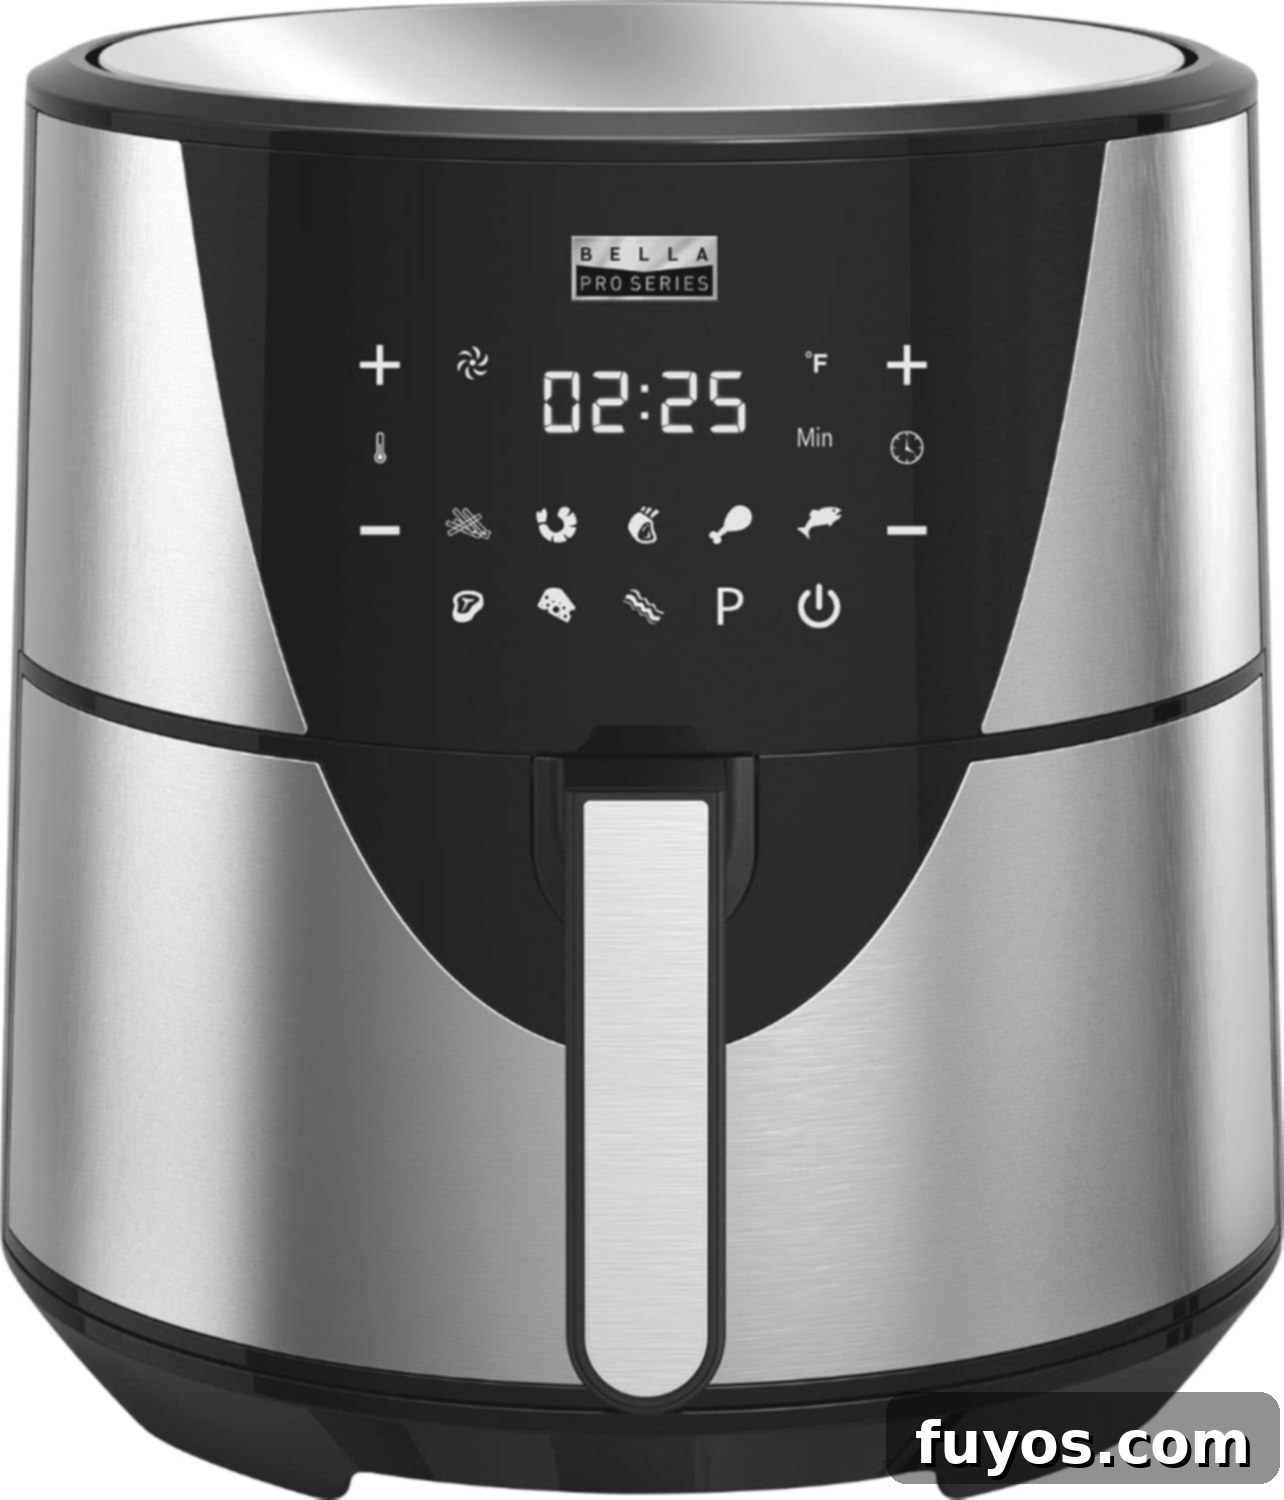
For robust performance and large batch cooking, consider the Bella Pro Series 8-Qt Touchscreen Digital Air Fryer.
You can view the complete manual for the Bella 8-quart Pro Series air fryer here.
Explore Guides for Other Air Fryer Brands
While this guide focuses on Bella air fryers, the world of air frying is vast! If you or someone you know uses a different brand, check out our other helpful guides:
Conclusion: Enjoy Your Bella Air Fryer Experience
As we’ve explored, Bella offers an impressive array of air fryers, each designed to meet different culinary needs and preferences. From compact 2-quart models to spacious 8-quart Pro Series units, and whether they feature intuitive manual dials or advanced digital touchscreens, the underlying principle of quick, crispy, and healthier cooking remains consistent across the brand.
Learning how to use your Bella air fryer, regardless of its specific model, is a straightforward process. The key is to understand its power-up sequence, temperature and timer settings, and any unique features like preset programs. By following the step-by-step instructions provided in this guide and applying general air frying best practices, you’ll quickly become proficient in preparing a wide variety of delicious dishes.
Embrace the convenience and versatility that your Bella air fryer brings to your kitchen. Say goodbye to greasy deep-frying and hello to perfectly crispy fries, succulent chicken, roasted vegetables, and even baked treats, all with less oil and less fuss.
Now that you’re equipped with the knowledge to operate your Bella air fryer, it’s time to get cooking! If you’re looking for inspiration or want to try some new culinary adventures, we highly recommend exploring our collection of the best Bella air fryer recipes. These recipes are specifically curated to help you make the most of your appliance and discover exciting new meals. Happy air frying!
